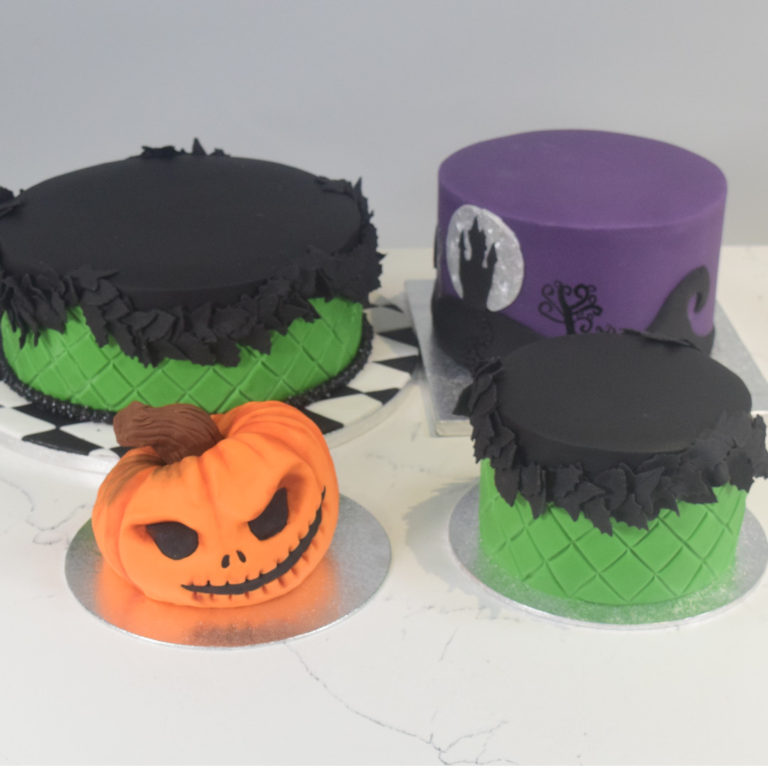
Halloween Centrepiece Cake
Uploaded by Kayleigh McDonough
Decorating ingredients
- 2 x 2.5 kg Renshaw Jet Black Ready to Roll Icing
- 1 kg Renshaw White Ready to Roll Icing
- 2 x 1 kg Renshaw Lincoln Green Ready to Roll Icing
- 4 x 250 g Renshaw Deep Purple Ready to Roll Icing
- 3 x 250 g Renshaw Tiger Orange Ready to Roll Icing
- 250 g Renshaw Dark Brown Ready to Roll Icing
- 250 g Renshaw Grey Ready to Roll Icing
- 400 g Renshaw Vanilla Frosting or Buttercream
- 400 g Renshaw White Royal Icing
- Rainbow Dust Black Sugar Crystals
- Rainbow Dust Black Metallic Food Paint
- Rainbow Dust Snow White Twinkle Dust
- Rainbow Dust Edible Glue
- Rainbow Dust Tylo Powder
- Rainbow Dust Powder Colour in Tomato Red, Moss Green, Chocolate
Renshaw products used


Email this recipe
Instructions
Prepare your equipment and cakes:
Step 1
Prepare cakes in the following sizes: 10”, 8”, 6”, prepared on the same size board with filling and masked with buttercream or ganache.
Step 2
Prepare the following equipment: Rolling pin, Smoothers, Cooled boiled water, Knife, Icing sugar, Dusting brushes (dusting), Pastry Brush (water), No 2 pointed brush (water/glue), No 1 pointed brush (painting), Tray or plate, 14 inch round board, Purple ribbon, Double sided tape, 1 inch Square cutter, Pencil, Mixing bowls, Patchwork Cutter Diamond Side Design, Greaseproof paper, Castle template, FMM Strip Cutter, FMM Decorative Boarder strip cutters (set 5-8), Dowels, Katy Sue Fir Tree Mould, Rose leaf plunger cutter, Gem strip cutter no.3, Trex, Palette knife
Board Decoration:
Step 3
On a clean dry surface knead the Renshaw White Ready to Roll Icing until pliable. Dust the worksurface with icing sugar and pin out the Icing to 3-4mm thick. Cut out 30 squares using the cutter, place under plastic until later. Repeat the process with Renshaw Jet Black Ready to Roll Icing.
Step 4
Once the squares are cut, brush the board with water and arrange the squares on the board in an alternating pattern. When the edge is reached carefully trim the Icing to the edge of the board, allow to set.

Step 5
Attach the ribbon around the edge of the board with double sided tape.
Bottom Tier Decoration:
Step 6
On a clean dry surface knead Renshaw Jet Black Ready to Roll Icing until pliable. Dust the worksurface with icing sugar and pin out the Icing to 4-5 mm thick. Drape the Icing over the cake, smooth over with the palm of your hand, expelling any air between the cake and Icing layer. Trim away excess Icing from the base of the cake with a sharp knife. Polish over the surface with smoothers for a neat professional finish.

Step 7
Make a template out of greaseproof paper to go around the circumference of the cake, fold it into quarters to create 4 equal sections. Use the curve of a bowl or something similar to draw around to create a drape effect.
Step 8
Next, on a clean, dry surface knead Renshaw Lincoln Green Ready to Roll Icing until pliable and shape into a long sausage.

Step 9
Dust the worksurface with icing sugar and pin out the Icing to 3mm thick to create an Icing panel the same length as the template.

Step 10
Brush the bottom section of the cake with a small amount of water and attach the panel around the cake. Allow the ends of the Icing panel to over-lap and trim neatly through both layers with a sharp knife.

Step 11
Use the template as guide to cut in the drape shape into the icing, remove excess icing and attach the pointed parts of the Green Icing panel to the cake with water.

Step 12
Use the Patchwork Cutter - Diamond Side Design to emboss the criss-cross pattern around the cake on the Green Icing. Go over the lines with the thin end of a Dresden tool for extra definition.

Step 13
Make thin sausages of the Renshaw Jet Black Icing and attach along the drape edge with water.

Step 14
Knead 1tsp Rainbow Dust Tylo Powder into 250g Renshaw Jet Black Ready To Roll Icing. Dust the worksurface with icing sugar and pin out the Icing until 2mm thick.


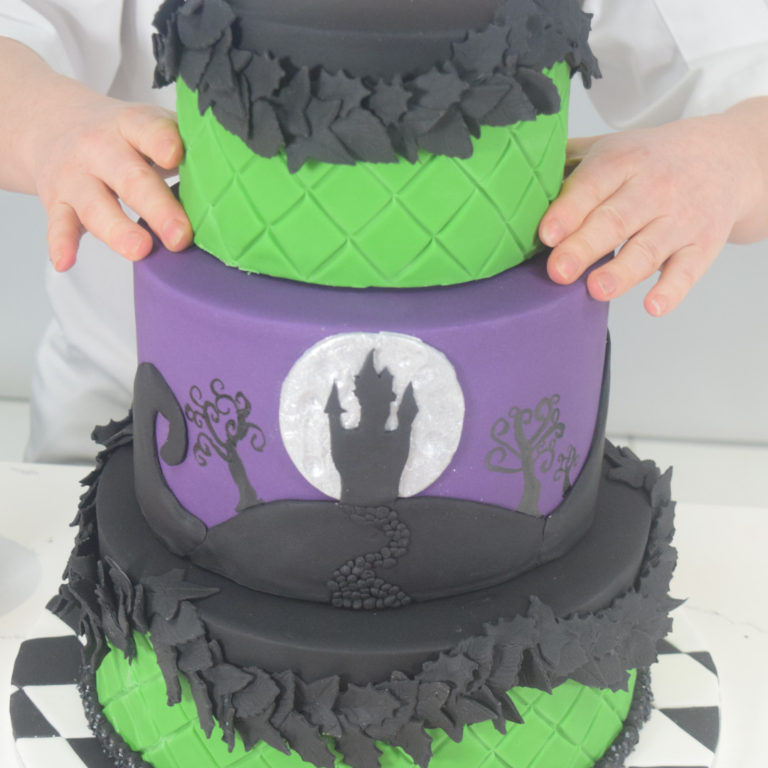
Middle Tier Decoration:
Step 19
On a clean dry surface knead Renshaw Deep Purple Ready to Roll Icing until pliable. Dust the worksurface with icing sugar and pin out the Icing to 4-5 mm thick. Drape the Icing over the cake, smooth over with the palm of your hand, expelling any air between the cake and Icing layer. Trim away excess Icing from the base of the cake with a sharp knife. Polish over the surface with smoothers for a neat professional finish.
Step 20
Knead Renshaw Grey Ready to Roll Icing until pliable. Add 1tsp Rainbow Dust Tylo Powder and knead well.

Step 21
To make the moon, take 50g Grey Tylo Icing and shape into a ball. Press down with the palm of your hand to flatten and smooth out.
Step 22
Use a ball tool to add craters and press the surface with crumpled tinfoil.
Step 23
Place the moon on a tray or plate, brush with Rainbow Dust Edible Glue and sprinkle over with Rainbow Dust Snow White Twinkle Dust, allow to dry for 5-10 mins before dusting off the excess. Attach to the cake with Rainbow Dust Edible Glue.

Step 24
Knead Renshaw Jet Black Ready to Roll Icing until pliable. Add 1tsp of Rainbow Dust Tylo Powder and knead in well.

Step 25
To create the hills, lightly dust the worksurface with Icing sugar and pin out the icing into an oval shape approx. 2-3mm thick and big enough to fill the space under the moon, attach with water and trim away any excess Icing from the base of the cake.

Step 26
Continue step 20-21 until the cake is filled with the silhouettes of hills. Dust the Katy Sue fir trees mould with cornflour and tap out the excess. Press small amounts of Black Tylo Icing into the mould until filled, turn over the mould and press out the tree. Trim to different heights and attach to the hill tops.

Step 27
Pin out a small piece of the Black Tylo Icing to 2mm thick, use a craft knife to cut around the castle template. Carefully attach the castle to the moon on the top of the hill with Rainbow Dust Edible Glue.

Step 28
Paint the trees along the hill tops using Rainbow Dust Black Metallic Edible Paint and a no 1 paint brush.

Step 29
Create the path up to the castle by attaching small balls of Black Icing to look like cobbles with Rainbow Dust Edible Glue.

Step 30
To create the fence, pin out Grey Tylo Icing to 2mm thick, cut out strips using the Gem Strip Cutter, cut each strip into 6cm sections.

Step 31
For the top of the fence use the FMM decorative boarder cutter by neatly cutting each individual point.

Step 32
Attach points to each of the sections with Rainbow Dust Edible Glue. Press down with a Dresden tool if required.

Step 33
Attach the railings around the middle tier once all the tiers are assembled. Position them 8cm apart. Add shorter 3cm railings in between each of the taller ones and add another strip across horizontally, attaching with Rainbow Dust Edible Glue, trim to size with a sharp knife.

Step 34
Silhouette grass; Pin out Black Ready to Roll Icing to 2mm thick. Cut a zig-zig line with a sharp knife, cut a straight line at the other side to form a strip, brush the straight edge side with Rainbow Dust Edible Glue. and roll the strip up, shape and curl the points to look like fronds.

Step 35
Roll the strip up, shape and curl the points to look like fronds. Pinch at the base and trim away excess Icing with a sharp knife, attach around the base of the railings with Rainbow Dust Edible Glue.

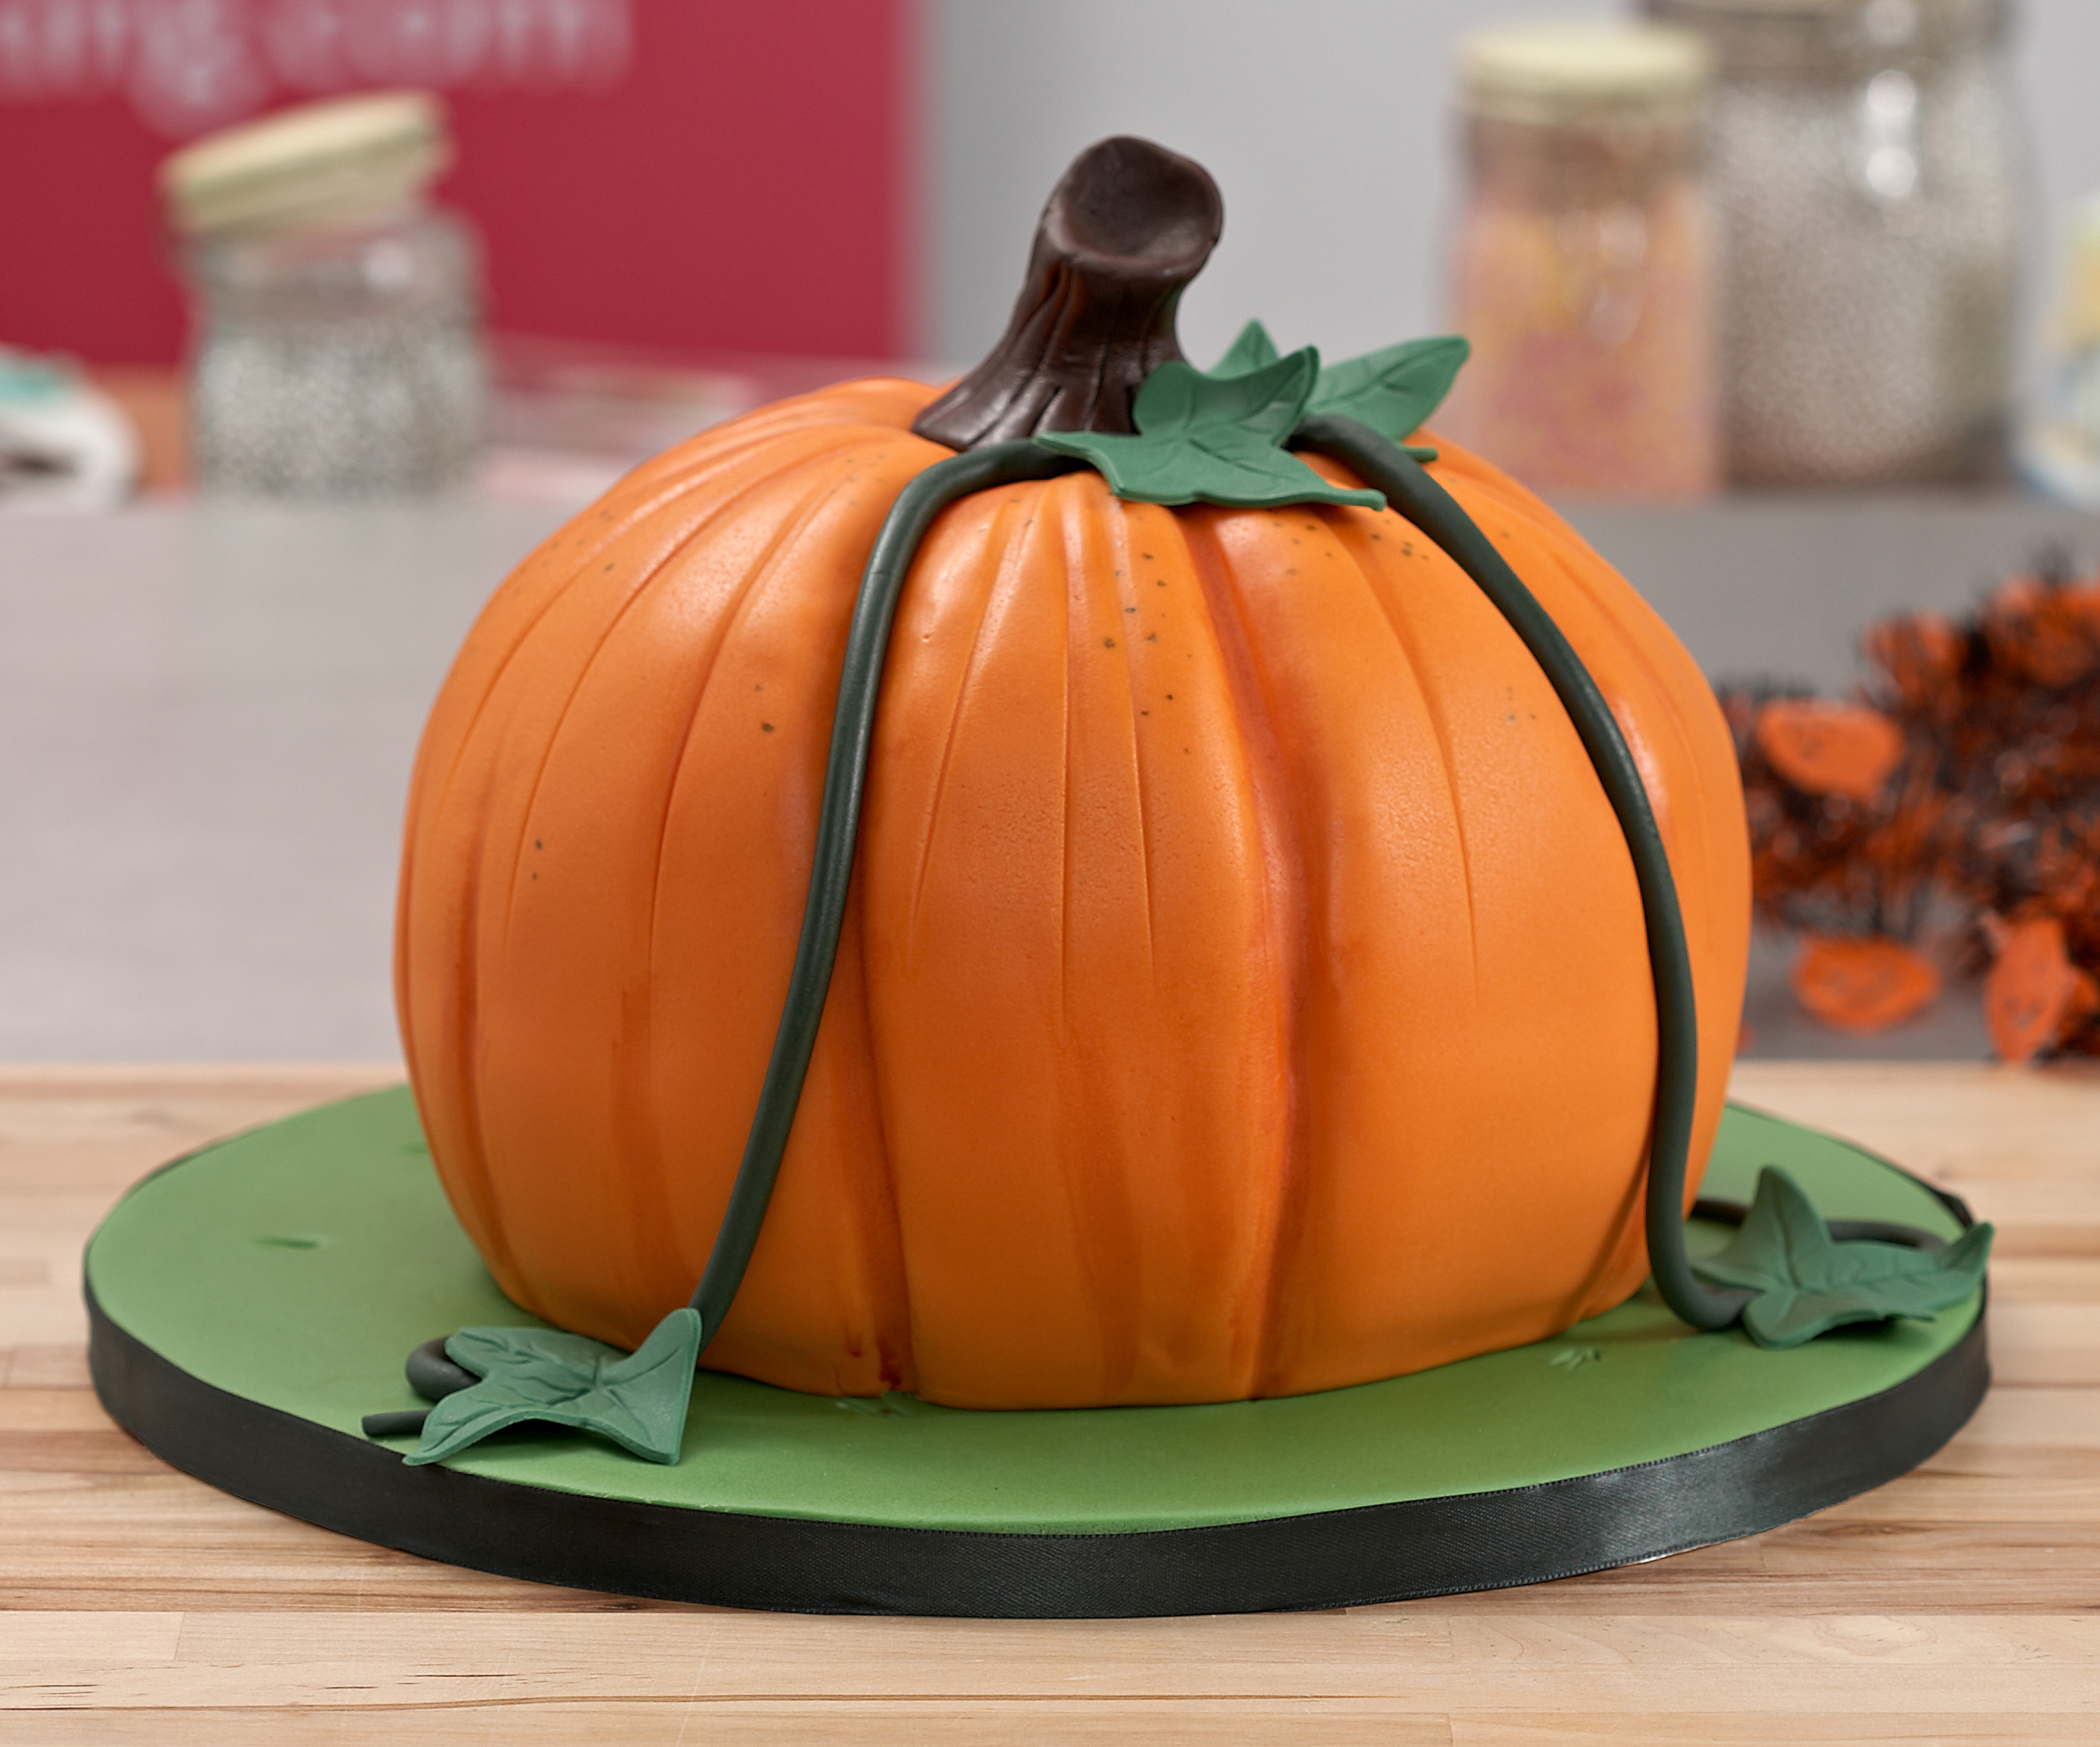
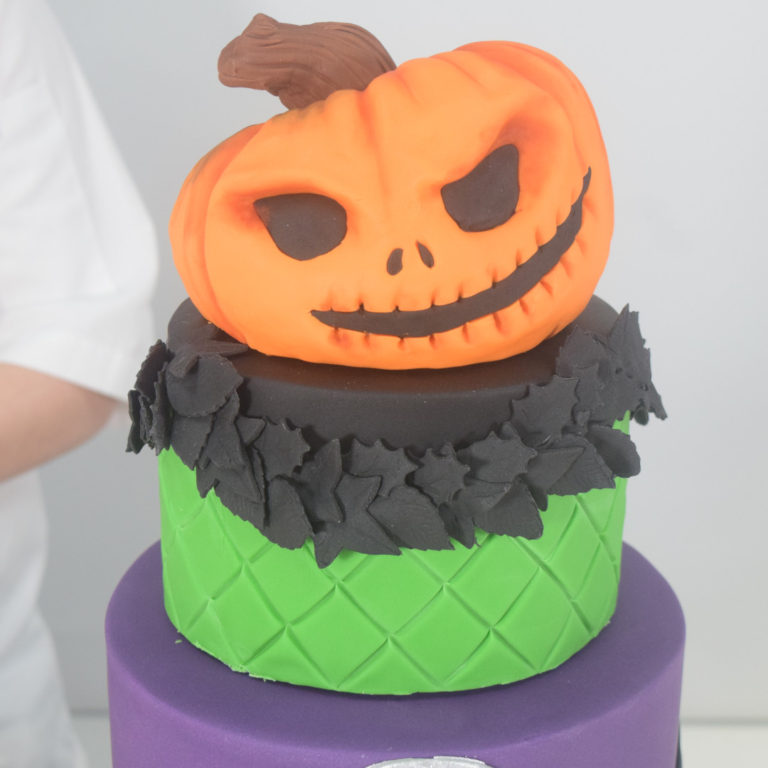
Making the Pumpkin:
Step 36
Grease 2 large mixing bowls with Trex, add the marshmallows to one.

Step 38
Add half the rice krispies to the other greased bowl, add all the melted marshmallows and top of with the remaining rice krispies.

Step 39
Coat your hands with Trex and mix together until fully combined. Wear gloves if you prefer but still coat them with Trex. Mix with Caution: Marshmallows can be very hot once melted and hold temperature in the centre, rather than touching the melted marshmallows directly, push the rice krispies into the marshmallows until cool enough to handle.

Step 40
Once combined, turn out onto a sheet of greaseproof paper and press together until compacted. Shape into a pumpkin shape of your choice, press your thumb in the top where the stalk should be and press two eye sockets at the front.


Step 42
Knead Renshaw Tiger Orange Ready to Roll Icing until pliable. Roll a 5cm ball into a sausage to form eyebrows, attach to the pumpkin, adding some shape and character.

Step 43
Dust the surface with icing sugar and pin out the rest of Renshaw Tiger Orange Ready to Roll Icing and cover the pumpkin, press the Icing into the recess before covering the sides. Leave 2-3cm of icing around the base to tuck underneath so it is fully covered. Mould and shape around the eye area to give definition.


Step 45
Cut out the mouth and the eye area with a craft knife. Fill the space with Renshaw Jet Black Ready to Roll Icing.

Step 46
Mark in the lines around the mouth with the thin end of a Dresden tool. Mark two holes for the nose and fill with Renshaw Black Ready to Roll Icing.


Step 48
Using a blend of Rainbow Dust Powder Colours in Tomato Red, Chocolate and Moss Green, dust all the creases on the pumpkin, add some extra shading around the eyes, mouth and top of the pumpkin with a flat shading brush.

Step 49
Knead Renshaw Dark Brown Ready to Roll Icing until pliable, add 1 tsp Rainbow Dust Tylo Powder and knead in well.

Step 50
Shape into a tapered sausage and trim the thin end at an angle. Add some shape by folding over in the middle. Attach to the centre of the pumpkin with Rainbow Dust Edible Glue.


Final Decorations:
Step 52
Attach all the cake tiers together using Renshaw Royal Icing and use cake dowels for support, add any final decoration such as the fence on the middle tier and the crystal beads to the top and bottom tier.

Step 53
Once all the tiers are assembled, shape Black Tylo Icing into thin sausages and press into the bead mould that’s been lightly dusted with cornflour. Turn the mould over and press out to release the decoration.

Step 54
Place the bead strips onto a tray or plate and brush with Rainbow Dust Edible Glue, sprinkle with Rainbow Dust Black Sugar Crystals. Attach around the bottom of the cake with Edible Glue.