
Mother’s Day Plaque Cake by Francezka Bell
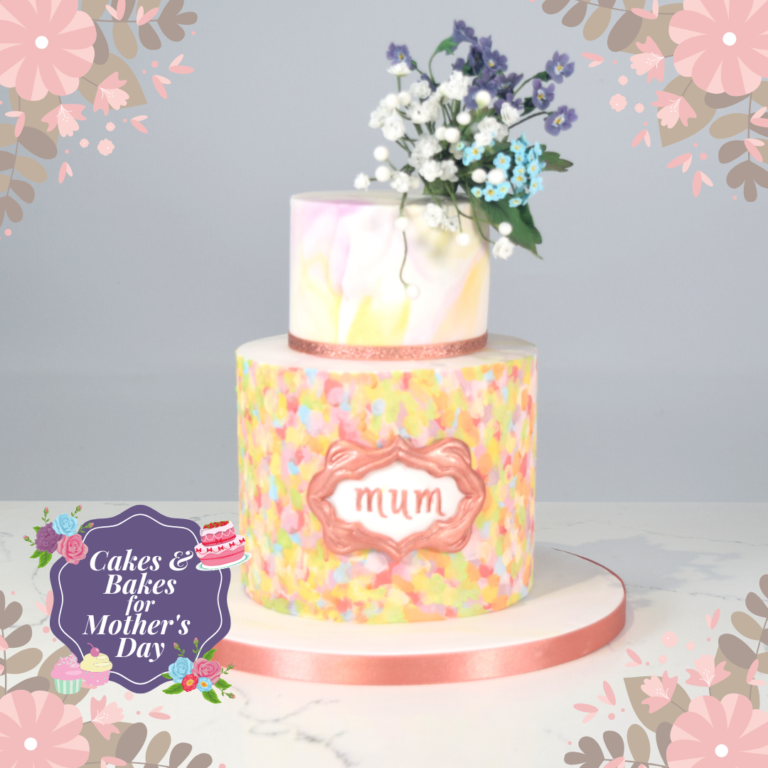
This gorgeous cake comes from Renshaw’s very own Francezka Bell, fusing a classic, flowery vibe with a clean modern aesthetic. Here’s what Francezka had to say about the cake:
“There is no celebration without cake and Mother’s Day is no different. Nowadays, personalisation is everything and nothing says “thank you” to the special lady or mother figure in your life more than something from the heart.
This cake was inspired by my nan, Violet. So of course, what more appropriate flower is there than the Violet itself? I chose the Forget Me Not as it’s the symbol for the Alzheimer’s Society, a cause close to my family’s heart. And the Gypsophila to bring them together in true beautiful wildflower harmony. My nan brought a lot of colour into the world and so a hand painted flower scene seemed like a fitting tribute.
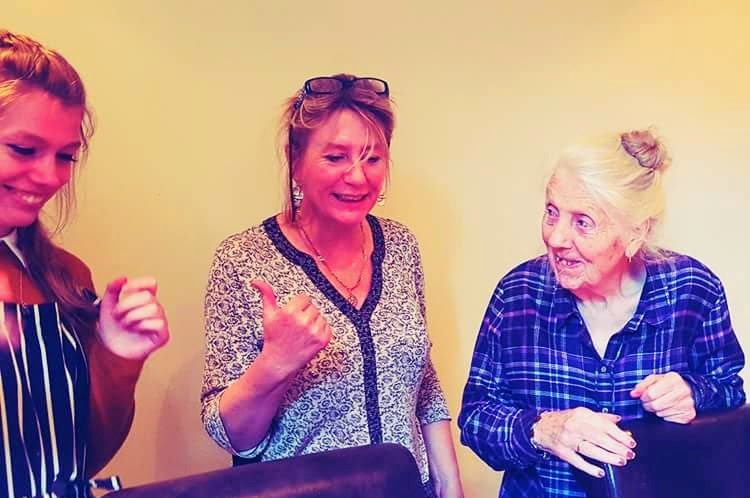
Dear mum, hope you enjoy the cake. In loving memory of your mum and all the mums, nans, aunts, sisters and mother figures who won’t be here to share the day with us.
This is my favourite picture of the 3 of us, taken 5 years ago when Gabriella and I revealed the cake we made for you and how much nan loved it. A little different to this one!”
That’s heartwarming, to say the least! Make sure you come back tomorrow to find how Francezka made the gorgeous flowers that top the cake!
Uploaded by Aaron Akpojaro
Decorating ingredients
- 250 g Renshaw Extra Marshmallow Flavour Ready To Roll Icing
- 250 g Renshaw Ready to Roll Icing Pink
- 250 g Renshaw Ready to Roll Icing Dusky Lavender
- 250 g Renshaw Ready to Roll Pastel Yellow
- 250 g Renshaw Ready to Roll Duck Egg Blue
- 250 g Renshaw Flower and Modelling Paste White
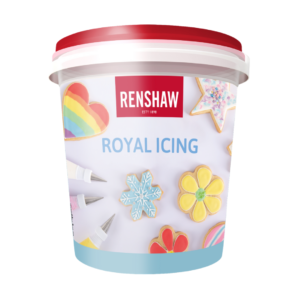
- 400 g Renshaw Royal Icing Pot
- Rainbow Dust Edible Glue
- Rainbow Dust Lustre Metallic Rose Gold
- Rainbow Dust Powder Colour Sunset Yellow
- Rainbow Dust Powder Colour Claret
- Rainbow Dust Powder Colour Poppy Red
- Rainbow Dust Powder Colour Lavender Drop
- Rainbow Dust Powder Colour Spring Green
- Rainbow Dust Powder Colour Primrose
- Rainbow Dust Powder Colour Tomato Red
- Rainbow Dust Powder Colour Snow Drift
- Rainbow Dust Powder Colour Baby Blue
- Rainbow Dust Powder Colour Dusky Pink
- 6” round x 5” deep cake stacked, filled and coated with ganache
- 4” round x 3” deep cake stacked filled and coated with ganache
Instructions
Prepare your equipment:
Step 1
You will need; 10” round cake drum, 6” round cake dummy, knife, palette knife, Dresden tool, large rolling pin, small rolling pin, icing sugar, smoothers, flexi smoothers, fine paintbrushes, glue brush, rejuvenator spirit/dipping solution, paint palette, cocoa butter, ceramic/glass side plate, ceramic/glass bowl, Sugar Press Sassy letter stamps set, Sugar Press circle board, 9cm x 6cm rectangular plaque cutter, 7.5cm x 4.5cm PME Creative Plaque cutter, florist tape 26m x 13mm dark green, large posy pic, long nose, sugarcraft pliers, spray bottle filled with cooled, boiled water
Covering the cake:
Step 2
Knead 500g Marshmallow Extra on a clean, dry surface until smooth and pliable. Lightly dust the surface with icing sugar and pin out to a 6” circle, randomly press in small amounts of each pastel shade of Icing until mostly covered. Knead the Icing briefly to marble then pin out to 2-3mm thick.

Step 3
Spritz the 6” cake all over and adhere the Icing. Secure to the top edge and gently smooth down to the bottom with the palm of your hand, trimming any excess Icing. Smooth over the cake with the top and side smoothers, then sharpen the edges using the flexi smoothers.

Step 4
Repeat with the remaining 500g of Icing and cover the 4” cake. Use the excess Icing to cover the cake board

Making the plaque:
Step 5
Knead 100g Flower and Modelling Paste and pin out to 2-3mm thick. Cut out two 9cm x 6cm rectangular plaques. Set one aside and cut the centre out of the other with the 7.5cm x 4.5cm plaque cutter. Brush the edges of the first plaque with Edible Glue and attach the second plaque on top. Soften the edges with your finger.

Step 6
Take a dresden tool and follow the outline around the middle of the plaque for extra detailing.

Step 7
Arrange the Sugar Press Sassy letters in the centre of the plaque for the “mum” lettering and press in with the circle board on top to emboss. Gently remove the letters and place the plaque onto a 6” round dummy to set curved.

Step 8
Once set, mix Rose Gold Lustre and rejuvenator spirit into a paint palette and mix into a paint. Paint the plaque and the lettering with a fine brush.

Painting the bottom tier:
Step 9
Fill a ceramic bowl with boiling water and set a side plate on top. Place 1tsp cocoa butter into the centre of the plate and a small amount of Sunset Yellow, Claret, Poppy Red, Lavender Drop, Spring Green, Primrose, Tomato Red, Snow Drift, Baby Blue and Dusky Pink Powder Colours around the sides of the plate. Once melted, mix the Powder Colours with the cocoa butter to make a paint.

Step 10
Mix each colour with varying amounts of Snow Drift to make the paints opaquer and to create pastel shades. Dab each colour paint randomly all the way around the 6” cake for an abstract flower scene.

Step 11
Attach the plaque to the centre of the cake with a little Royal Icing. Attach the cake to the board and the 4” cake on top.

Adding flowers:
Step 12
For the flower spray, follow the Gypsophila, Violet, Forget Me Not and large rose leaf tutorials. Tape each arrangement together with florist tape and insert into the posy pic. Push the pic into the top right of the 4” tier and adjust the arrangement to desired shape with a pair of pliers