Rose Gold Cake Inspiration
Friday 24th May 2019
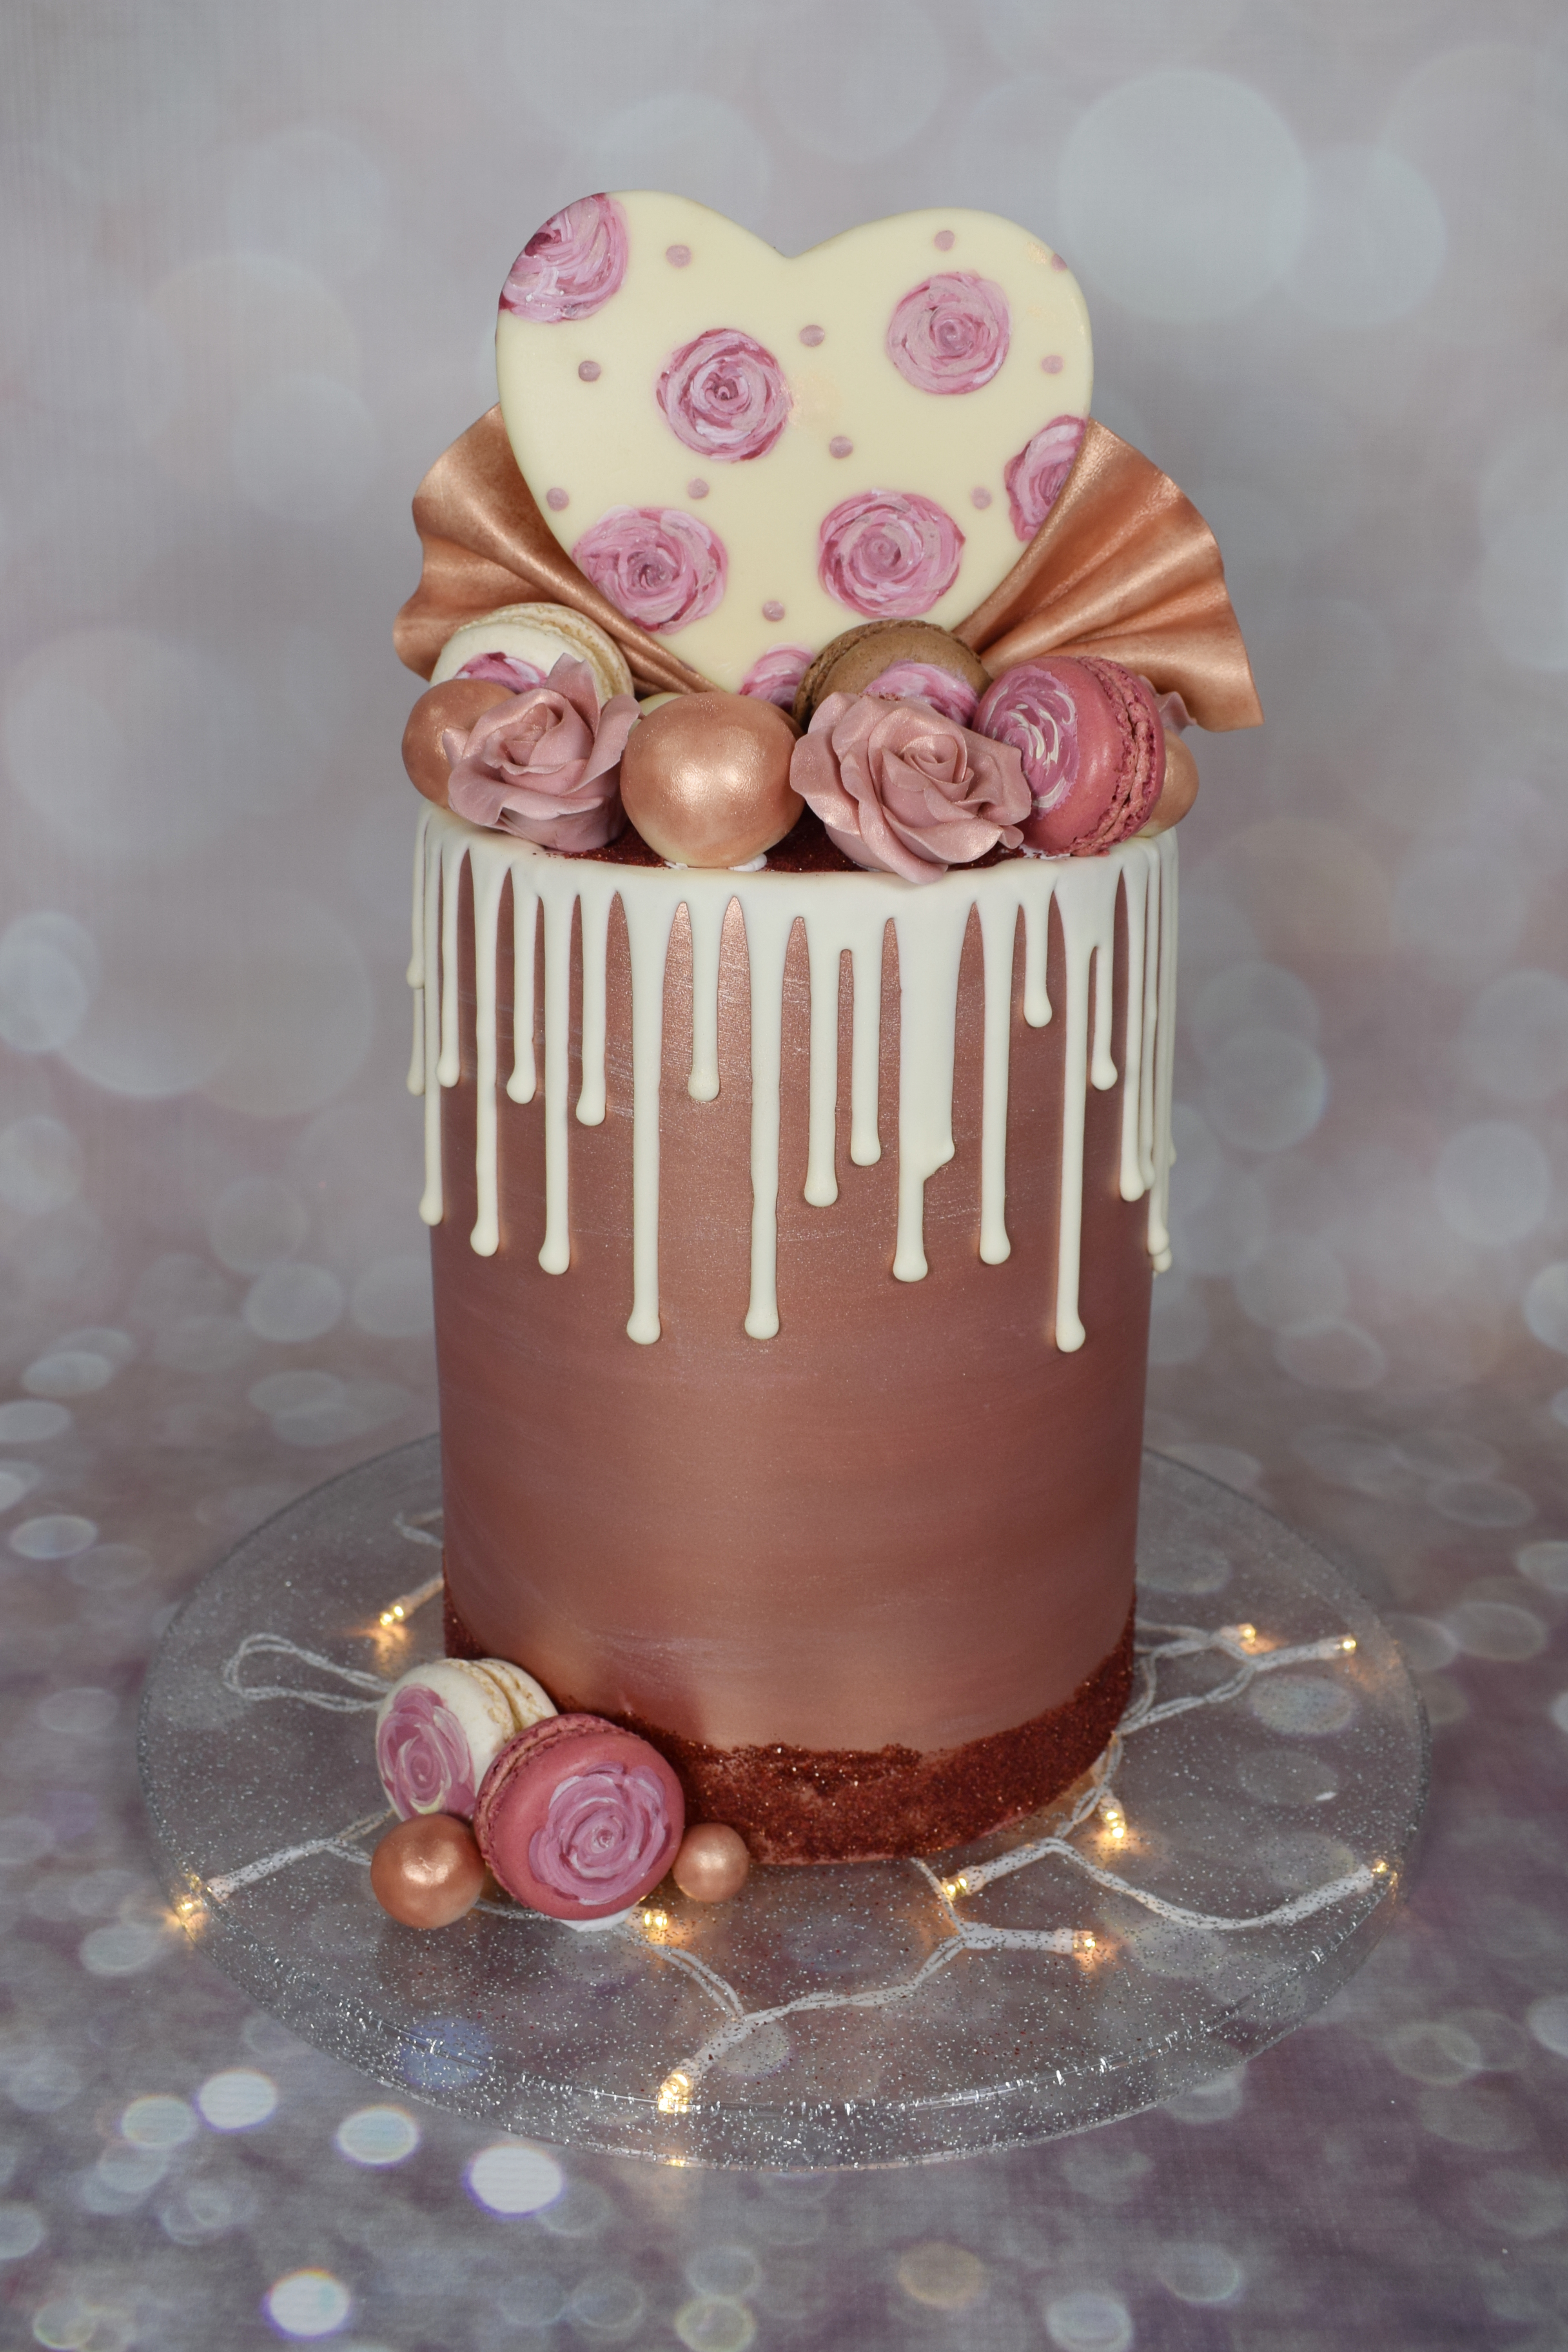
Rose gold is considered by many to be the most romantic and beautiful metal in the world due to its pinkish-red colour and dreamy hues. Did you know that you can easily create your own rose gold cakes using our Metallic Rose Gold Lustre?
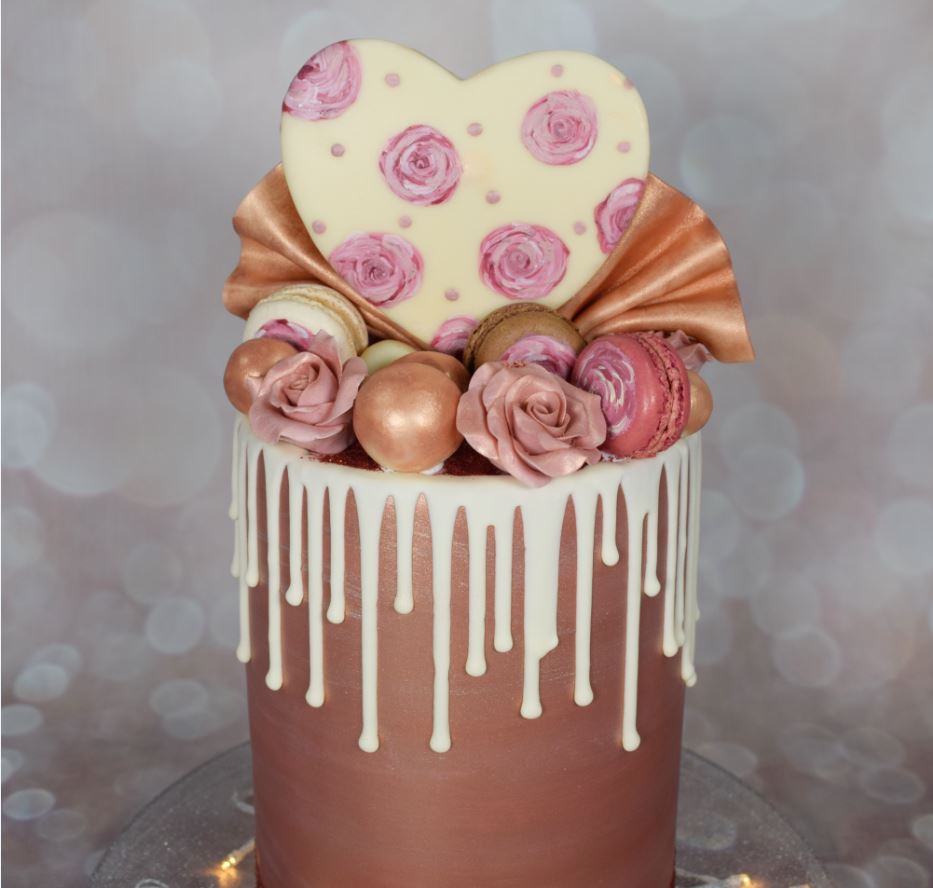
This rose gold cake was inspired by the work of Nauty Little Treats, who has created a number of beautiful rose gold cakes. Find out how to re-create some of these elements below!
Choosing the perfect base colour
In order to make the most of the Rose Gold Lustre and bring out the best in its beautiful hues, it needs the perfect base colour. Pink is the perfect colour to compliment Rose Gold. Paired together, the tones are enriched and therefore, the rose gold properties are enhanced. That’s why we have created the NEW Renshaw Icing Shimmer Kit in 3 shades including Rose Gold.
Already purchased your Lustre separately? Try our Pink RTR Icing as your base for the same result.
Painting
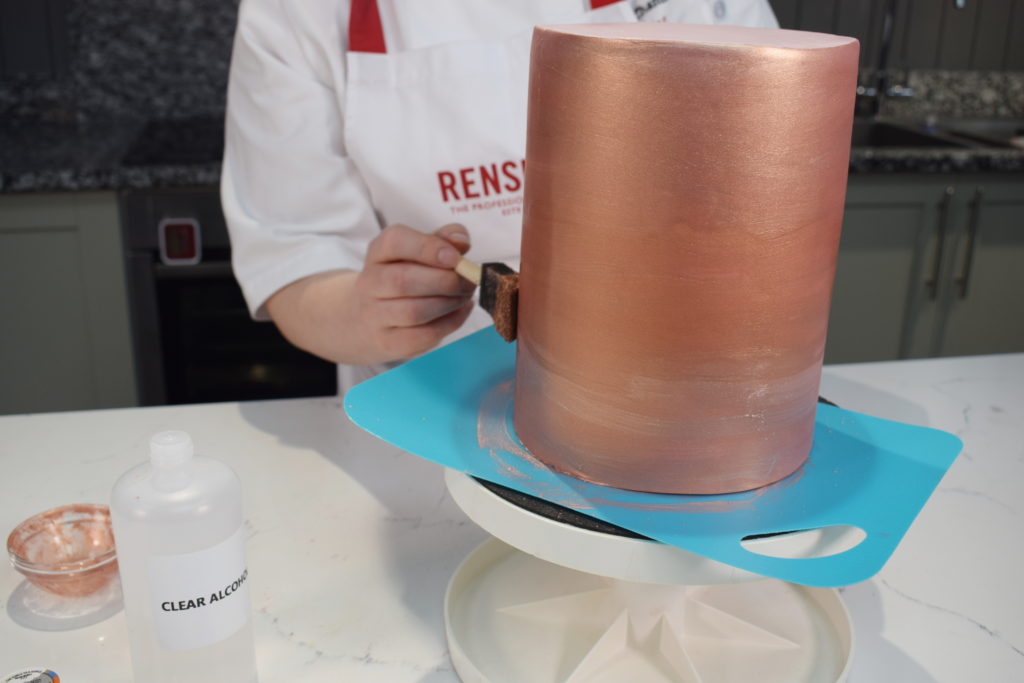
Painting with Lustre is an easy and stress-free way of applying a gorgeous sparkle to a cake. The colour of the lustre will intensify slightly with this method. The icing on this cake has been painted with this method.

- Place a teaspoon of Metallic Rose Gold Lustre into a dish and mix with clear alcohol to a painting consistency.
- Use an applicator sponge to paint the surface of the cake. Paint around the cake in bands until all the cake is covered. Apply a second layer.
Voila! You have a gorgeous metallic cake. Now time for a close up…

Simply stunning – and tasty too! Check out how to incorporate a stencil with your Lustre paint in our Art Deco Cake tutorial:
Cocoa Butter Painting
The heart topper for this cake was made with Flower and Modelling Paste then painted with Rainbow Dust Powder Colours. These were also used to paint flowers onto the decorative macarons.
- Place a small amount of cocoa butter in each of the reserves, depending on how many Powder Colours you plan to use. Allow to melt. For this cake, Claret, Rose and Snow Drift were used.
- Mix in Claret, Rose and Snow Drift Powder Colours in each of the reserves and mix with a cocktail stick until combined.
- Use a No. 4 flat paintbrush to paint a circle using Rose cocoa butter to form the base colour of the rose.
- Paint a dot of Claret cocoa butter in the centre, then add a dot of Snow Drift cocoa butter and swirl around in a spiral for the centre.
- For petals, paint “C” shapes in Claret cocoa butter around the centre to fill the circle. Next, use Snow Drift cocoa butter and your rose gold mix to add highlights to the petals. Blend the colours together and the cocoa butter starts to set to create a soft effect.
Top tip: Snow Drift can be added to coloured cocoa butter to lighten the colour and make it opaque.

Royal Icing Drip Effect
Renshaw Royal Icing was used to create the drip effect on this cake, by watering it down gradually. To create the white chocolate colour on this drip pattern, add Rainbow Dust Cream ProGel to your Royal Icing. Using Royal Icing will achieve a superior drip effect than if you used melted chocolate instead.
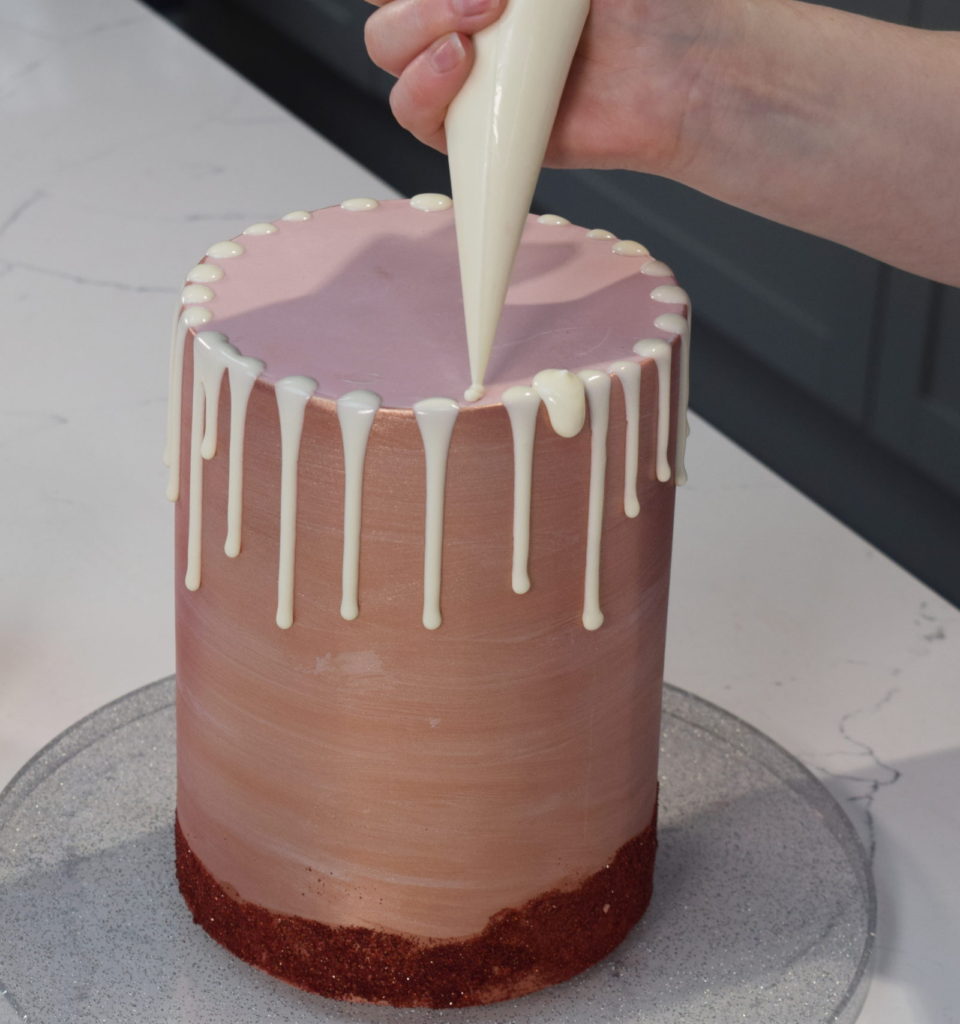
You can check out our full range of Progels here if you want to change up the shade of your drip effect
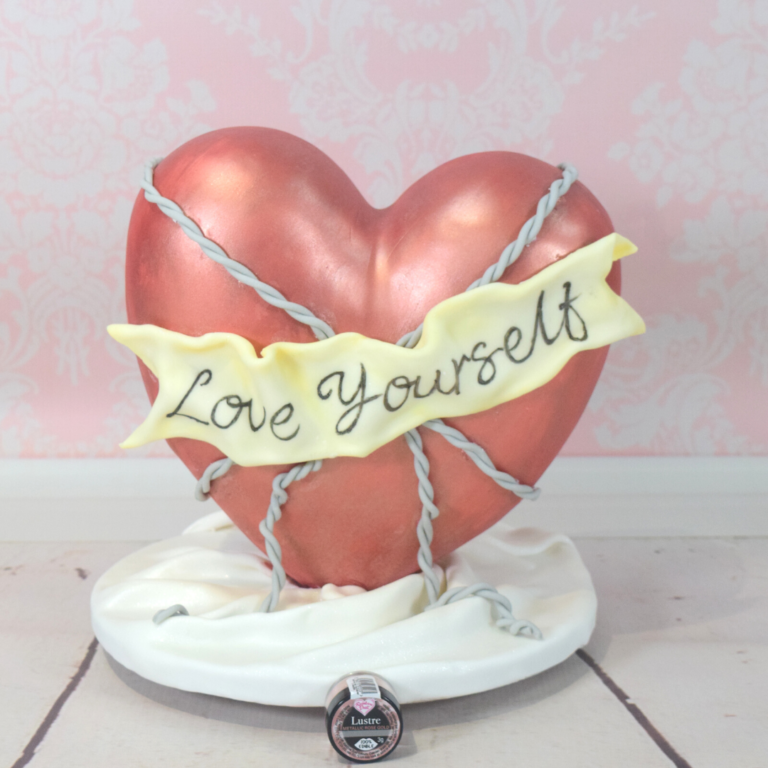
We hope you find our tips on using Rose Gold Lustre useful. The next challenge? Check out our 3D Rose Gold Heart Cake recipe.
We hope youre feeling inspired! Tag us in your Lustre creations via our social channels; @renshawacademy for all your bake-cational needs, and @renshawbaking and @rainbow_dust_colours for inspiration from our lovely customers!