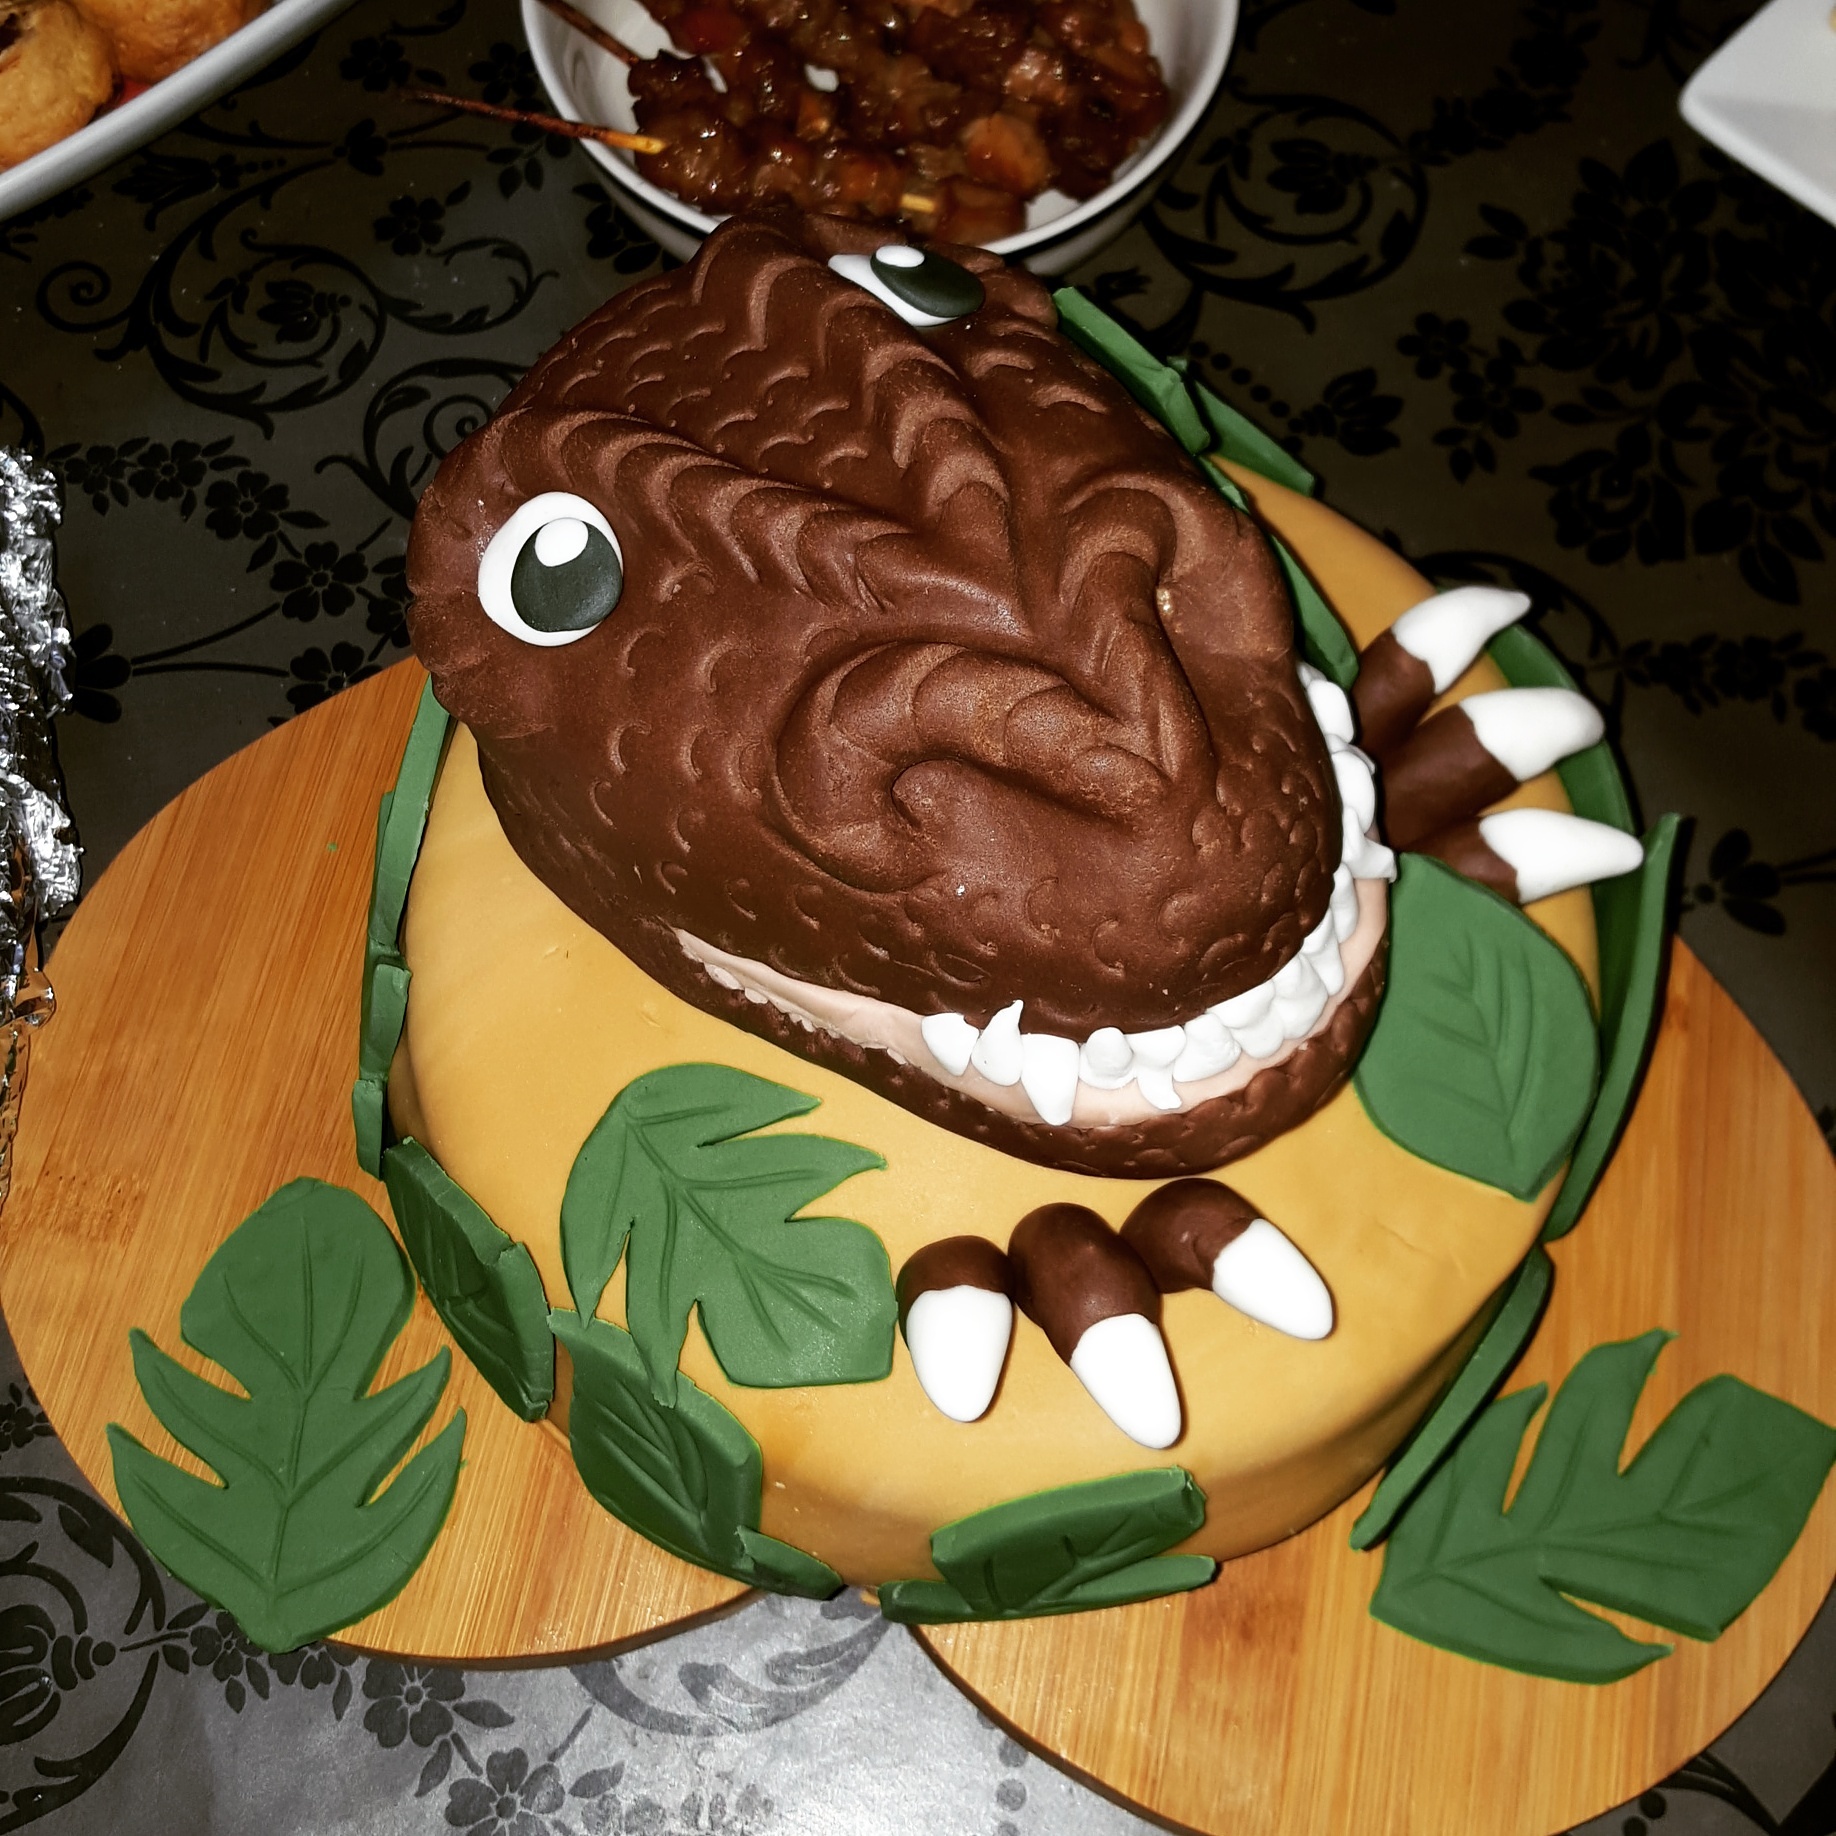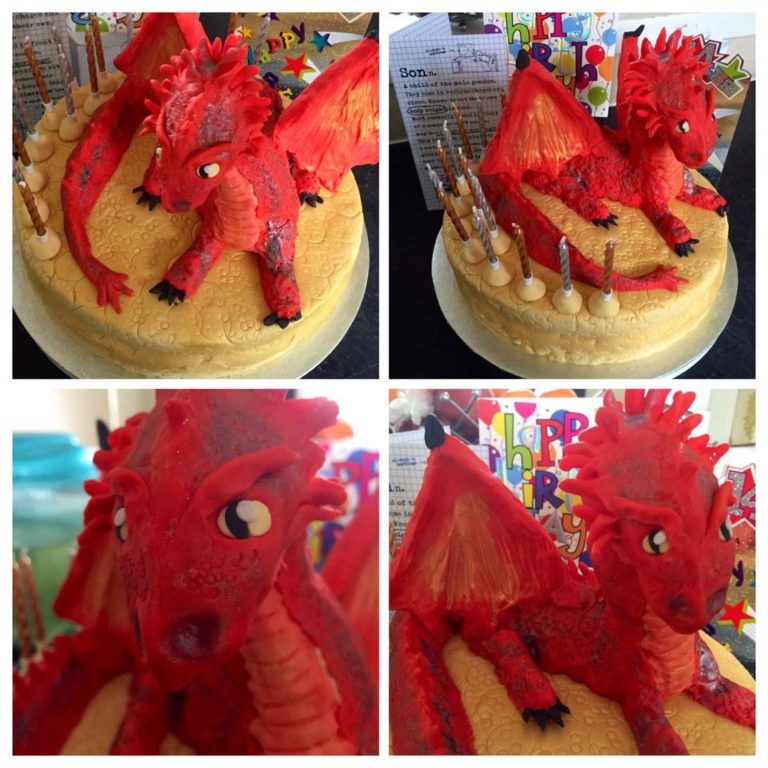
Smaug Cake
How to make a Smaug Dragon (from The Hobbit) on his gold coin stash. Sponge cake decorated using Renshaw Ready to Roll Icing.
Recipe by Helena M
Uploaded by Helena M
Time to make
Skill Level
Intermediate
Serves
30 people
Baking ingredients
- 1 Sponge Cake - I used a 10" Round
- 750 g Buttercream - I used a 250g butter/500g icing sugar mix
- 3 tbsp seedless raspberry jam
Decorating ingredients
- 1 kg Renshaw Ready to Roll Icing - I used white but you could use ivory
- Edible Gold Lustre Spray or Powder
- 25 g butter
- 100 g marshmallow
- 80 g Rice Krispies
- 250 g Renshaw Poppy Red Ready to Roll Icing
- 250 g Renshaw Jet Black Ready to Roll Icing - you only need a small amount
- Modelling Chocolate
- Edible Dark Lustre Dust - to add shading (I used grey/silver)
- You will also need a selection of nozzles, cake pop stick and cocktail sticks
Renshaw products used

Email this recipe
Instructions
Preparing The Cake:
Step 1
Cut your 10" round cake in half and fill with buttercream then raspberry jam. Sandwich them together on a cake board. Crumb coat with remainder of the butter cream and put in fridge.
Decorating The Cake:
Step 2
Roll out the 1kg White Renshaw Ready to Roll Icing to 5-6mm. Remove cake from fridge and cover with the rolled-out icing. Smooth the sides and top with a cake smoother.
Step 3
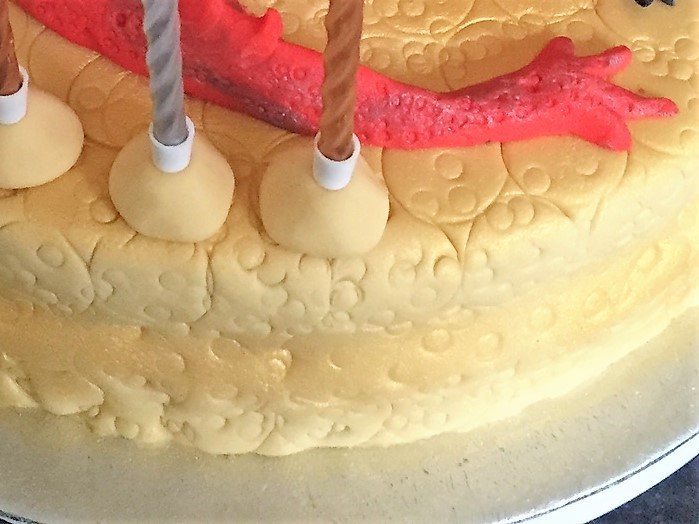
Use a selection of nozzles (the round part) to indent the icing on the cake to resemble coins. Spray the indented icing with Gold Lustre Spray or brush with Gold Lustre Dust.
Making The Dragon:
Step 4
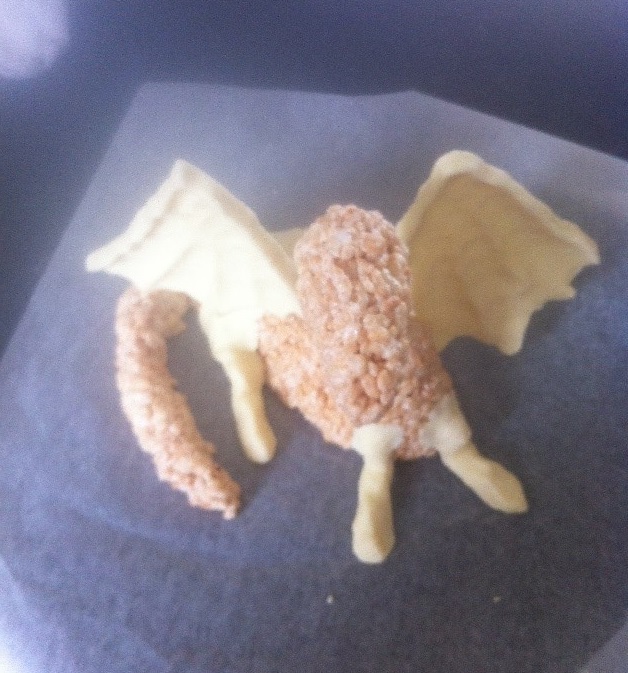
I wanted the dragon to cover the top of the cake, making him from modelling paste would have been too heavy so he was made from Rice Krispies and covered in sugarpaste.
Step 5
Melt 25g butter in a saucepan over a low heat. Add marshmallows and stir constantly until melted. Stir for a further minute then remove from the heat. Add the Rice Krispies and stir until well coated.
Step 6
Allow to cool slightly then with well-greased hands mold into a dragon shape, you may need a cake pop stick to support the head.
Step 7
Put the body to one side on grease proof paper, then use modelling chocolate to make the wings. You will need cocktail sticks inserted into the wings to enable you to add them to the dragon. Once the wings are made, set aside to go hard. Use modelling chocolate to add legs to your Dragon. Once the wings have hardened, insert them into the body. He will look something like this.
Decorating The Dragon:
Step 8
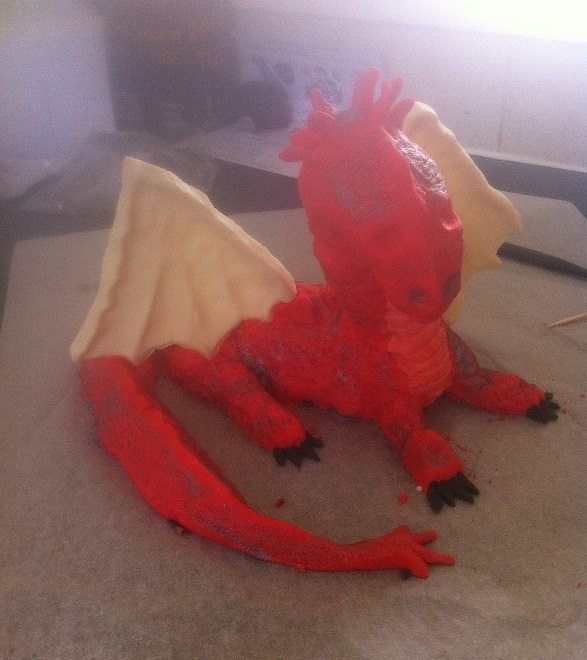
Roll out your Renshaw Poppy Red Ready to Roll Icing, and put on the dragon. You might find It easier to do this in sections.
Step 9
I lightened a small piece of red icing with some white icing for the chest area.
Step 10
Once the dragon is covered make small horn/cone shaped pieces with the red icing and put them down the center of his back, down his tail and around his face. Attach using a sugarpaste tool or a small amount of water.
Step 11
Use Jet Black Renshaw Ready to Roll Icing rolled into little cone shapes for his claws. Use white and black for his eyes.
Step 12
Use a ball tool or your fingers to indent his nostrils. Use a knife tool to create lines across his chest.
Step 13
To add texture to your dragon, use a number 2 nozzle dotted over the sugarpaste to create scales.
Step 14
Brush some dark lustre dust to create shading.
Step 15
I left the covering of the wings till last. (I was being a wimp). I added a little spray of gold lustre to the inside of the wings.
Finishing The Cake:
Step 16
Once your Dragon is complete, attach him onto his gold coin stash aka The Cake. This was a Birthday Cake so I added Gold and silver candles.