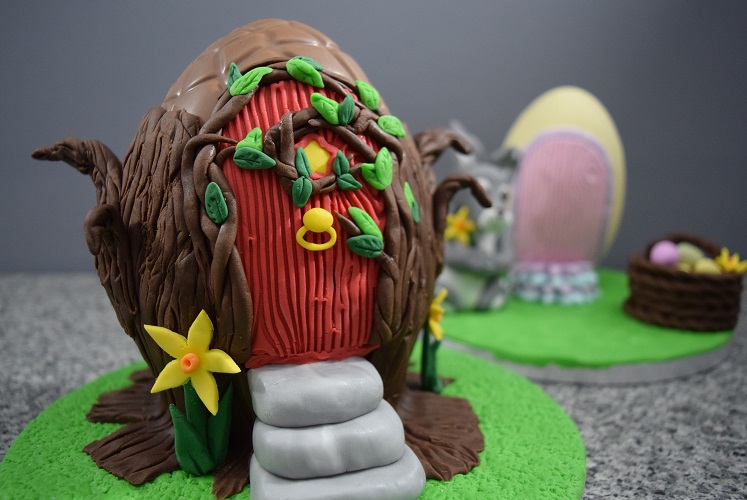
Fairy Door Easter Egg
Make your Easter gifts eggs-tra special and individual by decorating with Ready to Roll Icing.
Uploaded by Kayleigh McDonough
Time to make
Skill Level
Intermediate
Serves
2 people
Decorating ingredients
- 1 chocolate Easter egg
- 250 g Renshaw Poppy Red Ready to Roll Icing
- 250 g Renshaw Lincoln Green Ready to Roll Icing
- 250 g Chocolate Flavour Ready to Roll Icing
- 250 g Renshaw Grey Ready to Roll Icing
- 250 g Renshaw White Ready to Roll Icing
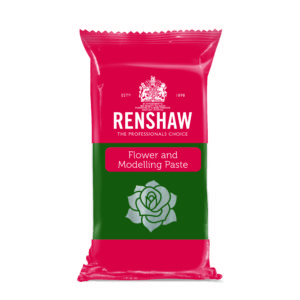
- 250 g Renshaw Grass Green Flower and Modelling Paste
- 250 g Renshaw Leaf Green Flower and Modelling Paste
- 250 g Renshaw Daffodil Yellow Flower and Modelling Paste
Renshaw products used


Email this recipe
Instructions
Step 1
Knead and roll out Lincoln Green icing on a surface lightly dusted with icing sugar until it is wide enough to cover your cake board. Add a little water to the cake board and gently lift the icing over, smoothing down with the palm of your hand or with a cake smoother. Use a sharp knife to trim away the excess icing around the edge of the board.
Step 2
Create a grass effect on your cake board by pressing a clean, unused toothbrush into the surface. Vary your pressure depending on how rough/grassy you want the surface to look.

Step 3
Knead and roll out red icing on a lightly dusted surface to the thickness that you would like your fairy door to be. Don't roll the icing too thin as next you'll need to imprint a wood effect embosser onto the surface, and you don't want this to rip through the icing. Alternatively you can use a modelling tool to mark in your own grain effects.
Step 4
Press one half of a circle cutter into the icing to create a rounded edge for the top of your door, then cut two straight lines at either side. Measure the door against your egg and cut a straight line across the bottom. It's better to cut the door before it starts to bend round the bottom of the egg, and remember to leave enough space for front door steps.
Step 5
Use a plunger cutter in your chosen shape to cut out a little window for the door. Use a different colour icing in the same shape to stick inside the gap - this egg uses yellow to look like a light inside. Stick the door to the front of the egg with a little water, and add in your window colour too. Model a door handle or knocker from your chosen colour of icing and attach to the door.
Step 6
Knead chocolate flavour icing and roll into smooth balls. Roll these gently until they elongate into strips and taper one edge so that they form vines.Twist three or four vines together and attach around the top and sides of the door with a little water, trailing some of the vines around the window if you wish.
Step 7
Knead both shades of your green modelling paste and roll into small tear drop shapes. (If you have any leftover Lincoln Green icing you could use this instead of the Grass Green modelling paste). Flatten each of the tear drop shapes slightly and mark in leaf veins with a modelling tool. Add these around the vines on your door with a little water.
. Flatten each of the tear drop shapes slightly and mark in leaf veins with a modelling tool. Add these around the vines on your door with a little water.")
Step 8
Stick the egg to the cake board with either edible glue, royal icing, or by mixing modelling paste with a little water to form a sticky paste. Be careful to keep the egg upright until you add the tree bark edge which will add more support.
Step 9
For the tree bark, roll out the rest of your chocolate flavour icing into a rectangle and measure it around the back and sides of your egg until it meets the vines of the doors. Once happy with the size, trim around the edges. Use a Dresden tool to mark in a tree bark effect then stick around the egg with a little water. Push slightly down on the top and bottom edges of the chocolate icing so that it looks more attached to the egg and the grass. With your leftover chocolate icing you can model branches, marking these with a tree bark effect and adding to the sides of the egg with a little water.
Step 10
Knead equal parts grey and white icing together, but not fully combing them, until they create a pebble/stone effect. Roll into oval smooth oval shapes and flatten slightly to create front door steps. Stick these together and to the board/egg with a little water.
Step 11
Knead and roll out your Daffodil Yellow and Leaf Green modelling pastes. Use a daffodil plunger cutter in varying sizes then bring up the petals to give them a better shape. Add orange icing to the centre of the flowers. Roll stems and cut leaves from the green modelling paste and attach all together, and around the egg, with a little water. It may be best to leave the stems to set harder before trying to attach anything else, so that it can support the flower.

Step 12
Finish by adding a ribbon around the edge of the cake board.