

Celebration Edible Bunting
Celebrate in style by adding colourful edible bunting to your latest creation. Why not add your own personal touch by creating a thoughtful word of your choice by using our fabulous Flower and Modelling Paste. You can check out our range of Flower and Modelling Pastes by clicking here.
Top Tips:
- Bring colour to your bunting by using a variety of Rainbow Dust ProGel Food Colour Gel. See the full range here.
- Place your Flower and Modelling Paste into a freezer bag to prevent it from drying out as it will set hard once it is in contact with air.
Uploaded by Chloe Edwards
Skill Level
Easy
Baking ingredients
- Prepare your equipment: non-stick rolling pin, freezer bags (to prevent your fondant from drying out), sharp knife, icing sugar (for dusting), alphabet letter cutters, small rectangle cutter, square cutter.
Decorating ingredients
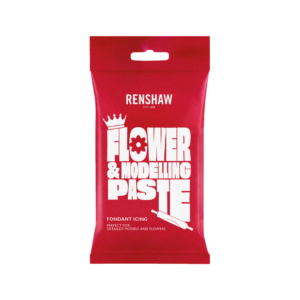
- 250 g White Flower and Modelling Paste
- 25 g Rainbow Dust ProGel Food Colour Gel (at least 5 colours of your choice)
- Colours used to make the Congrats Bunting:
- 25 g Lilac Rainbow Dust ProGel Food Colour Gel
- 25 g Strawberry Rainbow Dust ProGel Food Colour Gel
- 25 g Yellow Rainbow Dust ProGel Food Colour Gel
- 25 g Baby Blue Rainbow Dust ProGel Food Colour Gel
- 25 g Holly Green Rainbow Dust ProGel Food Colour Gel
- 25 g Pink Rainbow Dust ProGel Food Colour Gel
- Click Twist Edible Glue Brush
Renshaw products used
Email this recipe
Instructions
Making the Bunting::
Step 1
Begin by splitting one 250g packet of White Flower and Modelling Paste into 10 equal pieces if you are making an 8-letter word (cut in half and then each half split into 5 equal pieces). Keep 2 pieces out to make the rope and place the other 8 pieces into a freezer bag for later to prevent it from drying out.
Step 2
To make the rope, warm each half up until its pliable by kneading it in your palm of your hands. Roll each half into a long sausage shape roughly 30-40cm (depending on the length of your word you would like on the bunting).
Step 3
To intertwine the 2 long sausage shapes, take each end and lay them over each other. Take the other end and keep twisting them together (without squashing the modelling paste) until you reach the end. To secure the rope from unravelling, squeeze the ends with your fingers until the modelling paste combines.
Step 4
Finally, bend it slightly in your desired arch shape and place to the side to set hard.
Step 5
To make the bunting flags, colour the leftover pieces of the white modelling paste from step 1. Add 2 drops of each colour of Rainbow Dust ProGel Food Colour Gels into each piece and knead until the colour is fully blended. Place the coloured modelling pastes back into the freezer bags to prevent them from drying out again.
Step 6
Next, roll out each colour using your rolling pin and press out x1 rectangular shape using the cutter. Remove the excess modelling paste and push the rectangle out of the cutter. Then, using the corner of the square cutter, cut out a triangle shape on the bottom of the shorter side of the rectangle. You can use a sharp knife for this if you don’t have access to a square cutter. This will create two pointed ends on the bottom of the rectangle shape.
Step 7
Repeat this for each colour of modelling paste until you have the desired number of bunting flags. (You will need 1 for each letter).
Step 8
For the letters, roll out 50g of White Flower and Modelling Paste. Press your first letter cutter into a small amount of corn flour to prevent the paste from sticking and then press the cutter onto the rolled out white modelling paste. Move the cutter side to side to loosen it from the paste and pull away to reveal the cut-out letter. Repeat this for the other letters.
Step 9
To attach each letter to the bunting flags, organise the colour order of your bunting and then brush a small layer of edible glue using the Click Twist Edible Glue Brush onto the back of the letters and place them onto each bunting flag.
Step 10
Arrange the letters in order and then brush a small layer of glue onto the top section each flag. Next place the premade rope on top and move the flags around from underneath in place. Leave for the glue to dry for at least 20 minutes before adding onto your cake.