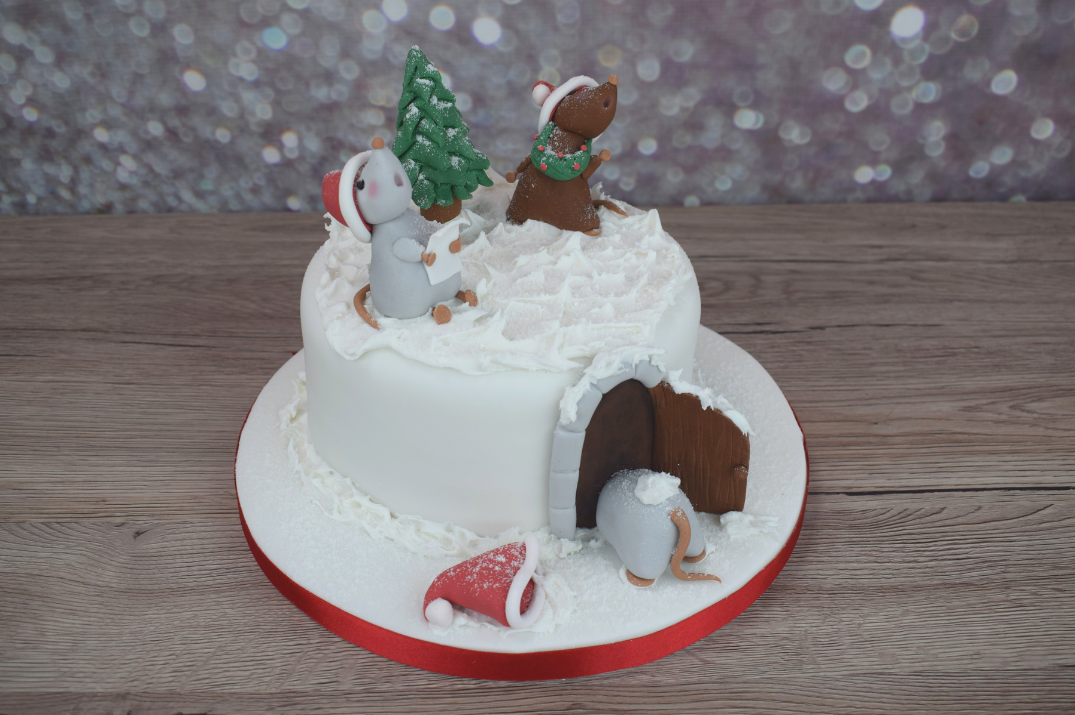
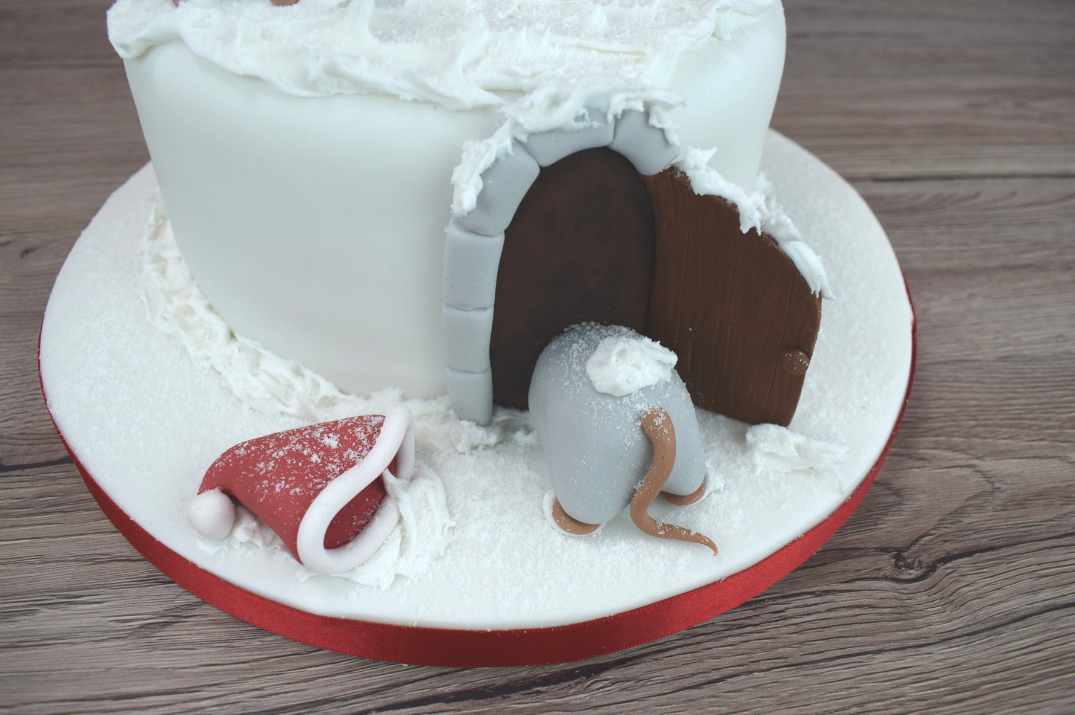
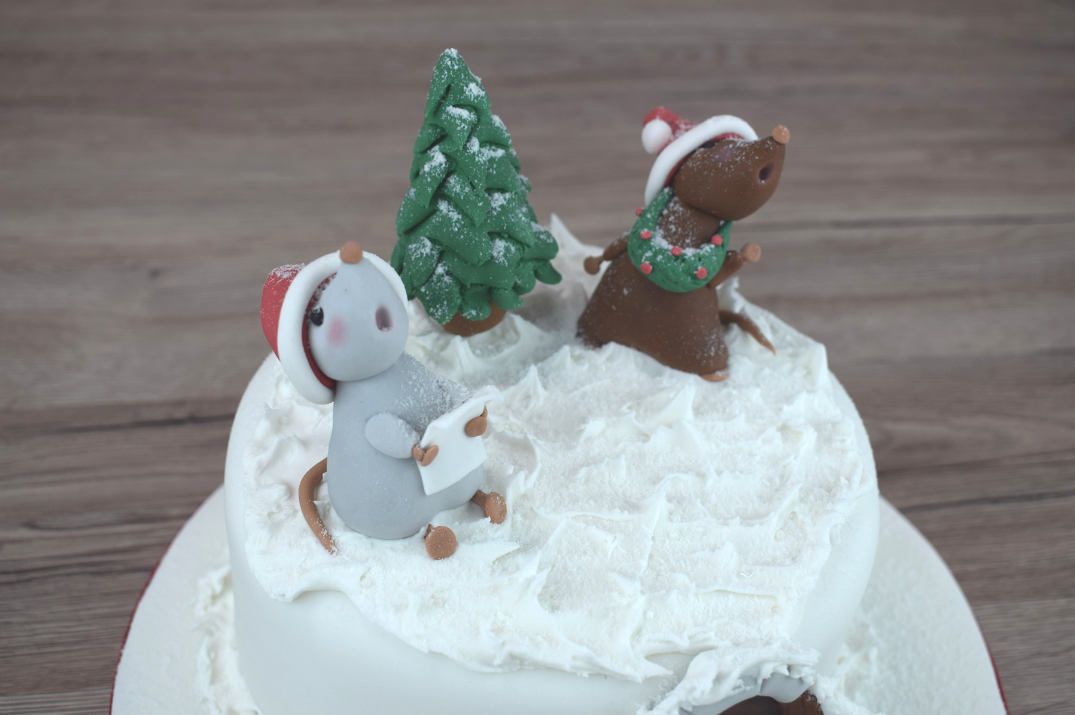
Singing Christmas Mouse Cake
Our Christmas Mice are out for the festive season and you can make them too if you follow our easy to follow steps.
You can place them on top of any cake you like; we decided to use a snow scene sponge but feel free to top your fruit cake with these adorable Christmas Mice.
Uploaded by Kayleigh McDonough
Skill Level
Easy
Decorating ingredients
- 250 g Renshaw Cool Grey Ready to Roll Icing
- 250 g Dark Brown Ready to Roll Icing
- 250 g Renshaw White Flower and Modelling Paste
- 250 g Renshaw Carnation Red Flower and Modelling Paste
- Rainbow Dust Tylo Powder
- Rainbow Dust Rose Powder Colour
- Rainbow Dust Black Edible Pen
Renshaw products used

Email this recipe
Instructions
PREPARE YOUR EQUIPMENT:
Step 1
You will need: Small edible black dragees, Scissors, Small rolling pin, Water brush, Small dry brush for dusting, Icing sugar, Sharp knife, Cooled boiled water, Kitchen paper, Dried spaghetti
Preparation:
Step 2
Start by mixing half a level teaspoon of Tylo Powder into 250g of Cool Grey Ready to Roll Icing. Leave to firm for at least an hour, then knead well before use. Then mix together 5g of Dark Brown Icing with 5g of White Flower and Modelling Paste to make a pale brown shade.
Creating the mouse:
Step 3
Shape a smooth 30g ball of Cool Grey Icing into a cone for the body. Roll your little finger back and forth on the bottom end of the cone to create an indent for the legs. Then, for the arms, take 1g of Cool Grey Icing and cut in half for two even sized balls. Shape these into long cones and flatten, attach the thicker end of the cone to the sides of the body with water.
Step 4
Take 1g of pale brown and cut in half for two even sized balls, attach onto the bottom of the body with water, flattening them to make feet. Push a stick of dried spaghetti down into the body, leave 1” of spaghetti sticking out of the top of the body to support the head and the hat.

Step 5
To make the head, shape a smooth 10g ball of Cool Grey Icing into a cone, push up the tip of the cone to make an upturned nose. Then push the end of the water brush underneath the nose and pull down to create an open mouth. Take two black dragees and push them into either side of the face for the eyes. Then for the nose, take a pinch of pale brown and attach it to the tip of the cone with a little water.

Creating the hat:
Step 6
Shape a 10g smooth ball of Carnation Red Flower and Modelling Paste into a long, pointed cone and turn the point of the cone over. Next, flatten and pinch all the way around the base of the hat with your thumb and forefinger to create an indent in which the mouse’s head will fit.

Step 7
For the trim of the hat, shape 2g of White Flower and Modelling Paste into a sausage 9cm long. Flatten slightly and attach around the base of the hat with a little water trimming off any excess. Take another 1g ball of White Flower and Modelling paste and attach it to the tip of the hat with water. Attach to the head with water.

Step 8
Brush the spaghetti and the top of the body with a little water and push the head and hat onto the spaghetti to attach the head to the body.
Creating the HYMN SHEET:
Step 9
For the hymn sheet, on a clean dry surface, knead and pin out 5g of White Flower and Modelling Paste. Using a sharp knife, cut a 2x3cm rectangle for the hymn sheet. Bend over the top half of the hymn sheet and attach the bottom half onto the front of the mouse with water. Once the hymn sheet has dried sufficiently, draw wavy lines using the Black Edible Pen to resemble lyrics.

Step 10
Next, take 1g of pale brown and cut in half for two even sized balls. Attach to the hymn sheet and the arms with water. Shape 2g of pale brown into a 5cm long, thin sausage tapered at one end for the tail. Attach onto the back of the mouse and bend around to the front.

fINISHING TOUCHES:
Step 11
Finally, dab a dry paintbrush into the Rose Powder Colour and tap off the excess onto a piece of kitchen paper. Lightly dust the cheeks and inside the mouth of the mouse to finish.