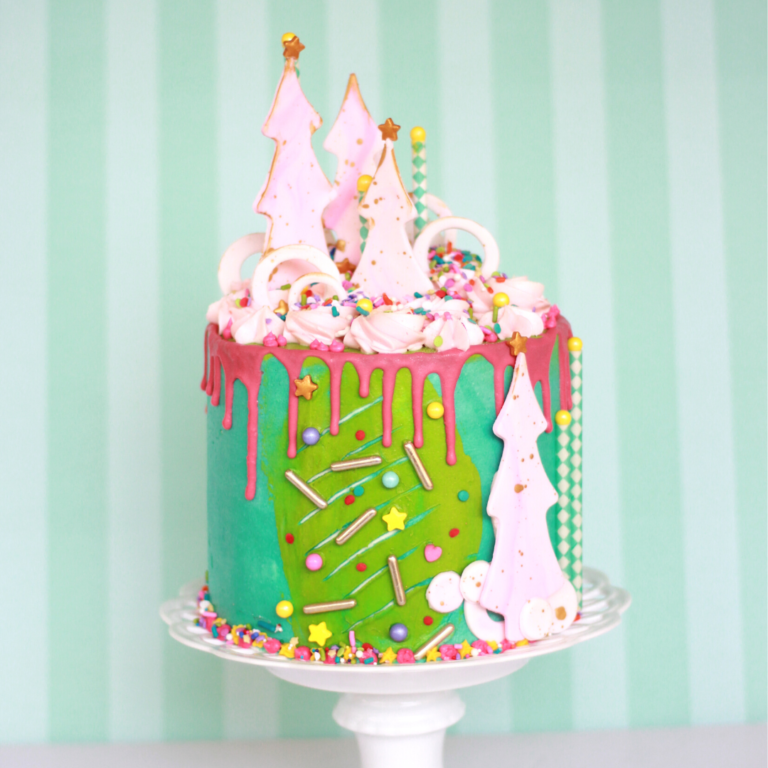

Neon Buttercream Christmas Cake by Reva Alexander-Hawk
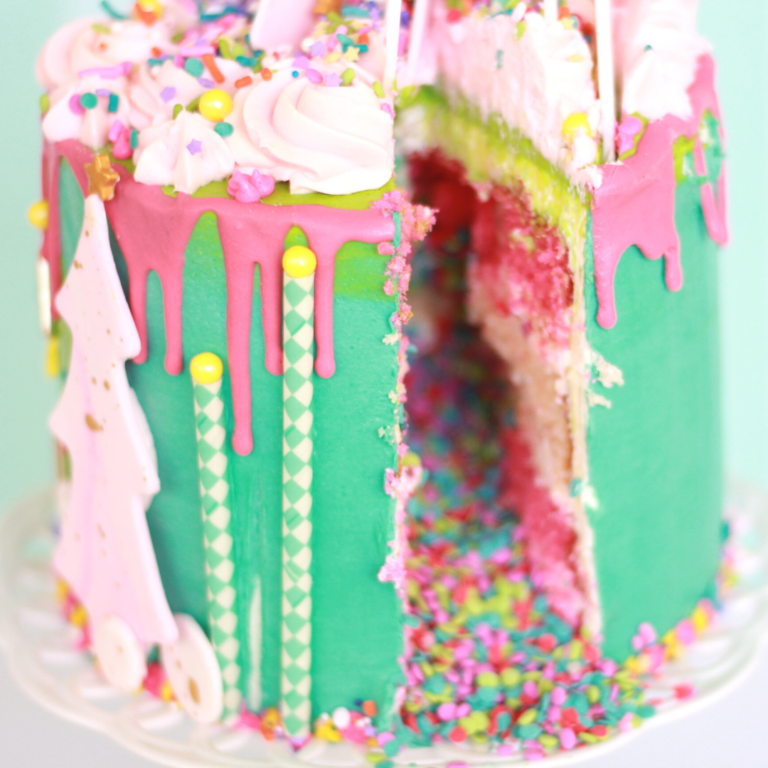
This bright and bold Christmas cake was created by Reva Alexander-Hawk of Merci Beaucoup Cakes. Challenge the norm this Christmas and brighten up your festive bakes with colours like Pink and Turquoise.
Uploaded by Kayleigh McDonough
Decorating ingredients
- Renshaw White Gum Paste (Americas) or Renshaw White Flower & Modelling Paste
- Rainbow Dust Metallic Gold Paint
- Rainbow Dust Green ProGel
- Rainbow Dust Yellow ProGel
- Rainbow Dust Pink ProGel
- Rainbow Dust Turquoise ProGel
- Selection of sprinkles
- Buttercream
Email this recipe
Instructions
Step 1
Prepare your equipment: 4 bowls, 2 offset spatulas, sharp knife, rolling pin, scraper, paintbrushes, Christmas tree cutter, circle cutter, cake board, decorative cake stand, turntable, decorative straws, piping bags, variety of piping tips, Dresden tool.

Step 2
Separate your buttercream into four bowls, and add ProGel colour to each. You can add more gel colours if you wish, depending on how vibrant you want the colour to be. Using extra Yellow Pro Gel with Green can give the colour an extra pop!

Step 3
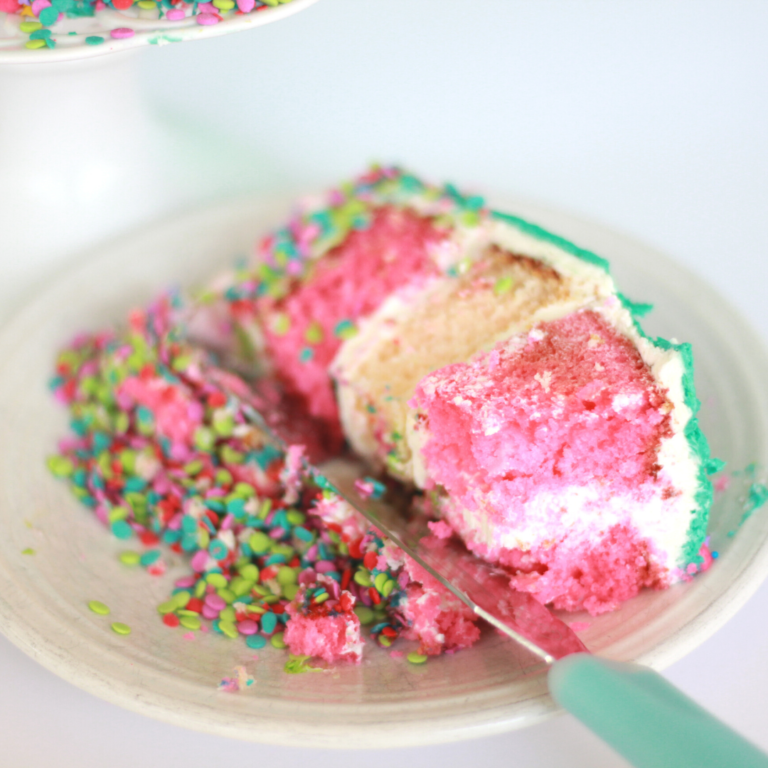
Place your cake on a cake board. Use a spatula to work your turquoise buttercream up the sides of the cake. Using a turntable will make it easier to decorate. Use a scraper (ideally taller than the cake) to scrape off the excess icing and smooth the buttercream.
Step 4
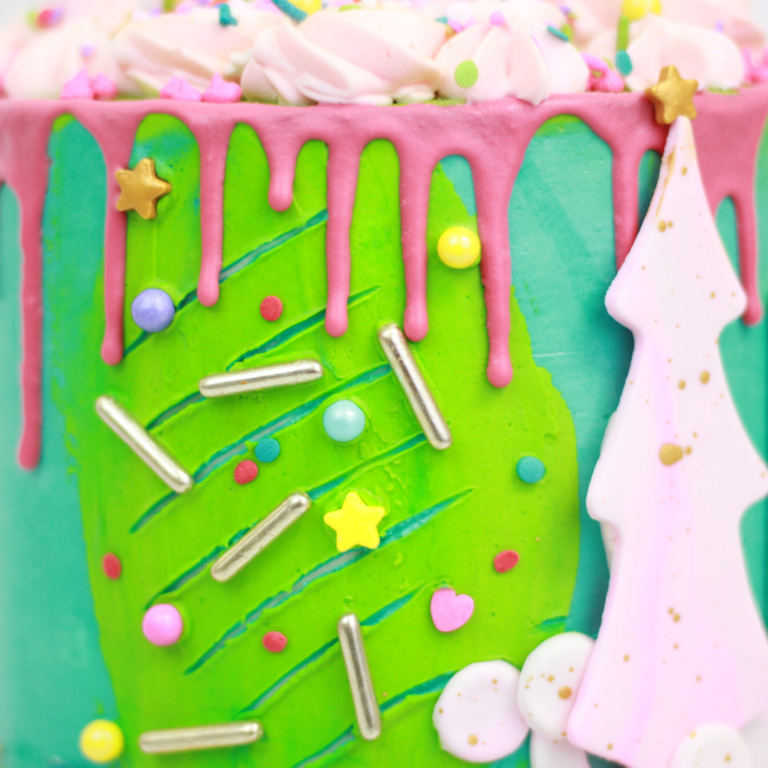
Use a spatula to spread green buttercream on the top of your cake, then use your scraper to neaten the top and edges. It's ok if the colours blur together as the edges will be covered with a drip effect.
Step 5
Add a splash of colour to the front of your cake using the green buttercream, and spreading this on with a spatula. Reveal the turquoise colour underneath by marking in lines with a Dresden tool. Attach a variety of sprinkles to the green buttercream. Sprinkle placement is everything!
Step 6
Knead your White Gumpaste or Flower & Modelling Paste and add a little Pink ProGel, kneading until it is just marbled. Dust your work surface with icing sugar and roll out the paste. Cut out some Christmas trees, circles and triangles and leave these to set.

Step 7
Dip a paintbrush in Metallic Gold Paint and pull back the bristles to create splashes across your trees and other shapes.
Step 8
Reva has used a water ganache for the drip around her cake, and added Pink and Red ProGel to achieve the colour. Alternatively, you could use Renshaw Royal Icing.
Step 9
Pipe buttercream rosettes on the top of your cake which will hold your decorations in place. Cover this with edible confetti and sprinkles. Place your Gumpaste decorations and some colourful paper straws into the buttercream rosettes and around the edges of the cake.
Step 10
Carefully transfer your cake to a decorative stand or another decorated cake board.
Step 11
Pipe a border around the bottom of the cake using different shaped nozzles and your pink and yellow buttercream.