How To: Make Hand Modelled Flowers
Wednesday 26th March 2014
Developing your sugar craft skill is always a joy, and progressing from cutters and moulds to hand formed models is the true marker of having mastered fondant icing. Sugar paste flowers form a key part of any keen cake decorators arsenal, and having taken you through all you need to know about creating flowers from cutters and beautiful blooms out of moulds, we’ve detailed below all the steps shared in our live hand modelled flower Q&A which took place Thursday 27 March on Twitter.
Such a delicate creation may appear intimidating at first glance, but they’re really not that tricky to turn out. With a few hints and tips from our very own Nic Hemming, you’ll soon be turning out immaculate hand-modelled flowers in no time.
All you need is your chosen colour of ready to roll icing, some flower and modelling paste, a sugar craft rolling pin and a ball tool, and you’re good to go!
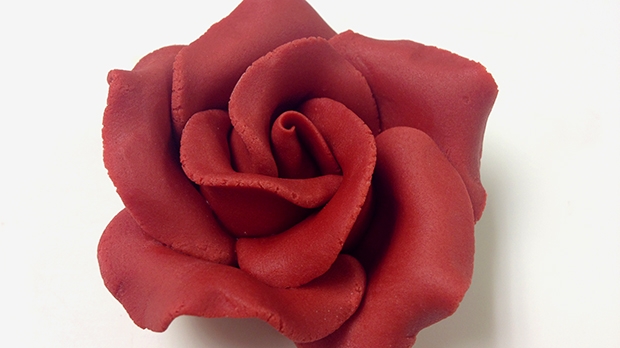
Hand Modelled Flowers
1. Knead the Ready to Roll Icing or Flower & Modelling Paste until soft and pliable on a clean dry work surface lightly dusted with icing sugar.
Mix your icing with flower and modelling paste or add gum tragacanth or CMC before rolling to help the icing set firm once rolled out, cut and shaped.


2. Roll a piece of icing into a ball about approximately 2cm in diameter, then roll the ball of icing between the palms of your hands, adding extra pressure on one side of the ball to make a cone shape which will form the centre of your rose.


3. To make the petals, roll a large ball of icing out into a sausage shape approximately 1cm in diameter, and cut a 1cm wide chunk of icing from the end.


4. Roll the piece of icing into a ball and then flatten with your thumb or finger, thinning one side with a ball tool and leaving the other side thicker. You will need to make sixteen petals in total.
Use a plastic wallet to thin your petals between, to avoid finger print marks on your finished flowers.


5. Wrap the first petal around the cone to cover the top of the cone and to form the start of the bud, sticking to the cone shape with cooled boiled water.


6. Press three more petals around the base of the bud. Gently curl the edges of the petals, and position each one overlapping the other round the first petal, sticking to the other petals with cooled boiled water.


7. Take five more petals. Using a little water stick petals under first row of petals, again curling the edges and positioning lower than the previous row of petals.


8. Continue the process with a further seven petals for a large open flower.

9. Trim off excess cone at the bottom of the flower and leave to set for a few hours.
Use coloured powders, lustre dusts or edible glitter to decorate, applying to the modelled flowers with a dry brush and leave to dry.

10. Place on your cake or cupcake, sticking down with a little cooled boiled water if required.

Feeling inspired to try your first flower cake? How about something simple like this beautiful in blooms flower cake, or being a little more adventurous with our vintage flower cake?