How To: Haunted House Roof
Thursday 16th October 2014
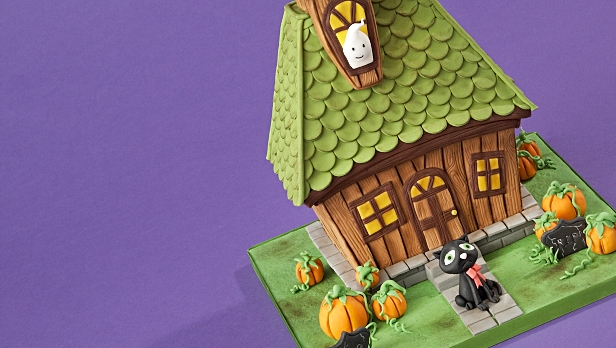
If you want to create something really impressive this Halloween, or have a similar project in mind, we’ve broken down the steps to creating the roof to our Haunted House so that you can try yourself.
You will need:
- 1kg Renshaw White Ready to Roll Icing
- 2x 250g Renshaw Grass Green Flower and Modelling Paste
How to make:
- Using Renshaw White Ready to Roll Icing to cover the cake/roof as normal. This provides a base for the tiles and seals the cake.
- Using Renshaw Grass Green Flower and Modelling paste, roll to a 2/3mm thickness.
- Take a circle cutter, roughly 1cm in diameter and cut out many circles. (Cut out in small batches to prevent drying out)
- Using cooled boiled water, paint a line of water at the base of the roof on the front section. (Do not use too much water)
- Take a pre-cut circle and stick at the base of the roof, making sure it over hangs the cake slightly (2mm).
- Repeat the above process, moving along the bottom edge of the front section of the roof.
- Once you get to the other side, if the circle over laps, take a pair of scissors and trim in line with the join. Don’t worry about the edge, this will be covered later.
- With the first row of tiles in place, wet another line above the tiles. Again making sure not to use too much water.
- Now take a circle and offset the tile so it overlaps 2 tiles underneath. To create a ‘brick effect’.
- Repeat this along the width of the roof. Trimming the tiles to fit at the joins. Now you should see the roof pattern forming.
- Repeat the Process again, the whole way up the roof, making sure you overlap and offset the tiles.
- When you get to the top of the roof. You need to cut the circles in half and apply one final line overlapping the row below. This gives you a neat finish to the top of the roof.
- Now you need to repeat this process for the other 3 sides of the roof and the top of the roof
- Now all the sides are covered with tiles, roll a long thin sausage shape using Renshaw Leaf Green Flower and Modelling Paste. The sausage should be 4/5 mm thick and long enough to go down the height of the roof.
- Take your wet paint brush and wet a line down one of the joins of the roof. Then take the green sausage and run it from top to bottom. Making sure you cover the join. Use scissors to cut the end.
- Repeat for the other 3 joins, apply a sausage around the very top of the roof to seal the joins and give professional finish.
- Leave the roof tiles to set over night; you can then use an edible colour dust to add a bit of depth and shading to the roof.
