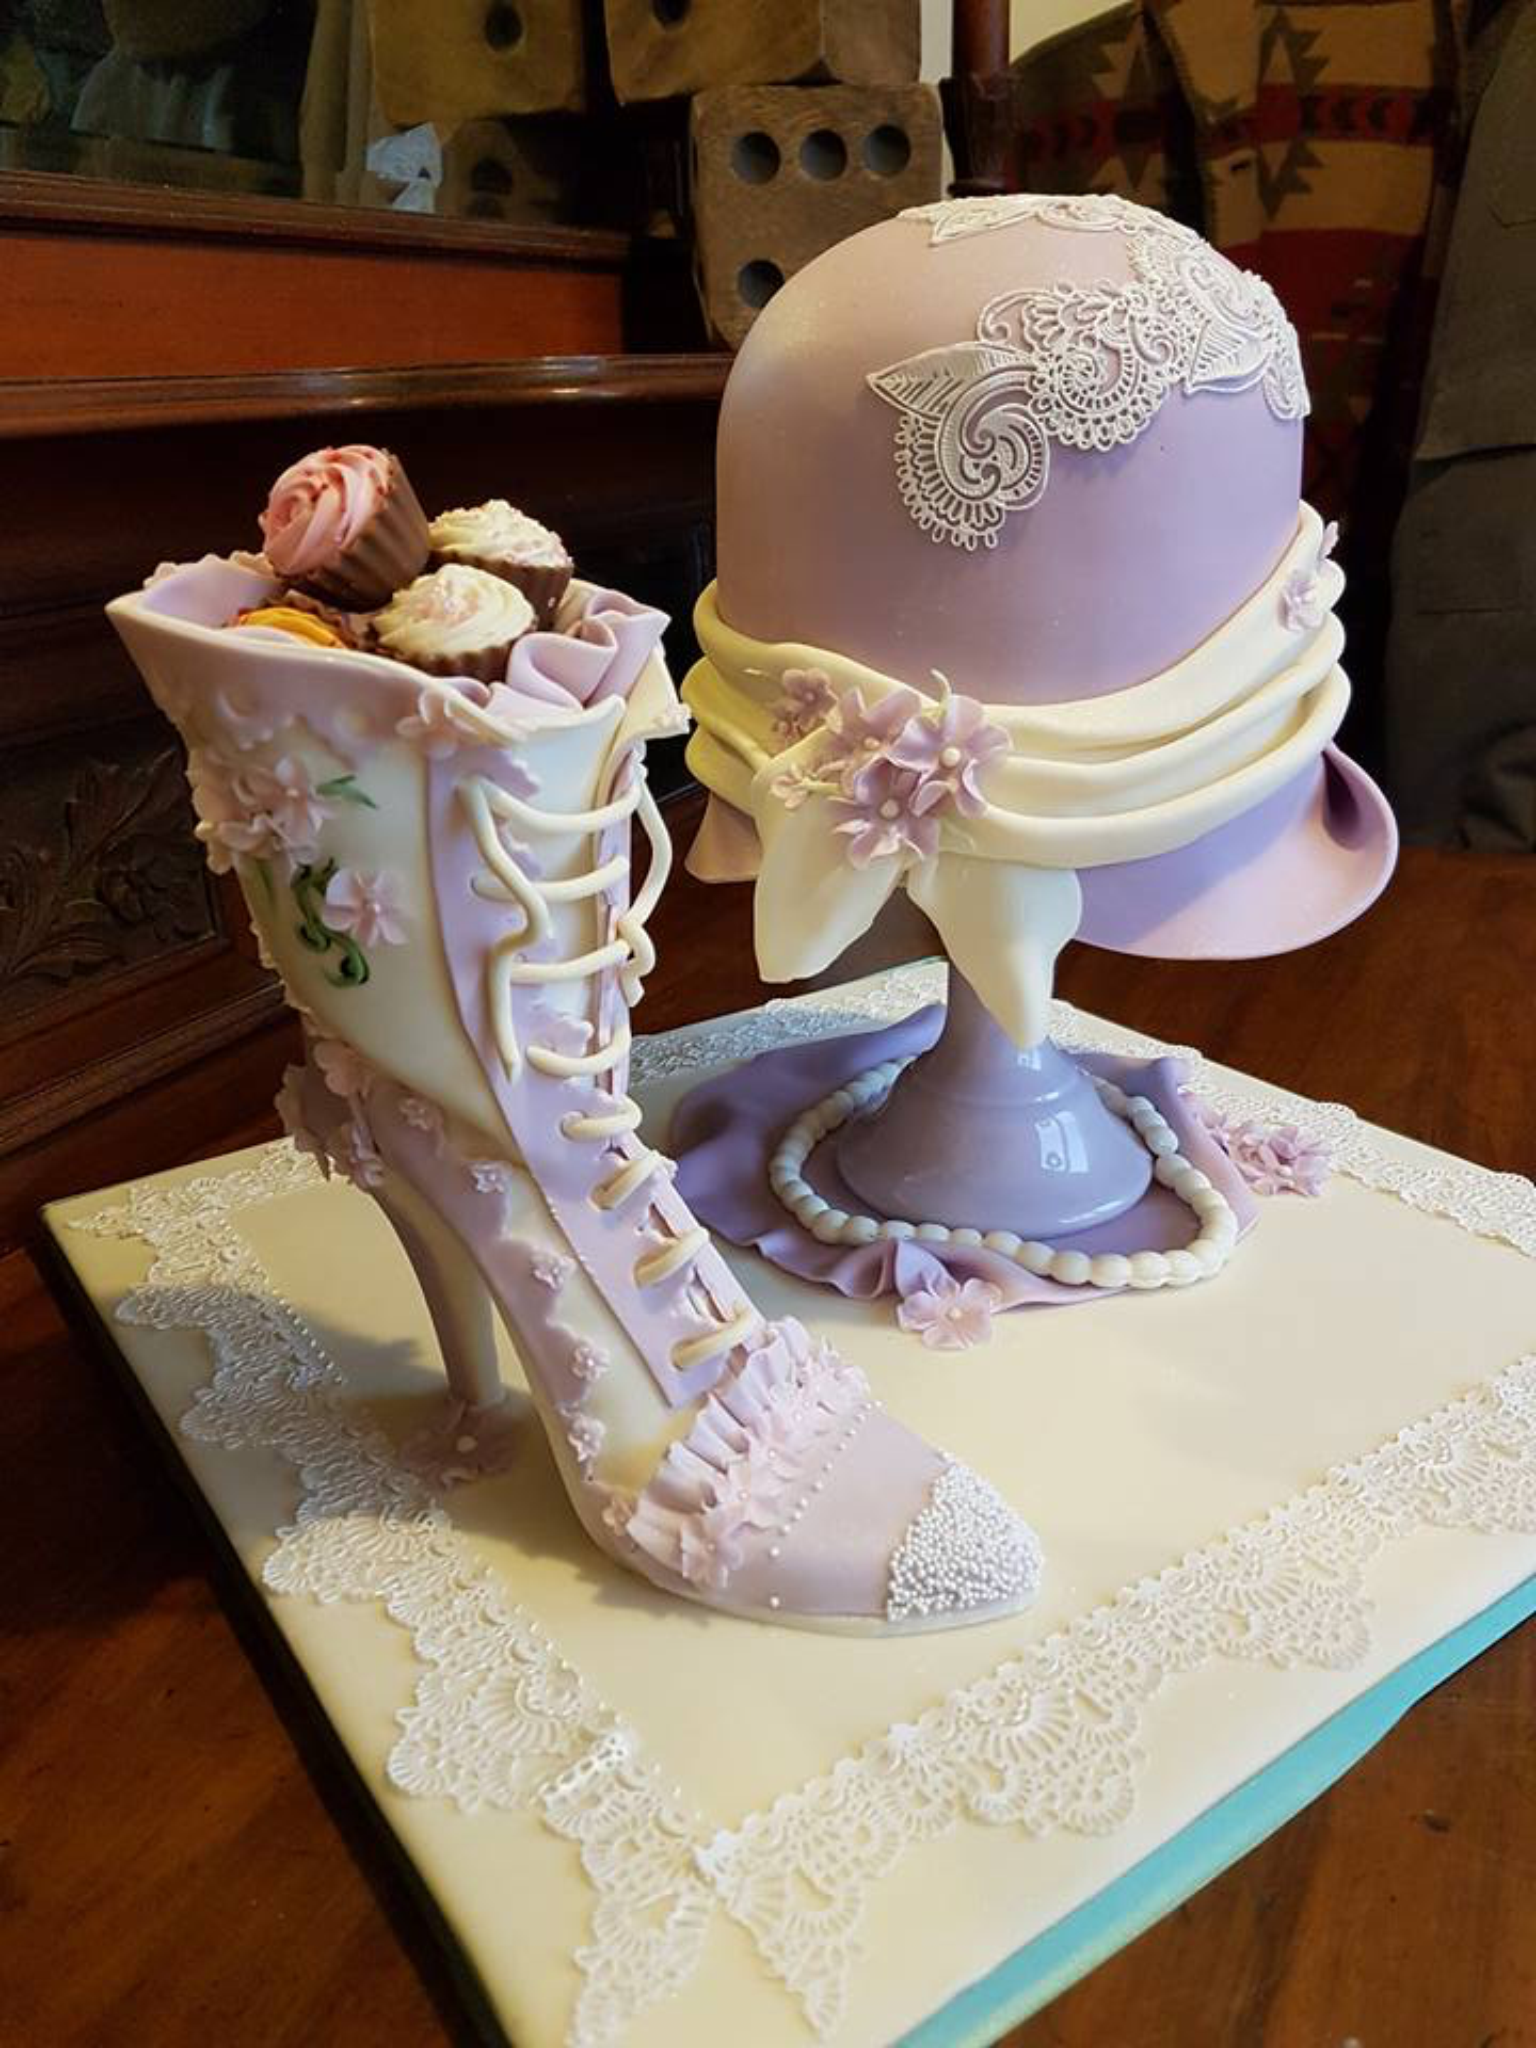
Vintage Cloche Hat and Boot Cake
This tutorial was submitted during the Renshaw ‘Battle of the Bakes’ competition.
A Madeira cake with vanilla buttercream and raspberry jam.
By Debbie Mole
Uploaded by DEBBIE MOLE
Time to make
Skill Level
Easy
Serves
12 people
Decorating ingredients
- Renshaw Extra (if adding colour)
- Renshaw Dusky Lavender Ready to Roll Icing (if using pre-coloured)
- Renshaw Flower and Modelling Paste
- Renshaw White Ready to Roll Icing (for the scarf)
- Renshaw White Royal Icing
Renshaw products used

Email this recipe
Instructions
Preparing the cakes:
Step 1
A Madeira cake recipe was used for the hat. Prepare one 6-inch cake, cut into 3 and fill with vanilla buttercream and raspberry jam. Prepare another 6-inch half sphere cake, cut into 2 and fill with buttercream and raspberry jam.
Step 2
The half sphere cake was placed on top of the 6-inch cake. It was then ganached with milk chocolate ganache.
Decorating the hat:
Step 3
Fondant was coloured light purple and the cake was covered in one piece. Renshaw Tip: There is a ready-made Dusky Lavender colour available if you don't wish to colour your own fondant. Knead your icing on a clean, dry surface until smooth and pliable before rolling out over a light dusting of icing sugar.
Step 4
The cake was placed on a purple stand and stuck down with royal icing.
Step 5
The front lip of the cake was cut out freehand and glued into place with edible glue and held by myself until it was stable enough to be supported with rolled paper towels.
Step 6
The back was also cut freehand and glued on with edible glue and also held until I could place a wedge of paper towels to support.
Step 7
I made edible lace pieces and used these on the front. The scarf was fondant which I put folds into using a cake dowel. This was then glued around the hat and decorated with a few fondant flowers.
Decorating the boot:
Step 8
The boot was made from flower paste and not edible. I used my shoe former for the sole and my heel former. The rest of the boot was just done freehand and took a few tries to get the shape I was looking for, then decorated with sugarpaste flowers and laces etc.