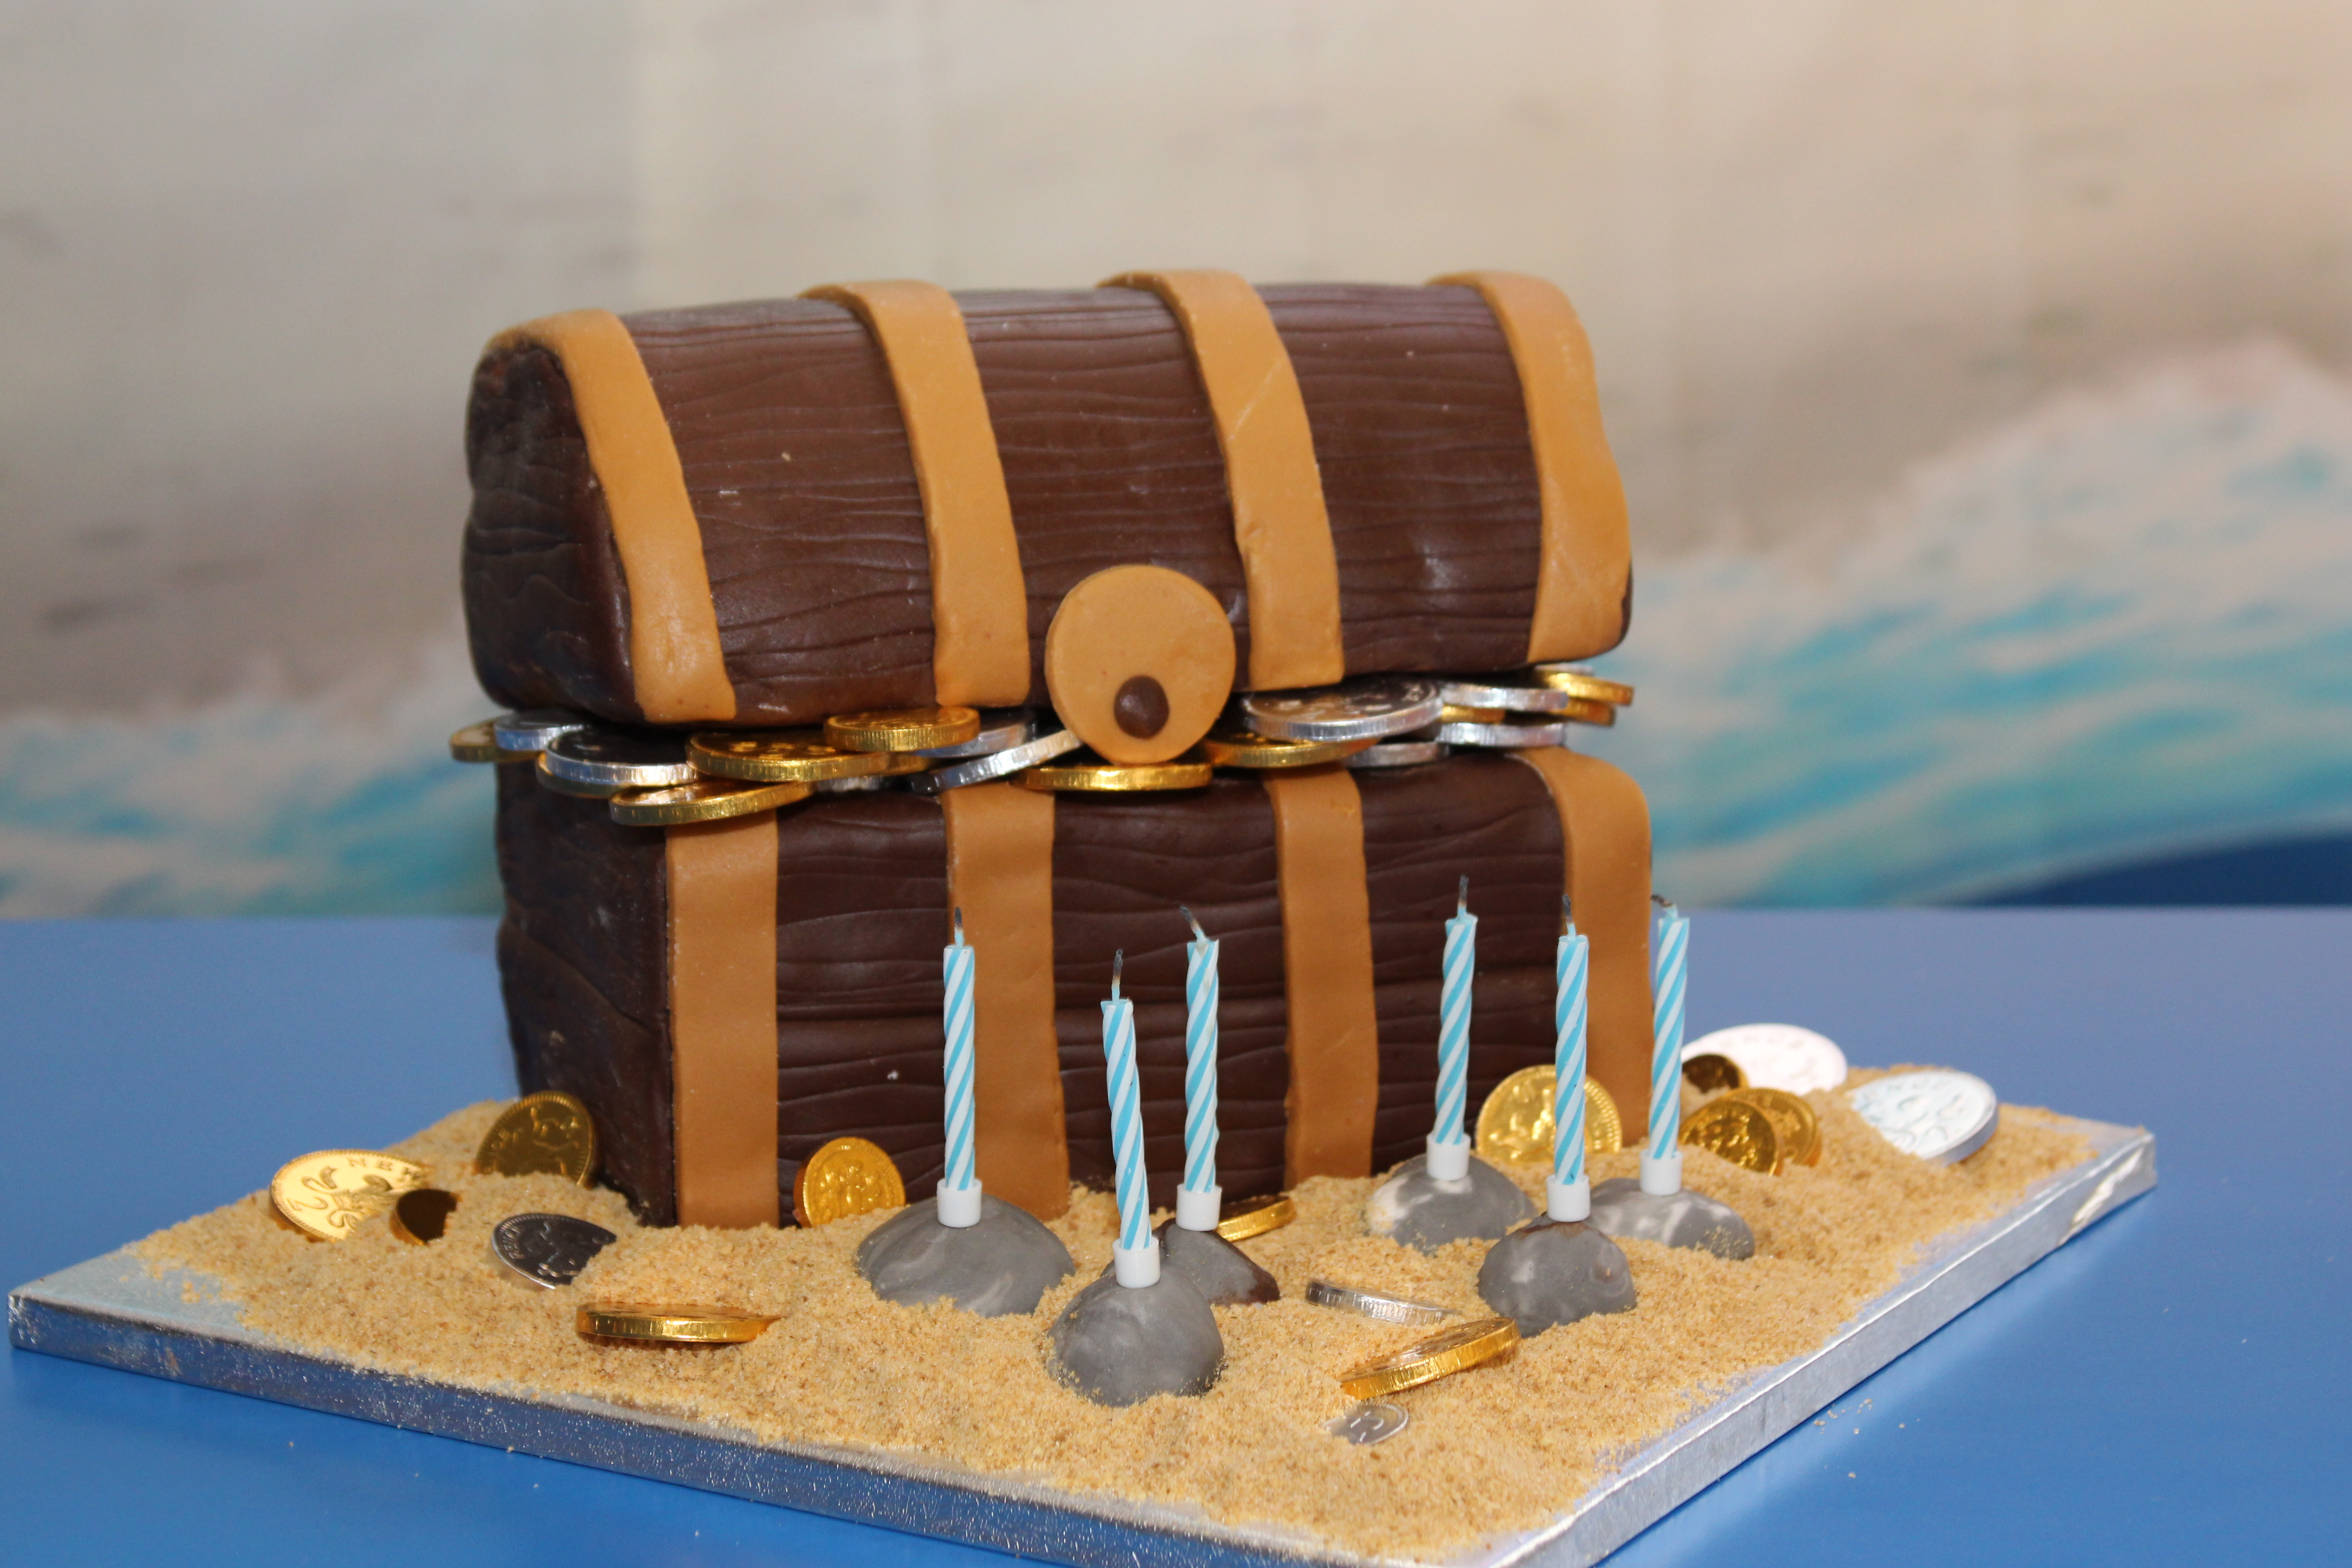
Treasure Chest Birthday Cake
How to make and decorate a treasure chest birthday cake with chocolate flavour fondant icing. This would be great for a children’s birthday party.
Recipe by Paul Elliott
Uploaded by Paul Elliott
Time to make
Skill Level
Intermediate
Serves
20 people
Baking ingredients
- 4 chocolate sponge mix
Decorating ingredients
- 1 set of butter icing
- 750 g Renshaw Chocolate Flavour Ready To Roll Icing (dark brown)
- 250 g Renshaw Teddy Bear Brown Ready to Roll Icing
- 2 packets of chocolate gold coins
- 8 digestive biscuits
- 3 tbsp golden caster sugar
- 2 tbsp caster sugar
- 1 tbsp dark brown or muscovado sugar
- 250 g Renshaw Grey Ready to Roll Icing (or leftovers from previous bake)
- 250 g Renshaw White Ready to Roll Icing (or leftovers from previous bake)


Instructions
Main cake assemply:
Step 1
Bake 4 sponge cakes (I chose chocolate - but any flavour will work) in square brownie tins. 2 will make the main body and 2 will make the lid. Once baked, take all 4 slabs and trim off a couple of cm's on one side to make rectangular slabs.
Step 2
Take 2 of the slabs and stack on top of each other, placing a layer of butter cream between them to stick together.
Step 3
To make the lid, stick the remaining 2 layers together with a layer of buttercream.
Step 4
Place the set for the lid on a small and thin cake board, which is just smaller than the cake. This board is to take the weight of the lid so it doesn't collapse. Out of a piece of paper cut two semi-circles, pin these to each end of the lid using cocktail sticks. Using a long knife, cut the top along the edges of the semi-circle to get the domed shape lid. Once you have cut to shape, remove the paper templates and the cocktail sticks.
Step 5
In the cake that will form the base, hollow out a small amount of cake along the front, this will allow you to load up on chocolate coins etc in the finished cake.
The Icing:
Step 6
Cover the base in a very thin buttercream icing (as glue) and then roll out the dark brown icing in a long thin strip. Wrap this around the cake base. Wrap the loose edges on the top inwards so you don't get an edge.
Step 7
Repeat this for the lid of the chest For this you will probably want to do this in 3 parts, one each for the sides and then one for the curved top.
Step 8
Gently use a pizza cutter to create a solid line in the sides and top of the chest, this creates the lines for the solid planks. Then use a cocktail stick to gently mark the lines in wood, make them wavy and not uniform for a more realistic look.
Step 9
For the detailing, roll out the light brown icing and cut into strips. Apply this to the cake with a little water to allow it to stick.
Assembly:
Step 10
Get the gold coins and fill in the top of the chest, then lift the lid of the chest onto the base. The coins will act as the supports keeping the lid open. Now the lid is on, you can tuck a few more coins in to make it look more stuffed and overflowing.
The sand:
Step 11
Take the digestives and the sugar and blend in a food processor until the right consistency is obtained...now spread this around the cake.
Stones:
Step 12
For added effect add some stones, these equally act as a handy place to place candles. To make these marble some grey and white ready to roll icing and break into balls and shape into stone/pebble shapes.
Step 13
Add these stones in front of the cake in the sand and add a few gold coins into the sand for good measure.