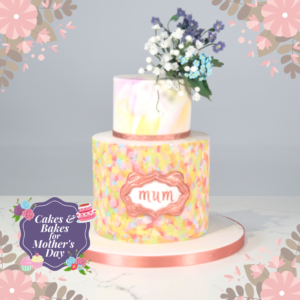
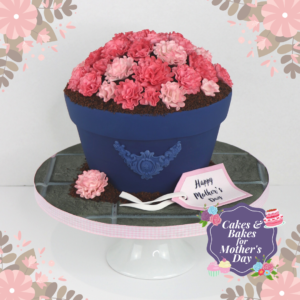
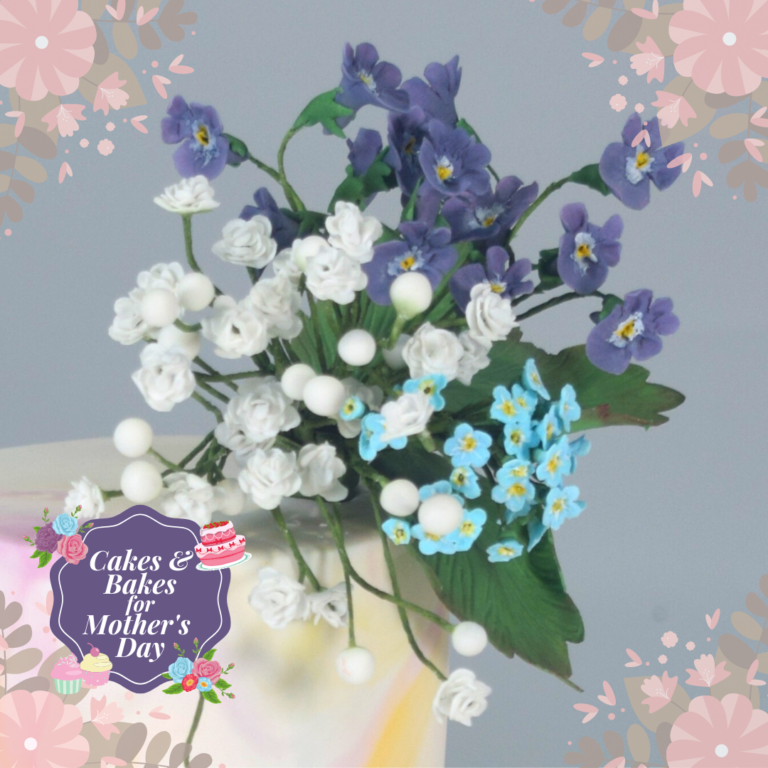
I Accept

We use cookies to ensure you get the best experience on our website. By continuing to browse the site you accept the use of cookies as outlined in our Privacy Policy.

You are here: Recipes > Sugarpaste Flowers

Sugarpaste Flowers

Following on from yesterday’s tutorial, find out how to make these delicate, undeniably stunning flowers using a range of Renshaw and Rainbow Dust products. With step-by-step tutorials for three beautiful flowers why wouldn’t you want to have a go and create a beautiful bloom?

Uploaded by

Decorating ingredients

  • 1 kg Renshaw Flower and Modelling Paste
  • Rainbow Dust Powder Colours
  • Rainbow Dust ProGels
  • Rainbow Dust Edible Glue

Instructions

Forget Me Not Flowers:

Step 1

You will need: 250g Renshaw Flower and Modelling Paste White, Rainbow Dust ProGels Sky Blue, Holly Green, Leaf Green, Rainbow Dust Powder Colour Sunset Yellow, Snow Drift, Baby Blue, Periwinkle Blue, Moss Green, Rainbow Dust Edible Glue, Cocktail stick, Cel stick modelling tool, Leaf veining board, 9mm blossom cutter, Cornflour, Vegetable shortening, Fine paintbrushes, Dusting brush, Kitchen paper, Foam pad, Glue brush, Cocoa Butter, Ceramic/glass side plate, Ceramic/ glass bowl, Florist tape 26m x 13mm dark green, Long nose sugarcraft pliers, Wire cutters, 26 gauge wires

Step 2

Colour 100g Flower and Modelling Paste with Sky Blue ProGel to make a pale blue. Cut the wires into thirds and make a small hook at the end of each wire with the pliers.

Step 3

Form a very small pea sized ball, place it over one of the grooves for making Mexican hat style flowers. Pin out very thinly using the cel stick. Dust the groove with cornflour or grease with a little vegetable shortening if the paste sticks.

Step 4

Turn the paste over and place the blossom cutter over the lump, making sure itโ€™s in the centre of the cutter. Cut out and place the blossom on the foam pad, thin the petals with a cocktail stick. ๐ŸŒŸ Academy Advice: If your hands are warm and the paste is becoming sticky, lightly dust your fingers with cornflour.

Step 5

Brush the hooked end of the wire with a little Edible Glue, then push the other end through the centre of the flower. Pinch the bottom of the flower and gently drag the excess paste downwards to secure onto the wire. Leave for 24 hours to dry completely.

Step 6

Mix Baby Blue and Periwinkle Blue Powder Colour and brush liberally all over the flower.

Step 7

For the calyx, colour 100g Flower and Modelling Paste with Holly Green and Leaf Green ProGel to make a pale green. Form a very small pea sized ball and roll it at one end to make a cone. Open the cone and thin out the edges with a cocktail stick as with the violet. Take the small scissors and cut out five โ€œVโ€ shapes. Thin again with the cocktail stick then brush the inside with a little Edible Glue. Slide the calyx up the wire and attach it to the back of the violet, leave to set then dust with Moss Green Powder Colour.

Step 8

Fill a ceramic bowl with boiling water and set a side plate on top. Place 1tsp cocoa butter into the centre of the plate and a small amount of Sunset Yellow and Snow Drift Powder Colour around the sides of the plate. Once melted, mix the Powder Colours with the cocoa butter to make a paint. ๐ŸŒŸ Academy Advice: Mix a little Snow Drift into the Sunset Yellow Powder Colour when painting with cocoa butter to make the colour more opaque.

Step 9

Paint inside the throat of the flower first with Snow Drift and the centre with a dot of Sunset Yellow for the stamen.

Step 10

Cut a length of florist tape and trim in half. Pull the tape gently to release the adhesive, tape the wire then shape to a slight curve. Tape the violets together in groups of odd numbers at differing heights. The Large Rose Leaf tutorial can be followed for Violet leaves, attach these towards the bottom of the stem.

Gypsophila:

Step 11

You will need: 250g Renshaw Flower and Modelling Paste White, Rainbow Dust Powder Colour Moss Green, Rainbow Dust Edible Glue, Cocktail stick, Cornflour, Small rolling pin, Work board, 9mm blossom cutter, 12mm blossom cutter, Fine paintbrush, Dusting brush, Kitchen paper, Foam pad, Glue brush, Florist tape 26m x 13mm dark green, Long nose sugarcraft pliers, Wire cutters, 26 gauge wires

Step 12

Cut the wires into thirds and make a small hook at the end of each wire with the pliers. Roll out a small amount of Flower and Modelling Paste until paper thin and cut out a 9mm blossom. Place the blossom onto a foam pad and frill the edges with a cocktail stick. Brush the centre with Edible Glue and feed the wire through. Close the blossom over the hook of the wire to create the centre, leave to set.

Step 13

Cut out another blossom shape of the same size, frill and apply glue in the same way then feed through the wire, positioning behind the first blossom. Repeat until you have 4 layers of this size. Then cut out a 12mm blossom, frill and attach with glue for the final layer. ๐ŸŒŸ Academy Advice: Bend and shape the wires to give the flowers a more natural appearance.

Step 14

To make the buds, cut the wires into thirds as before but do not make a hook. Make very small pea sized balls, brush the ends of the wires with glue and insert them into the buds. Pinch lightly at the base to secure and leave to dry.

Step 15

Dust the bases of the flowers and buds with Moss Green Powder Colour to create the calyx. Cut a length of florist tape and trim in half. Pull the tape gently to release the adhesive and tape the wires.

Step 16

Tape the flowers and buds together in groups of three, then tape together three groups of three. You will need a lot of these for a realistic look.

Large Rose Leaf:

Step 17

You will need: 250g Renshaw Flower and Modelling Paste White, Rainbow Dust ProGel Holly Green, Leaf Green, Rainbow Dust Powder Colour Claret, Moss Green, Rainbow Dust Edible Glue, Small rolling pin, Leaf veining board, FMM Creative Leaf Set large rose leaf cutter, FMM Veining Mat Set 2 (5-8) leaf veiner, Ball tool, Cornflour, Vegetable shortening, Fine paintbrushes, Dusting brush, Kitchen paper, Foam pad, Glue brush, Florist tape 26m x 13mm dark green, Long nose sugarcraft pliers, Wire cutters, 26 gauge wires

Step 18

Colour 100g Flower and Modelling Paste with a small amount of Holly Green and Leaf Green ProGel to make a pale green. Cut the wires into thirds.

Step 19

Form a small ball and roll it into a sausage, place it over one of the leaf veining grooves and pin out thinly. Dust the groove with cornflour or grease with a little vegetable shortening if the paste sticks.

Step 20

Turn the paste over and place the leaf cutter over the vein, making sure itโ€™s in the centre of the cutter. Cut out and place the leaf on the foam pad, brush the end of the wire with Edible Glue and carefully insert into the vein until itโ€™s a third of the way up the leaf. Turn the leaf over and thin the edges with a ball tool. Press the veiner onto the leaf to texture.

Step 21

Curl the edges and leave to set for 24 hours. Dust the leaf all over with Moss Green Powder Colour then dust the edges with Claret.

Step 22

Cut a length of florist tape and trim in half. Pull the tape gently to release the adhesive and tape up the wire. Tape the leaves together in odd numbers as they appear in nature. ๐ŸŒŸ Academy Advice: The large rose leaf can be used for various leaves such as elm, beech and violet leaves.

Violet Flowers:

Step 23

You will need: 250g Renshaw Flower and Modelling Paste White, Rainbow Dust ProGel Purple, Ice Blue, Holly Green, Leaf Green, Rainbow Dust Powder Colour Sunset Yellow, Snow Drift, Royal Blue, Aubergine, Moss Green, Rainbow Dust Edible Glue, Cel stick modelling tool, Cocktail stick, Small scissors, Cornflour, Fine paintbrushes, Dusting brush, Kitchen paper, Foam pad, Glue brush, Cocoa Butter, Ceramic/glass side plate, Ceramic/ glass bowl, Florist tape 26m x 13mm dark green, Long nose sugarcraft pliers, Wire cutters, 26 gauge wires

Step 24

Colour 100g Flower and Modelling Paste with Purple and Ice Blue ProGel to make a pale violet colour. Cut the wires into thirds and make a small hook at the end of each wire with the pliers.

Step 25

Form a small pea sized ball, roll it at one end to make a cone shape then flatten the base of the cone by running it over a smooth surface. Push a cel stick into the flattened end and gently roll it against the side of your finger or onto a foam pad to open it up. Make sure the paste isnโ€™t too thick. Your cone should now look like a flute shape.

Step 26

Take a small pair of scissors and make five incisions. Three close together, then one at either side of these. This will give you two small petals at the top of the flower, two slightly larger petals at the sides and one large petal at the bottom.

Step 27

Separate and thin out each petal between your finger and thumb while holding the tip of the cone. Place the flower on the foam pad and gently roll each petal with a cocktail stick. Trim off any harsh corners with the scissors.

Step 28

Brush the hooked end of the wire with a little edible glue, then push the other end through the centre of the flower angled upwards so it emerges above the point of the cone and behind the top two petals. Pinch to secure. Leave for 24 hours to dry completely.

Step 29

Mix Royal Blue, Aubergine and a little Snow Drift Powder Colour to make a violet dust. Brush liberally all over the flower.

Step 30

For the calyx, colour 100g Flower and Modelling Paste with Holly Green and Leaf Green ProGel to make a pale green. Form a very small pea sized ball and roll it at one end to make a cone. Open the cone and thin out the edges with a cocktail stick as with the violet. Take the small scissors and cut out five โ€œVโ€ shapes. Thin again with the cocktail stick then brush the inside with a little Edible Glue. Slide the calyx up the wire and attach it to the back of the violet, leave to set then dust with Moss Green Powder Colour.

Step 31

Fill a ceramic bowl with boiling water and set a side plate on top. Place 1tsp cocoa butter into the centre of the plate and a small amount of Sunset Yellow and Snow Drift Powder Colour around the sides of the plate. Once melted, mix the Powder Colours with the cocoa butter to make a paint.

Step 32

Paint inside the throat of the flower first with Snow Drift and the centre with a dot of Sunset Yellow for the stamen.

Step 33

Cut a length of florist tape and trim in half. Pull the tape gently to release the adhesive, tape the wire then shape to a slight curve. Tape the violets together in groups of odd numbers at differing heights. The Large Rose Leaf tutorial can be followed for Violet leaves, attach these towards the bottom of the stem.