Stained Glass Heart Biscuits
How to make stained glass biscuits for Valentine’s Day. Make heart shaped stained glass biscuits with edible glitter for your loved one using ready to roll fondant icing and royal icing.
Uploaded by Kayleigh McDonough
Baking ingredients
- 125 g butter or margarine
- 55 g caster sugar
- 180 g plain flour, sieved
Decorating ingredients
- 250 g Renshaw Fuchsia Pink Ready to Roll Icing
- 250 g Renshaw White Ready to Roll Icing
- 400 g Renshaw White Royal Icing
- Rainbow Dust Claret Pro Gel
- Rainbow Dust Edible Pink Hearts
- Rainbow Dust Edible Gold Hearts
- Clear hard boiled sweets
- Apricot jam, boiled and cooled
- Water, boiled and cooled
Renshaw products used

Email this recipe
Instructions
BAKING INSTRUCTIONS:
Step 1
Heat the oven to 190°C/375°F/gas mark 5.
Step 2
Cream together the butter and sugar until it's nice and smooth then gradually stir in the flour to form a smooth paste.
Step 3
Wrap the shortbread in cling film and leave to rest in the fridge for 30 minutes.
Step 4
Pin out the dough on a clean surface lightly dusted with flour. Cut out as many L, V and E alphabet shapes and large heart shapes as required using the cookie cutters.
Step 5
Place the shapes on a greased and lined baking tray. Cut out the centre of each heart with the smaller sized heart cookie cutter. These smaller heart shapes can also be placed on the baking tray to be baked for added decoration.
Step 6
Partially bake the biscuits in the oven for 15 minutes, take out the tray of biscuits and replace the centre of each of the hearts with a clear hard boiled sweet and a sprinkle of Rainbow Dust gold and pink edible hearts.
Step 7
Place the tray back in the oven and bake biscuits for a further 3 minutes until the biscuits are golden brown and the hard boiled sweets have melted and filled the heart centres.

Step 8
Remove from the oven and allow to cool on a wire rack. Do not touch the melted sweet centres before they have cooled and hardened completely. Clean utensils and work surface.
Step 9
Prepare the biscuits by brushing over the surface with a thin layer of apricot jam.
DECORATING THE BISCUITS:
Step 10
On a clean, dry surface knead the Fuchsia Pink and White icing separately until pliable.
Step 11
To create the colour gradation, knead together the Fuchsia Pink and White icing at different ratios to create four different shades of pink.
Step 12
Dust the work surface with icing sugar and pin out each colour of the icing in turns to prevent drying until 2-3mm thick.
Step 13
Decide which colour icing you would like to texture and using the texture mat, emboss the icing all over.

Step 14
Using the same L, V and E alphabet cutters and the large and small heart shaped cookie cutters used for the biscuit dough, cut out as many shapes as required. Carefully place the icing shapes on to the top of the corresponding biscuits and gently smooth down gently with the palm of your hand. The large heart shapes should frame the stained-glass centre.
Step 15
Before the icing hardens, gently imprint heart shapes on desired letter using the extra small sized heart plunger cutters. Using the same plunger cutters, cut out heart shapes of another shade of icing and stick onto the imprints using a little cooled boiled water.

Step 16
Royal Icing preparation: Prepare 5 piping bags each containing a no2 tube.
Step 17
Evenly split Royal Icing into 5 small bowls. Colour up 4 of the bowls of Royal Icing by mixing in differing amounts of Rainbow Dust Claret ProGel with a spoon to create 4 different shades of pink; these can either match with the icing colours or you can try different shades.
Step 18
Spoon the 4 pink coloured and 1 white coloured bowls of Royal Icing into the prepared piping bags.
Step 19
Using the colour of your choice, pipe small balls onto several of the letters, as seen in picture.

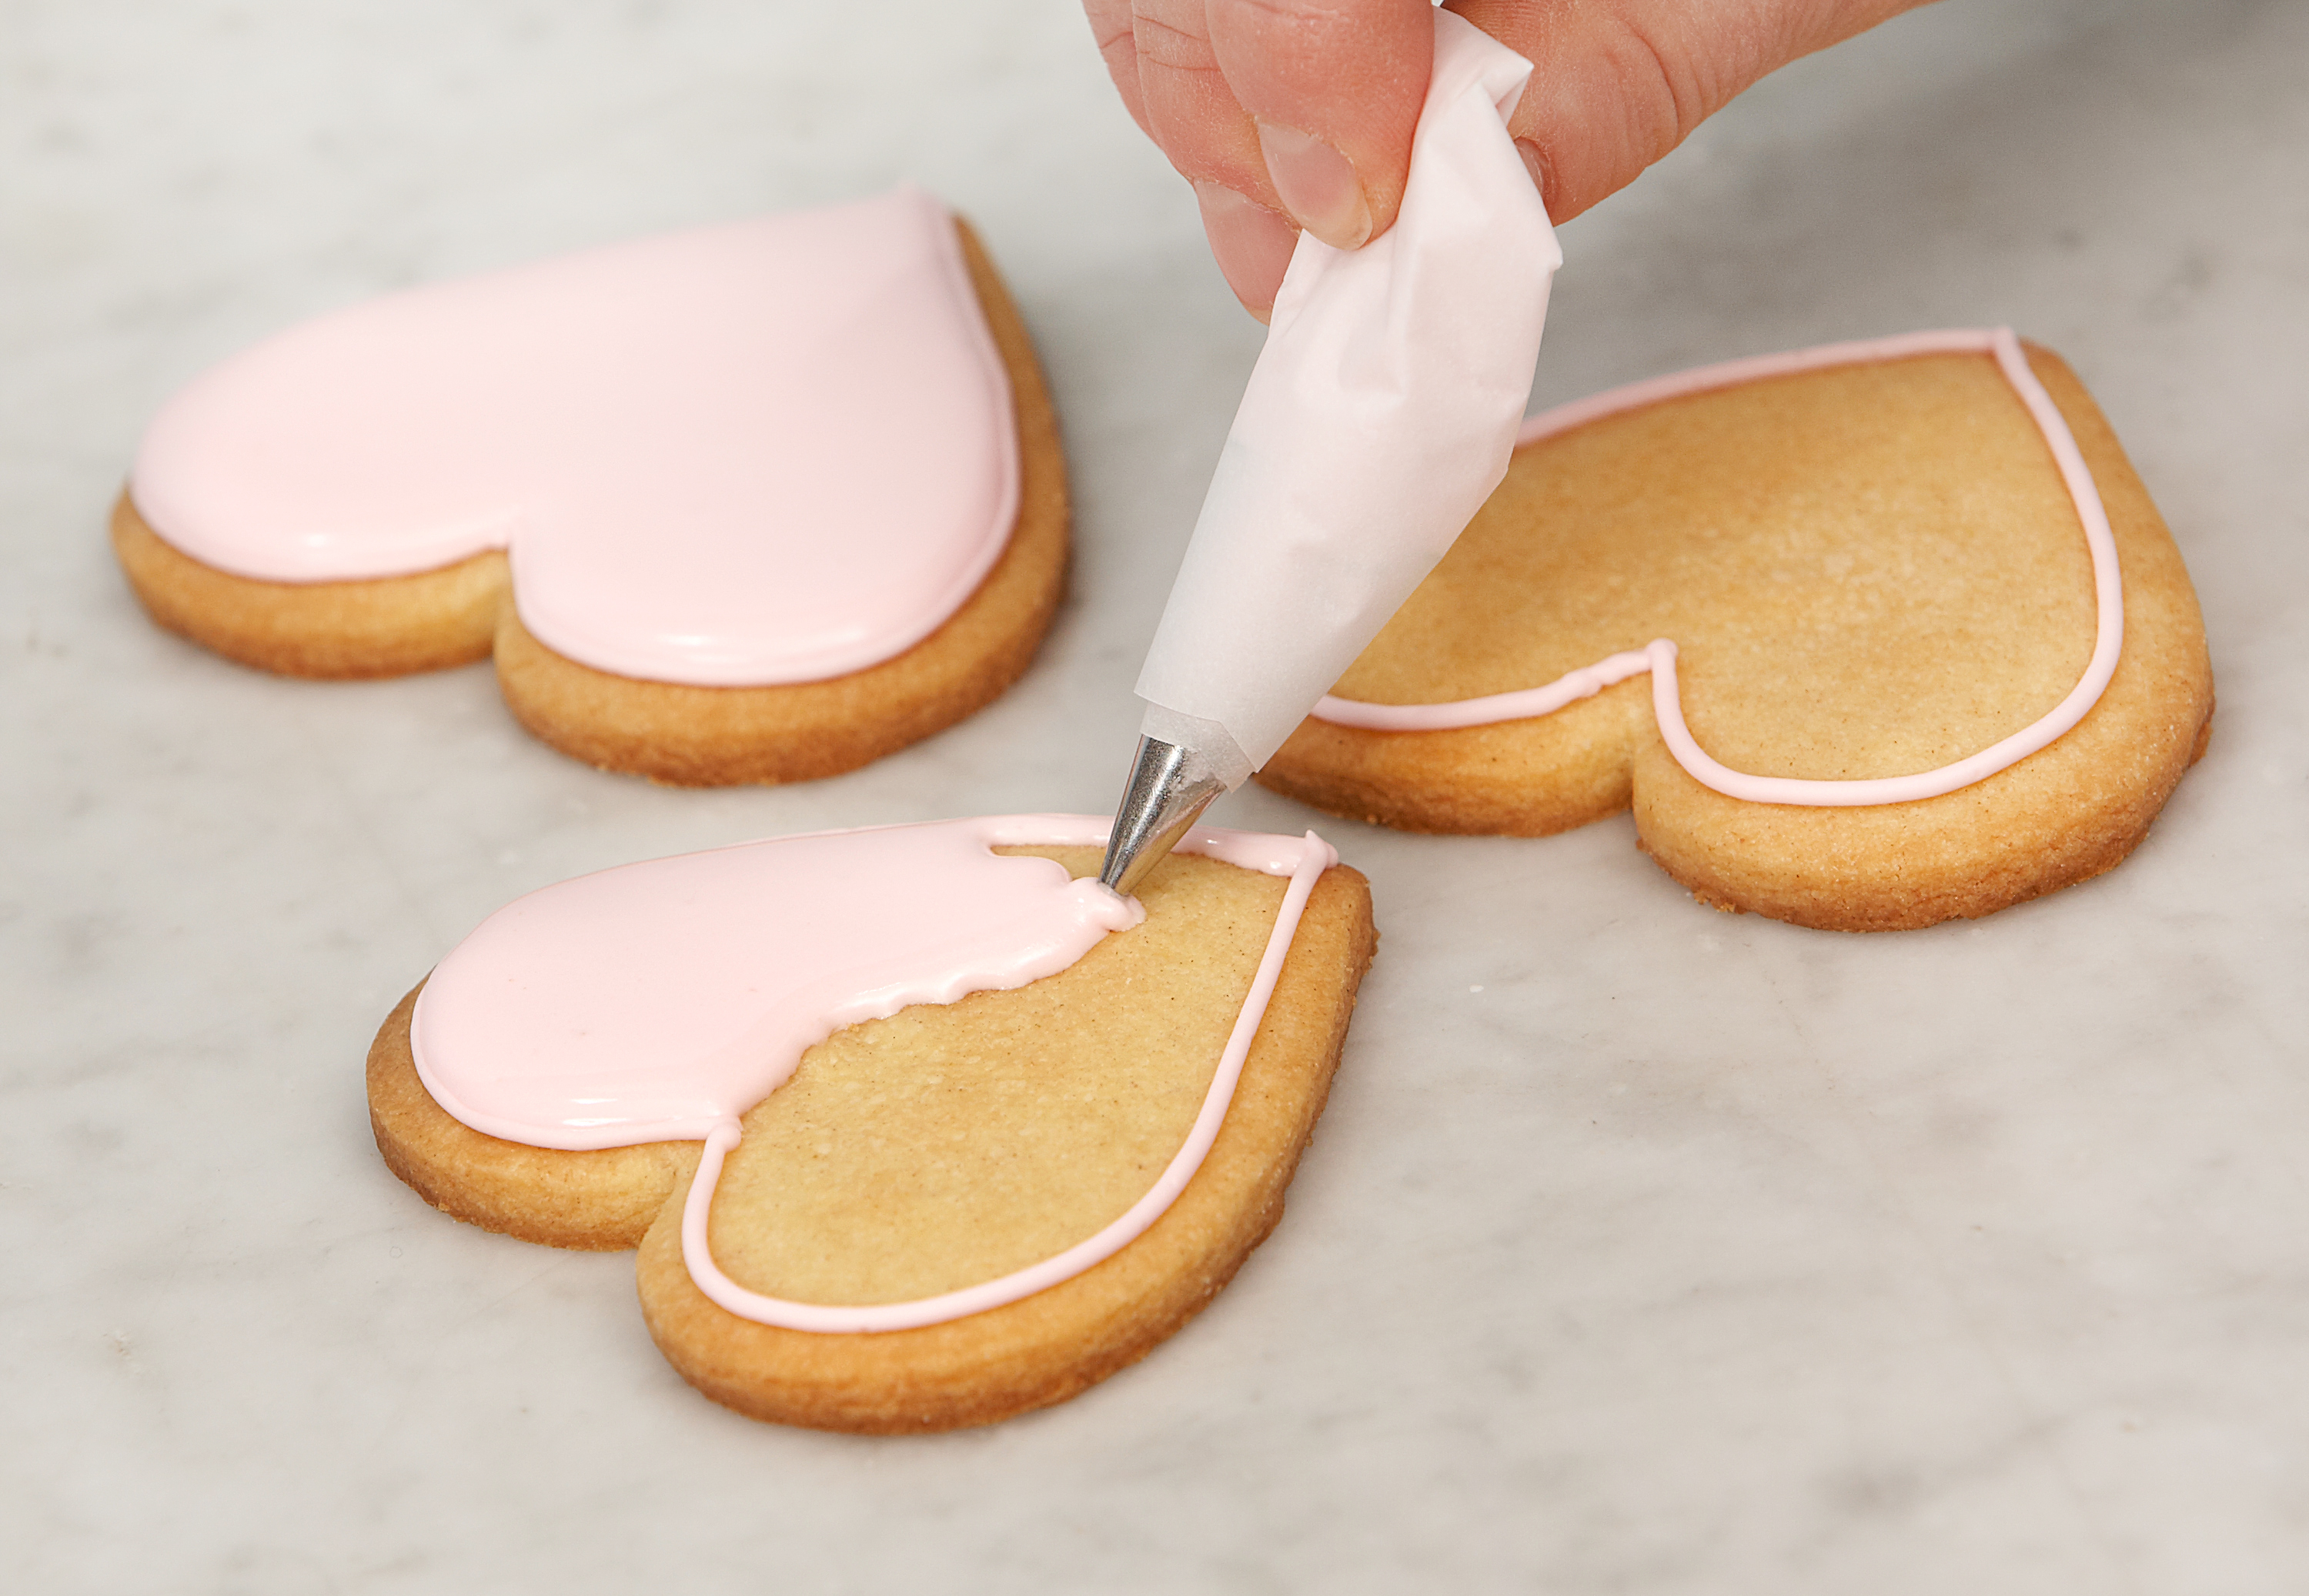
Step 20
Next, take the white Royal Icing and pipe a pearl border around the stained-glass heart centres by piping connecting dots.

Step 21
Lastly, pipe borders around each of the letters and hearts using the Royal Icing colour of your choice to finish the biscuits.

Step 22
Tip: If the royal icing is firm and creates a peak when piped, take a small paint brush, slightly dampen with a wet cloth and gently pat down the peak.