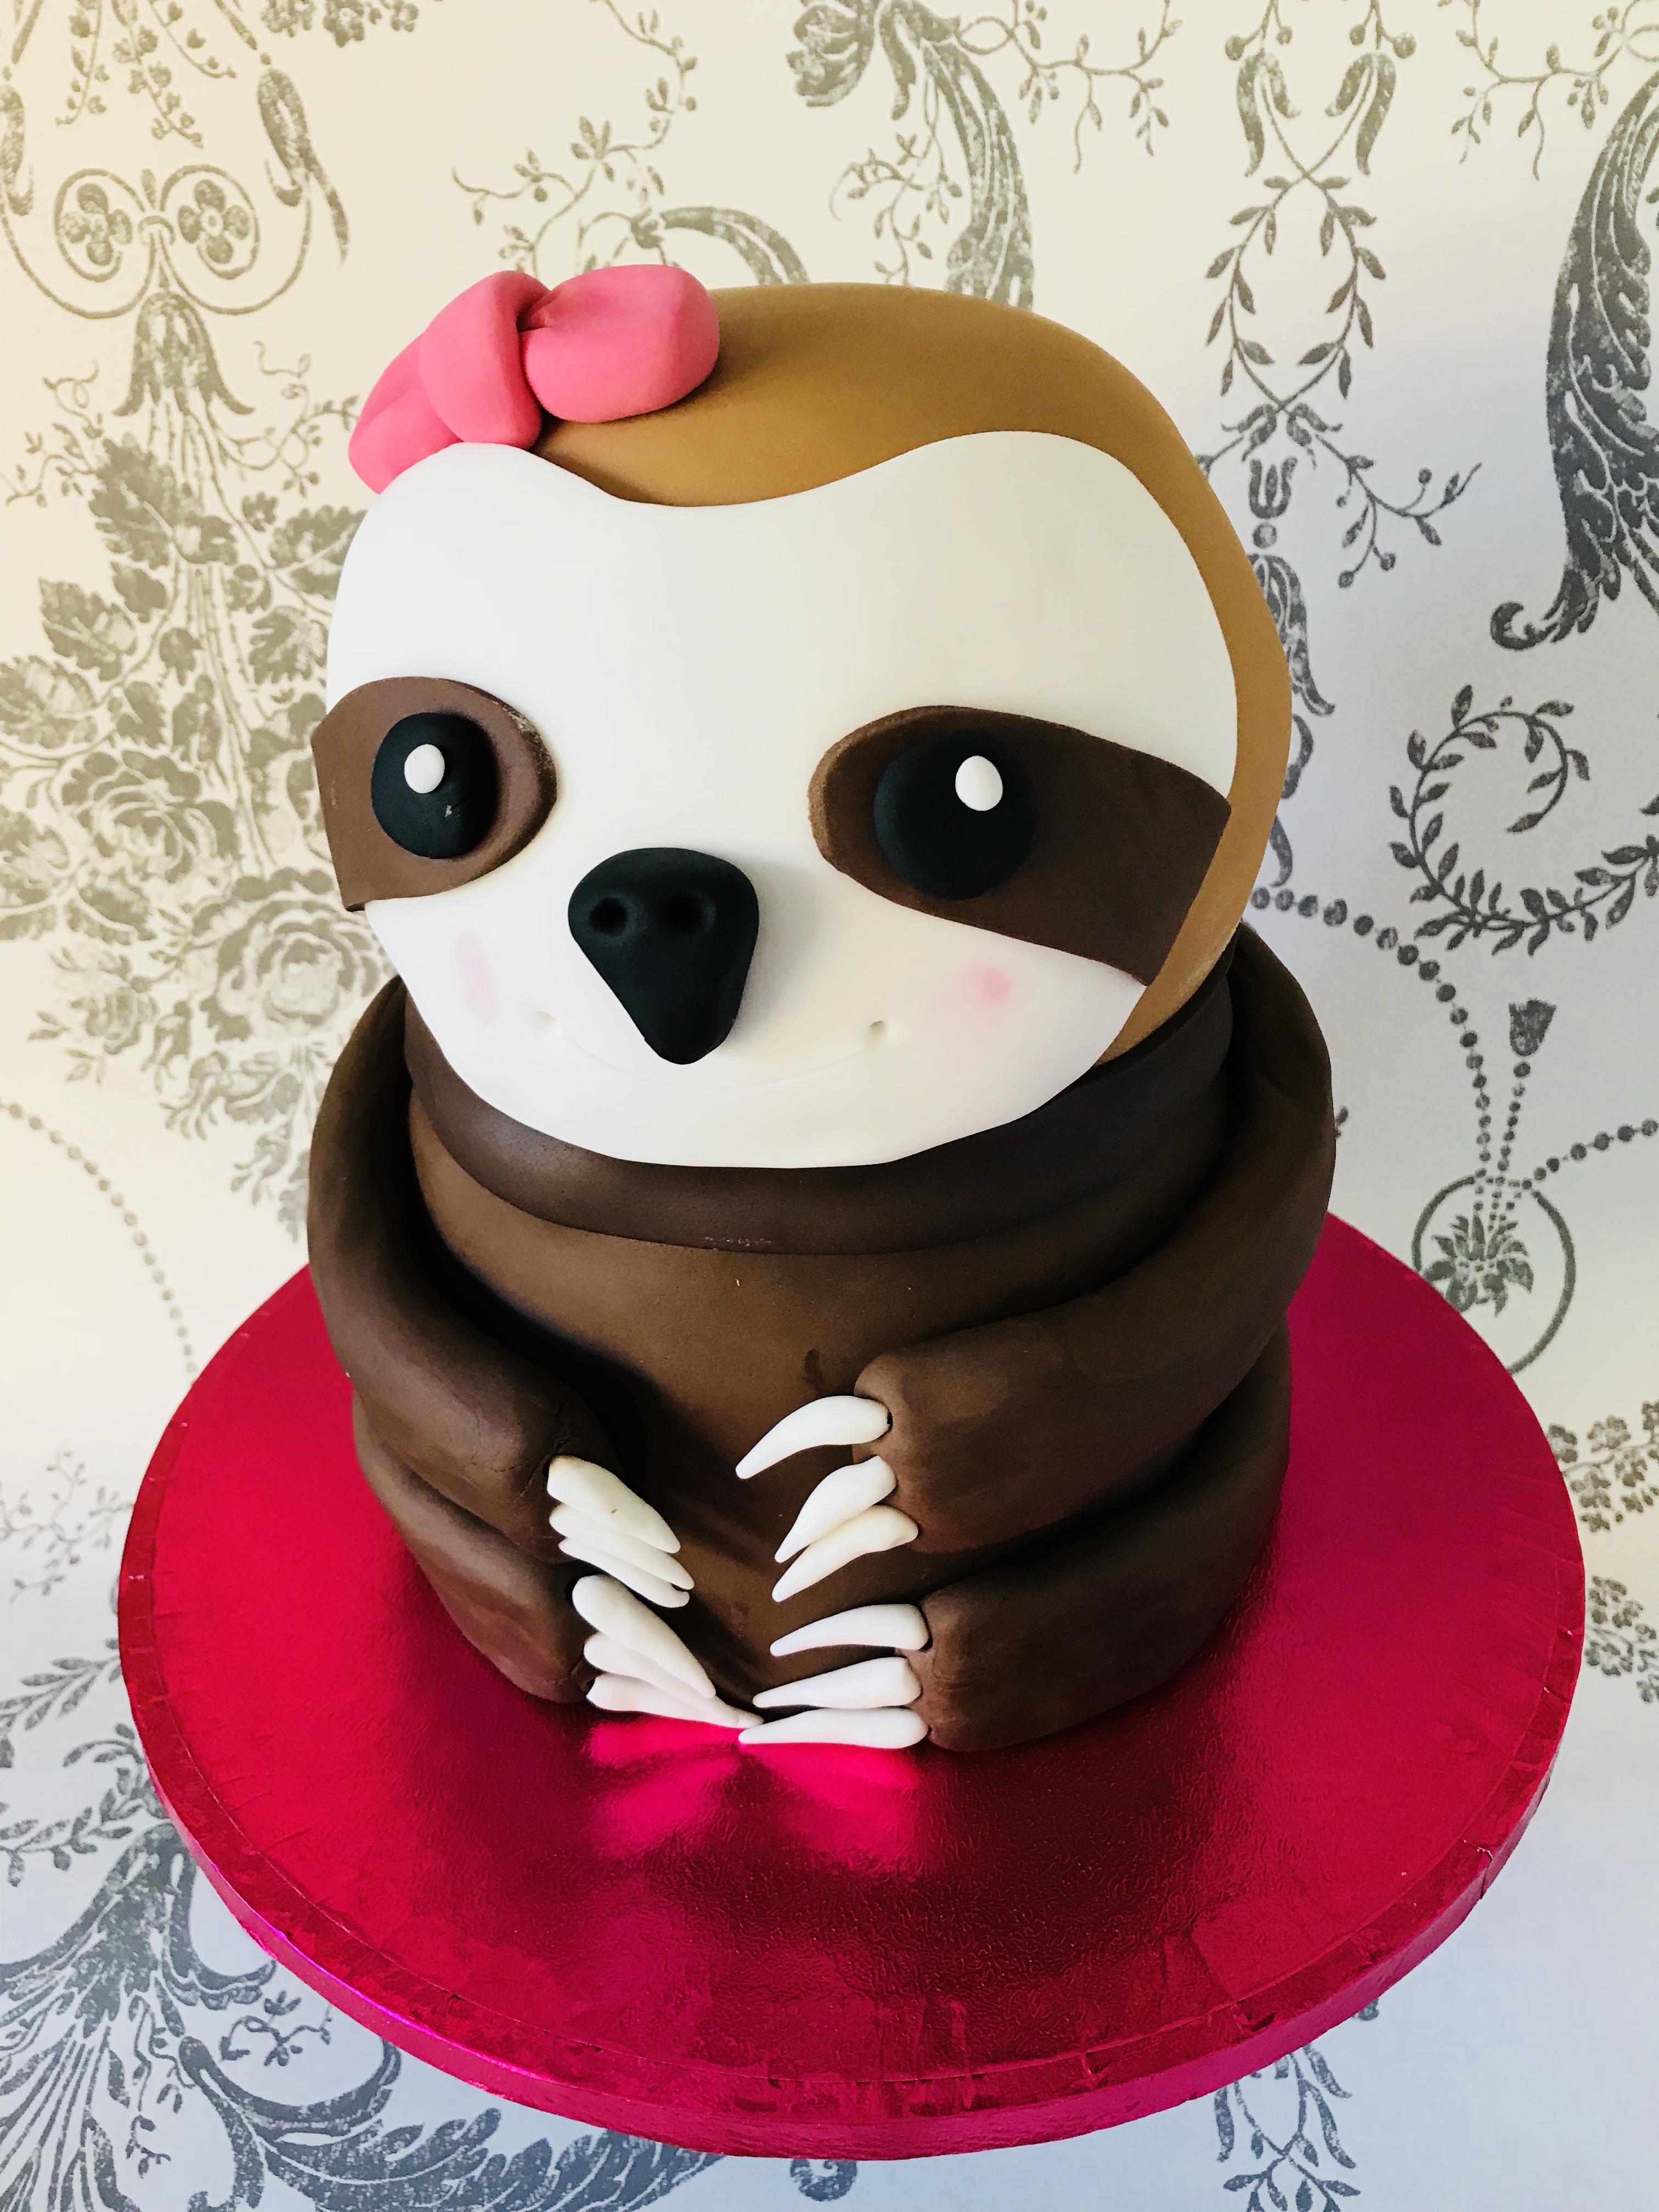
Sindy The Sloth Cake
This is a fabulous teenage birthday cake idea, made for my fourteen old, she loved it so much she named it Sindy.
Recipe by Emma Louise Fuller.
Uploaded by Emma Louise Fuller
Time to make
Skill Level
Intermediate
Serves
40 people
Baking ingredients
- 250 g Butter/margerine
- 550 g Caster Sugar
- 400 g Self raising flour
- 100 g Cocoa powder
- 4 large eggs
- 320 ml Water
- 2 tsp Vanilla extract
- 500 g Butter
- 1 kg Icing Sugar
- 3 tbsp Salted caramel sauce
Decorating ingredients
- 180 g Renshaws White Sugar Paste
- 500 g Renshaws Teddy Bear Brown Paste
- 500 g Renshaws Chocolate Sugar Paste
- 180 g Renshaws Pink Sugar Paste
- 180 g Renshaws Black Sugar Paste
Renshaw products used


Email this recipe
Instructions
Step 1
Line 3 cake tins and make 3 x 6” round cakes, using the "All in one recipe. Bake at 160°C fan. Allow to cool.
Step 2
Split the cakes, then using 3 layers for each tier (body and head), fill with butter cream, chill cakes for 20 minutes.
Step 3
When chilled, place the body on a cake board and carve the top edge to create the shoulders. Place the base of the head on a 5” card and carve the bottom edge to create the neck.
Step 4
Tip - To make the round head, using some cake, make a fine crumb mixed with a little soft butter cream, line a basin in cling film, fill the base with some cake and chill until firm. Tip out and layer on top of the head to create a round head.
Step 5
Dowel the base cake, I used 3 straws cut to size and stack the top tier on. When you are happy with the shape (Tip-think of a Russian Doll) cover in a layer of butter cream and chill. Go over again to make sure all the cake is covered in butter cream. Tip- Use a plastic cake smoother to get a really smooth finish before sugar paste.
Step 6
Knead and roll out the teddy bear brown paste, start by covering the head, finishing at the neck.
Step 7
Roll out the chocolate paste and roll out a strip of brown and wrap around the body, finishing at the back. Tip- use very little icing sugar to prevent drying out and marking of the paste.
Step 8
Make a face template out of greaseproof and cut out of the white sugar paste. Attach with some water.
Step 9
Roll out 2 strips of brown with a round edge meeting in the middle and finishing at the edge of the face. Add on 2 balls of black sugar paste for eyes with 2 smaller white balls for the pupils. Model a larger heart shape for the nose with 2 nostrils. Mark in a smiley mouth with a knife. I also dusted on some rosy cheeks.
Step 10
To make the paws, I used chocolate paste rolled into 4 large sausage shapes, thinning at one end, stick on with edible glue around the body and make 3 ball tool holes at the end of each paw to take the claws.
Step 11
The claws are white sugar paste rolled into a ball, thinned at one edge to create a cone shape. Once holding their shape, fix into place. You will need 12 claws.
Step 12
Finally the pink bow was modelled out of 2 tear drop shapes with 2 lines marked in, and a sausage shape over the join. Glue into place using edible glue.