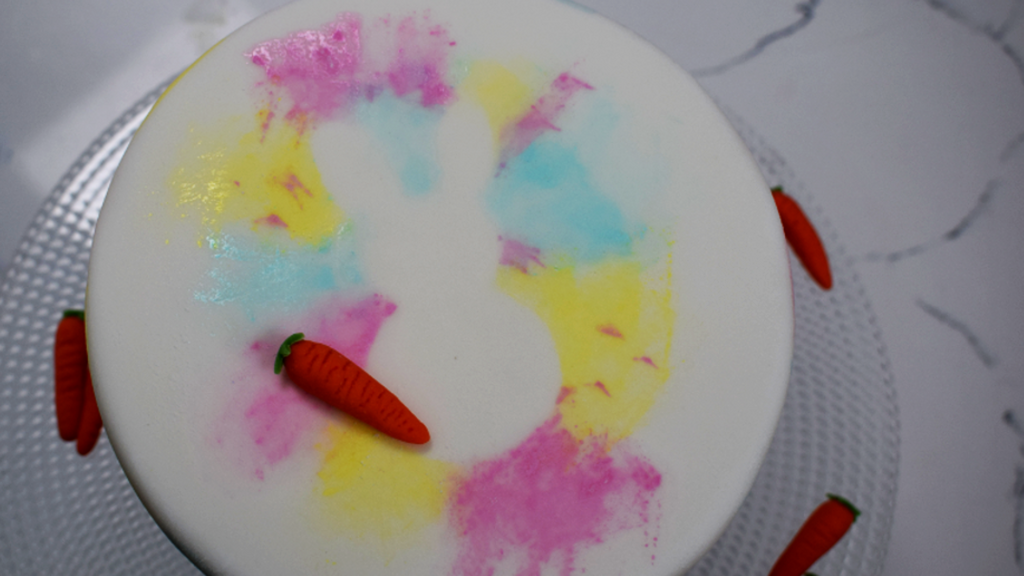
Painted Watercolour Silhouette Cake
How to paint a watercolour design on a cake, over a silhouette. We’ve chosen a bunny rabbit design for Easter.
Uploaded by Kayleigh McDonough
Skill Level
Easy
Decorating ingredients
- 500 g Renshaw White Ready to Roll Icing
- Rainbow Dust ProGel Pink Food Colouring
- Rainbow Dust ProGel Turquoise Food Colouring
- Rainbow Dust ProGel Yellow Food Colouring
- Rainbow Dust Pearl White Edible Lustre Powder
Renshaw products used

Email this recipe
Instructions
Step 1
Equipment: You will need separate sponges for each gel colour, a paint palette, pot of water and cocktail sticks. Have some paper towels and a spare rolled out piece of sugar paste to hand. Print and cut out a silhouette in your chosen shape.
Step 2
Knead your Renshaw White Ready to Roll Fondant Icing until pliable, roll out on a surface lightly dusted with icing sugar, then cover your cake with this and smooth over.
Step 3
In a paint palette, add small amounts of your chosen gel food colours. A little goes a long way!
Step 4
Mix your gel colours with a little water. You can use your cocktail sticks to mix these.
Step 5
Add a small amount of white edible dust to your colours and mix again. This will create pastel shades.
Step 6
Stick your silhouette in place with a little royal icing, or you can hold this in place while you're working.
Step 7
Using a different sponge for each colour, add the watered down gel to the sponge then tap off the excess on a paper towel. Test the colour on the spare piece of paste before you add it to the cake, so you know you're happy with the colour.
Step 8
Dab the sponge around the silhouette, little and often, so that you can build up colour if needed.
Step 9
Once you've added all your colours, take the silhouette away and leave the surface to dry before serving.