Decorating ingredients
- 250 g Renshaw Jet Black Ready to Roll Icing
- 250 g Renshaw Poppy Red Ready to Roll Icing
- 250 g Renshaw Skin Tone Ready to Roll Icing
- 400 g White Royal Icing
- Rainbow Dust Black Food Art Pen
- Pink edible dust
- Apricot jam
- Cooled, boiled water
- Green Pro Gel
- Blue Pro Gel
- Edible gold paint
Renshaw products used
Email this recipe
Instructions
BAKING INSTRUCTIONS:
Step 1
Heat the oven to 190°C/375°F/gas mark 5.
Step 2
Cream together the butter and sugar until it's nice and smooth then gradually stir in the flour to form a smooth paste.
Step 3
Wrap the shortbread in cling film and leave to rest in the fridge for 30 minutes.
Step 4
Knead the dough lightly and roll out to the desired thickness, then use a rectangle cutter to cut the biscuit shapes out. If you don't have a rectangle cutter, you could use a cardboard template to cut around. We used a 10cm x 3.5cm template.
Step 5
Place the rectangles on a greased and lined baking tray and bake in the oven for 15 to 20 minutes until pale-golden brown.
Step 6
Remove from the oven and leave to cool on a cooling rack for 30 minutes.
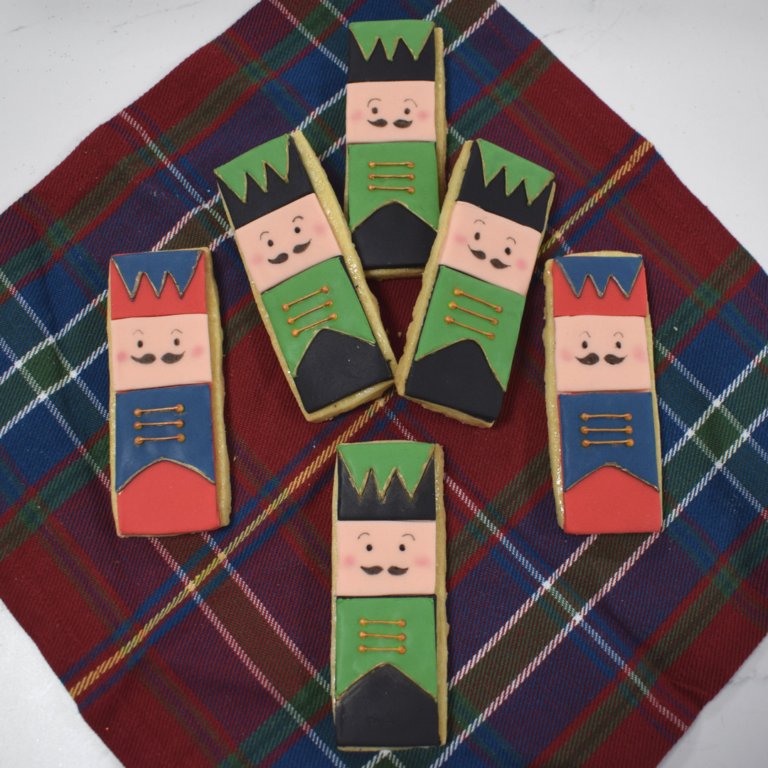
DECORATING INSTRUCTIONS:
Step 7
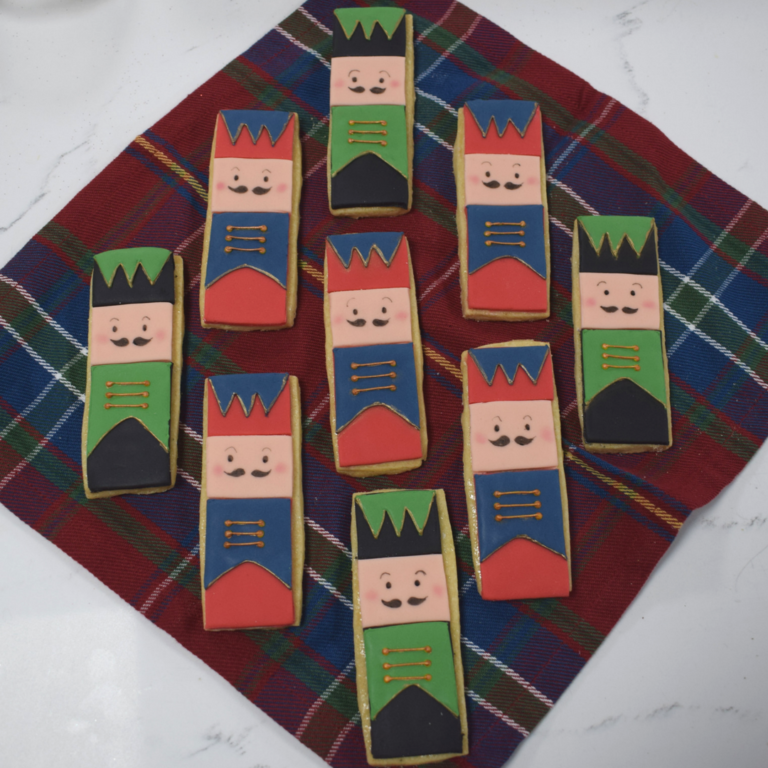
Decide which colour icing you want to use as the base of your Nutcracker (red or black) and knead this until smooth and pliable.
Step 8
Lightly dust the work surface with icing sugar and roll out your base colour icing, rotating after each roll to prevent sticking. Use your rectangle cutter or template to cut out shapes of icing.
Step 9
Cut the rectangle in half, and stick this to the bottom half of the biscuit for the legs and body, using a little apricot jam.
Step 10
Cut the other half in half again (to a quarter of the length of the biscuit), and stick this to the top of the biscuit for the hat.
Step 11
Repeat in the same colour on 4 more of your biscuits. The roll out your next base colour of icing and repeat again for the next 5 biscuits.
Step 12
Knead the Skin Tone icing until smooth and pliable, then roll out on a surface lightly dusted with icing sugar. Keep this to the same thickness as you have done with the red and black icing.
Step 13
Use your rectangle cutter or template to cut out rectangles, then cut these into quarters.
Step 14
Place your quarter of Skin Tone icing into the space between your red or black icing, for the Nutcracker face.
Step 15
Split your Royal Icing into 2 bowls, leaving some extra aside for extra piped detail later.
Step 16
Add small amounts of green Pro Gel to one pot and blue to the other. Only add a small amount at a time, then mix, and add a little more until you get the colour you want.
Step 17
For a runny piping and flooding consistency of Royal Icing, you'll need to add 6-8 drops of water to each pot. Only add a drop at a time, mixing after each, to make sure you get the right consistency. You can always add more water but you can't take it away!
Step 18
Add your first colour of Royal Icing to a piping bag, using a small nozzle. Pipe the outline of your jacket and hat decoration, then leave to set slightly.
Step 19
Flood the rest of the jacket and hat decoration with more icing, tapping the biscuit gently on the work surface so that the icing levels out. Leave this to set and repeat with the next colour on the other half of your biscuits.
Step 20
Add a little water to your leftover White Royal Icing so that it is piping consistency, and add this to a piping bag.
Step 21
Pipe 3 small circles on one side of the jacket, then 3 more on the opposite side. Pipe a thin line between each of these to join them up. Leave this to set.
Step 22
Paint a thin gold trim around the hat decoration, the bottom of the jacket and the decoration on the jacket and leave to dry.
Step 23
Add facial features to the Skin Tone section of icing using the Black Food Art Pen. Finish the biscuits by adding a circle of pink edible dust for the cheeks, using a dry brush.