Baking ingredients
- 5 inch round cake, prepped on 5 inch cake drum
- 6 inch double dept cake, prepped on a 6 inch square board
Decorating ingredients
- Renshaw Grey 'Just Roll With It' Fondant Icing
- Renshaw Deep Purple 'Just Roll With It' Fondant Icing
- Renshaw Yellow 'Just Roll With It' Fondant Icing
- Renshaw Jet Black 'Just Roll With It' Fondant Icing
- Renshaw Turquoise 'Just Roll With It' Fondant Icing
- Renshaw Tiger Orange 'Just Roll With It' Fondant Icing
- Renshaw White 'Just Roll With It' Fondant Icing
- Renshaw Pastel Green 'Just Roll With It' Fondant Icing
- Renshaw Lincoln Green 'Just Roll With It' Fondant Icing
- Renshaw Emerald Green 'Just Roll With It' Fondant Icing
- Renshaw Ruby Red 'Just Roll With It' Fondant Icing
- Renshaw Fuchsia Pink 'Just Roll With It' Fondant Icing
- Renshaw Royal Icing
- Rainbow Dust Edible Glue
- Rainbow Dust Icing whitener
- Rainbow Dust ProGel Pink
- Rainbow Dust ProGel Black
- Rainbow Dust Metallic Paint Dark Gold
- Rainbow Dust Metallic Paint Silver
Email this recipe
Instructions
PREPARE YOUR EQUIPMENT:
Step 1
You will need; rolling pin – large and small, smoother, knife, No 2 pointed brush, glue, Fmm ball tool, Fmm dresden tool, Fmm tropical leaf cutter set, Leaf plunger cutters – variety, Fmm foam pad, 2 stiff bristled brushes, paint palette, 2 20g wires, florist tape
Covering the middle tiers:
Step 2
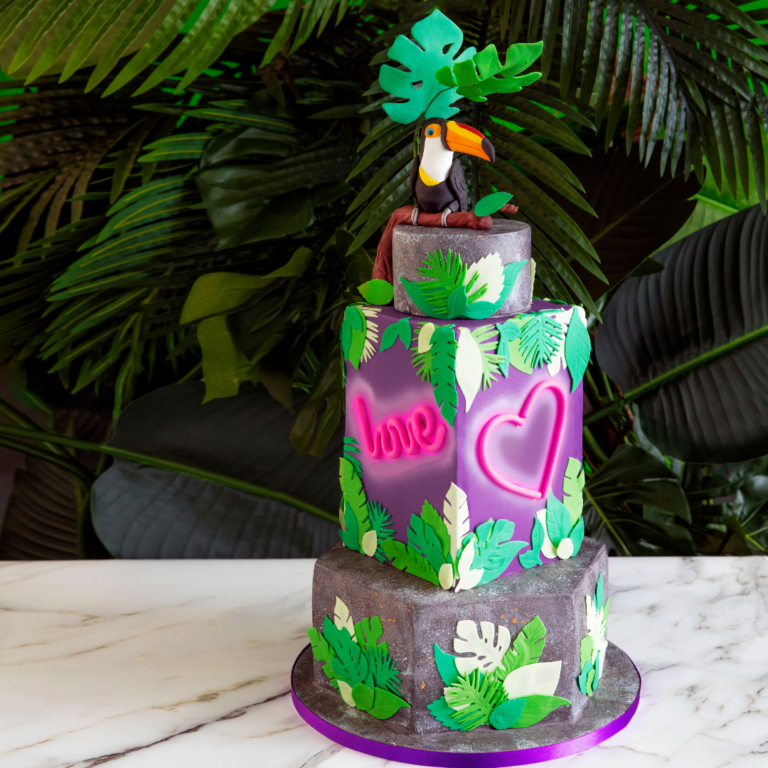
To cover the middle tier cake, the panelling technique was used. As the cake is square and very tall a much neater result can be obtained by using this method. Rainbow Dust Tylo Powder was added to the Icing, allowed to develop over a period of time, which adds extra strength to the Icing, making the Icing sheets more robust during handling.
Step 3
Prepare the cake with firm setting ganache (ratio 2 dark chocolate: 1 double cream), ensure all the edges are smooth and straight and free of any loose ganache particles.
, ensure all the edges are smooth and straight and free of any loose ganache particles.")


Step 6
Knead the Deep Purple Icing together into a smooth pliable ball. Place in a plastic bag and allow to rest for minimum of 30 mins to allow the Tylo to develop.

Step 7
First cover the top of the cake. Knead the Deep Purple Icing with added Tylo powder until pliable. Lightly dust the worksurface with icing sugar and pin out 300g Icing to 4mm thick using icing guides.


Step 9
Smooth over the surface of the Icing with a smoother whilst it is supported on the table.


Step 13
Use a sharp knife or scalpel to trim the Icing to the edge of the cake, use the length of the knife’s blade in a downward motion to ensure the edges are neat.

Step 14
Cut a 6 inch square of greaseproof paper to place on the top of the cake to protect the Icing whilst spritzing the sides of the cake with water.

Step 15
Cover the sides of the cake by creating individual Icing panels, recommended size is 10 inch by 8 inch rectangles to allow extra handling Icing around the edge.

Step 16
Lift the panel of Icing and place to the side of the cake, use a smoother to attach the Icing panel to the cake and even out the surface.

Step 17
Top tip- If you get an air-bubble, simply peel the Icing panel off the cake where the bubble is located, remove the air and gently smooth the Icing back in place. If you notice an air-bubble after this stage and it is difficult to release the air as mentioned, then use a thin scriber to pierce the bubble and apply light pressure with your finger to expel the air.
Step 18
Trim the Icing to the side of the cake, using a downward motion with a sharp knife or scalpel.

Step 19
Where 2 Icing panels meet, use a metal ruler as a cutting guide to protect the joining panel.


Step 21
Cover the opposite side of the cake following the instructions in step 6, use a smoother to neaten all the edges.

Step 22
For the sides of the cake with the joining Icing panels, repeat the same process as described in step 6a&b. When trimming the sides, use the metal ruler as a cutting guide to protect the Icing of the other panel.

Step 23
Attach all the seams together with Edible Glue and smooth over with a smoother and allow to set.

Step 24
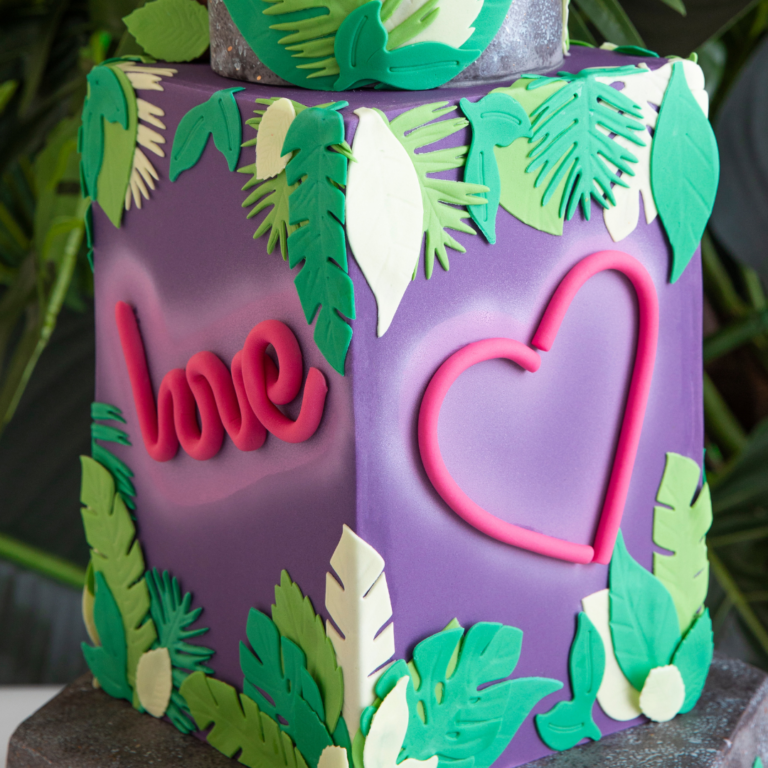
Airbrushing and Lettering
Step 25
Create the templates out of card using the attached templates guide.

Step 27
Make a thin white paint by mixing Icing Whitener into cooled boiled water, add Pink Progel and mix until combined using a paintbrush.

Step 28
Top tip – put the Progel on the side of the bowl and use the paintbrush to slowly dilute into the white paint.

Step 30
Using the medium setting on the airbrush, spray the design, focusing on the edge of the template design, to concentrate the colour in this area. Use the heart template on 2 sides of the cake. Carefully remove the template and allow to fully dry.

Step 31
Top Tip - When airbrushing apply a little at a time and allow to dry before applying again to build the depth of colour, this will stop the moisture from forming droplets on the cake.
Step 32
Knead 250g Renshaw Fuchsia Pink Ready to Roll Icing until pliable, add 1 tsp Tylo powder and knead until fully incorporated. Place in a plastic bag and allow to rest for minimum of 30 mins to allow the Tylo to develop.


Step 36
Place the template on a cake board and lay a piece of butchers wrap over the top. Using the lettering template as a guide, shape the rope over the top.

Step 37
Trim the end of the rope with a sharp knife, angle the cut towards the board. Allow to firm up slightly for 10-15 mins.


Step 39
Use a smoother to help lift and support the letters as you apply them to the side of the cake.

Step 40
Word 'Love' and part of 'Only' are the parts where the lettering is joined up. All the other letters are either made up individually or made of a few parts.

Step 41
Knead 250g of each of the following Renshaw Ready to Roll Icings; Pastel Green, Lincoln Green and Emerald Green until pliable. Add 1tsp of Tylo Powder. Place in a plastic bag and allow to rest for minimum of 30 mins to allow the Tylo to develop.


Step 43
Use the Fmm tropical Leaf cutters to cut out the leaf shapes in all 3 coloured Icings. Apply medium pressure all the way around the cutter, give it a little wiggle on the board to ensure it cuts through the Icing. Gently pull the excess Icing away from the cutter whilst holding the cutter down with your other hand. Once you lift the cutter away; with the Icing in the cutter, rub the palm of your hand over the cutter edge - this will ensure a nice clean cut is achieved.


Step 46
Cut multiple leaves out of each colour; you can also use other leaf plunger cutter for more variety.


Shape a small ball of Jet Black Icing into an oval, attach to the back of the beak with Edible Glue.:
Step 48
Pin out the Icing to 2-3mm thick creating a central thicker ridge, align the large tropical leaf cookie cutter so the ridge goes through the centre of the leaf, cut out the shape.

Step 49
Brush a 20g wire with Edible Glue and insert the wire into the central ridge at least 3/4 of the way though.

Step 50
Use a tiny tear drop cutter to make a couple of holes in the leaf. Add a few smaller holes using the point of the dresden tool in a circular motion.

Step 51
Place the leaf on a foam pad and use a ball tool to thin out the outer edge of the leaf and add veins to the surface with the thin end of the dresden tool.

Step 52
Make 2 tinfoil cups, place on the leaves and allow to set.
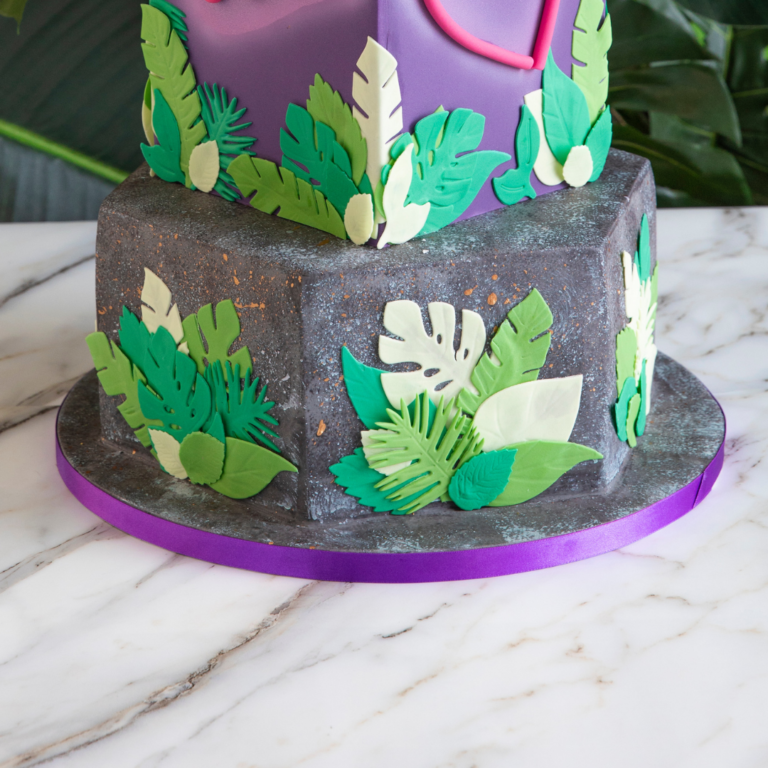
Bottom Tier and top tier decoration:
Step 53
On a clean dry surface knead 12x250g Renshaw Grey Icing until pliable. Dust the worksurface with icing sugar and pin out to 4-5mm thick. Drape over the base tier and smooth over with the palm of your hand, expelling any air from between the Icing and cake. Knead and roll out the remaining Icing and cover the top tier and board.


Step 55
Top tip - you can use an adapted flexi smoother over the edges, just be careful not to catch the icing with the edge of the smoother. Transfer the base tier to the covered cake board.
Step 56
To fill in the small space between the cake and board, create some Icing glue by adding water a few drops at a time to Icing, knead well after each addition.

Step 57
Once it starts to soften use a palette knife and add more water until a piping consistency is achieved. Place into a piping bag fitted with a no3 piping tip.

Step 58
Pipe the Icing along the bottom edge, use a small damp flat brush to smooth the icing into the gap. Wipe any excess icing off the brush onto kitchen paper and dip the brush in water, take excess water off the brush by dabbing on kitchen paper. Continue around the cake until all sections are complete and allow to set.

Step 59
In a small bowl dilute Black Progel with a few drops of water, mix until combined with a cocktail stick.


Step 62
Press the sponge on the surface of the Icing until enough paint is applied to create a mottled effect. Continue until both cakes and the board are covered. Allow to dry.

Step 63
Create a white paint by mixing Icing Whitener with water, mix until combined with a cocktail stick.

Step 64
Dip a sponge in the white paint and squeeze out the excess liquid.
Step 65
Press the sponge lightly on the surface of the cake to transfer the paint. Continue until both cakes and the board are covered. Allow to dry.

Step 66
Stack all the cake tiers together using cake dowels and royal icing.
Step 67
Start to add the leaf decorations to the cake, brush a small amount of Edible Glue to the backs of the leaves and attach to the cake surface. Create little bunches of leaves for the middle of each side on the bottom tier. Overlap the leaves and alternate the leaf colours.


Step 69
Top tip - if you are nervous about adding the leaf decoration to the middle tier you can try an arrangement on the paper template, adjustments can be easily made before committing to the final design on the cake.
Step 70
Knead 250g Renshaw Dark Brown Ready to Roll Icing until pliable. Shape into a tapered sausage and create a branch effect by holding the thick end of the sausage and rolling the thin end away from you to twist.


Step 72
Attach the branch with Edible Glue. Place a piece of sponge under the branch at the thin end whilst if sets.

Step 73
Knead 250g Renshaw Jet Black Ready to Roll Icing until pliable. Add 1tsp Tylo Powder and knead until fully incorporated. Place in a plastic bag and allow to rest for minimum of 30 mins to allow the Tylo to develop.


Step 75
Pinch out the tail with your finger and thumb and add feather markings with the thin end of a dresden tool.

Step 76
In the position the Toucan is to sit on the branch, place a dowel through into the cake, brush the dowel with Edible Glue.


Step 78
Knead a small ball of White Icing until pliable, roll into an egg shape and press down to flatten.


Step 81
Knead and shape 2 small balls of Tiger Orange Icing. Attach to the eye area with Edible Glue. Use the small end of a ball tool to add eye sockets and brush with Edible Glue.

Step 82
Knead and shape 2 tiny balls of Turquoise Icing and fill the eye sockets, use the end of a thin paint brush to press another little hole for the pupils, brush with Edible glue and fill with 2 tiny balls of Jet Black Icing. Use a cocktail stick to add a hole for the beak which will be added later after the body has set.

Step 83
Knead 20g Tiger Orange Icing until pliable, add a small amount of Tylo powder and knead until combined and allow to rest for 30mins. Knead 10g Yellow Icing and 5g Ruby Red Icing.


Step 86
Cut the cocktail stick down to size, brush with Edible Glue and insert into the hole created previously. Hold the beak in position for 30 seconds to a 1 minute for the glue to bond the 2 pieces together.

Step 87
Shape a small piece of Jet Black Icing into a cone, press flat and attach to the end of the beak with Edible Glue.


Step 90
Shape a small ball of Black Icing into a sausage, press an indent with the small end of the ball tool and brush with Edible Glue.


Step 92
Attach the leg to the body and the claw to the branch with Edible Glue. Use a scriber to help put in place.


