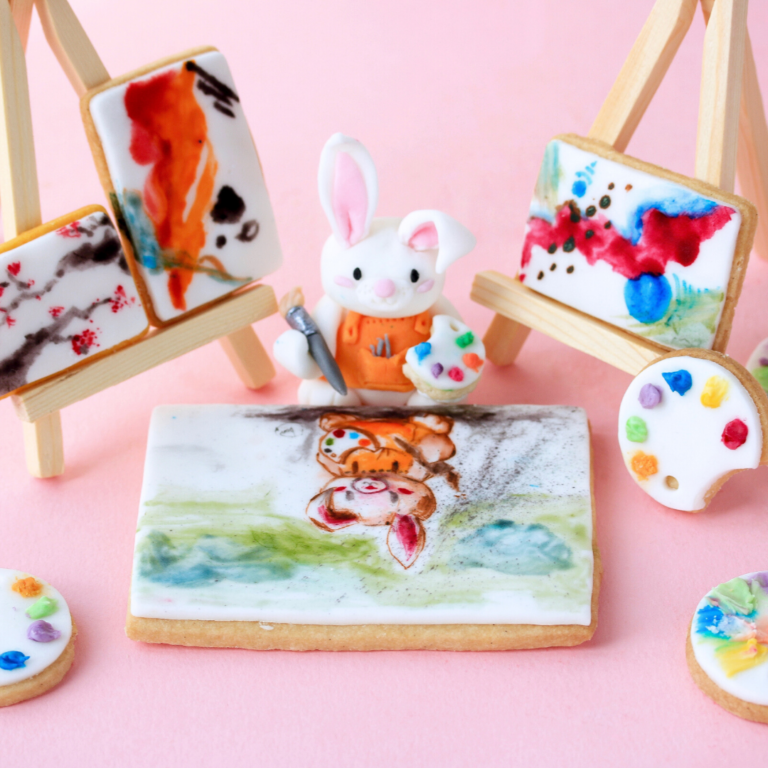
Kim-Joy’s Shortbread and Sugarpaste Easels and Paintings
These shortbread are very easy to make, but extremely crumbly and melt in your mouth! Plus you can decorate them with sugarpaste and paint your own creations, to make your own miniature art gallery. ??
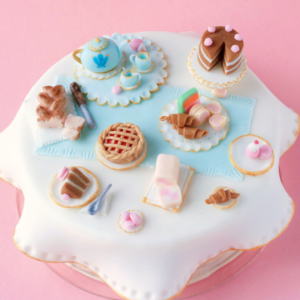
This cute tutorial was created by 2018 Great British Bake Off Finalist Kim-Joy. If you like this, check out Kim-Joy’s Afternoon Tea Cake tutorial too.
Uploaded by Cameron Collings
Skill Level
Intermediate
Serves
30 people
Baking ingredients
- 200 g Salted Butter
- 85 g Caster Sugar
- 270 g Plain Flour
- Apricot Jam
Decorating ingredients
- Renshaw White Ready to Roll Icing
- Renshaw Pink Ready to Roll Icing
- Renshaw Tiger Orange Ready to Roll Icing
- Renshaw Jet Black Ready to Roll Icing
- Renshaw Grey Ready to Roll Icing
- Renshaw Royal Icing Pot
- Rainbow Dust ProGels - various colours
- Vodka (to paint with)
Renshaw products used

Email this recipe
Instructions
Baking the shortbread:
Step 1
Beat together the butter, salt and caster sugar in a mixing bowl until smooth and fluffy.
Step 2
Add the flour and mix until just combined. The dough should be slightly sticky, but soft and easy to handle. If necessary, wrap the dough in cling film and chill for 10-15 minutes or until firm enough to roll out.
Step 3
Turn out on to a well-floured surface and roll out to about 1/8inch thick. Use rectangular cutters for the paintings. For the paint palettes, stamp out circles, and then use a small round cutter to cut into an edge. Transfer to a lined baking tray (that you can fit in the fridge).
Step 4
Refrigerate for 15 minutes, whilst you preheat the oven to 160C (fan)
Step 5
Bake for 10-15 min, or until just lightly browned at the edges. Let cool for ten minutes on the baking tray, then gently transfer to a wire rack to finish cooling.
Decorating the Shortbread:
Step 6
Once cool, roll out white icing and cut into shapes to fit on top of the biscuits (use a little apricot jam or similar to adhere). Use a straw to stamp out little holes on the paint palettes.
Step 7
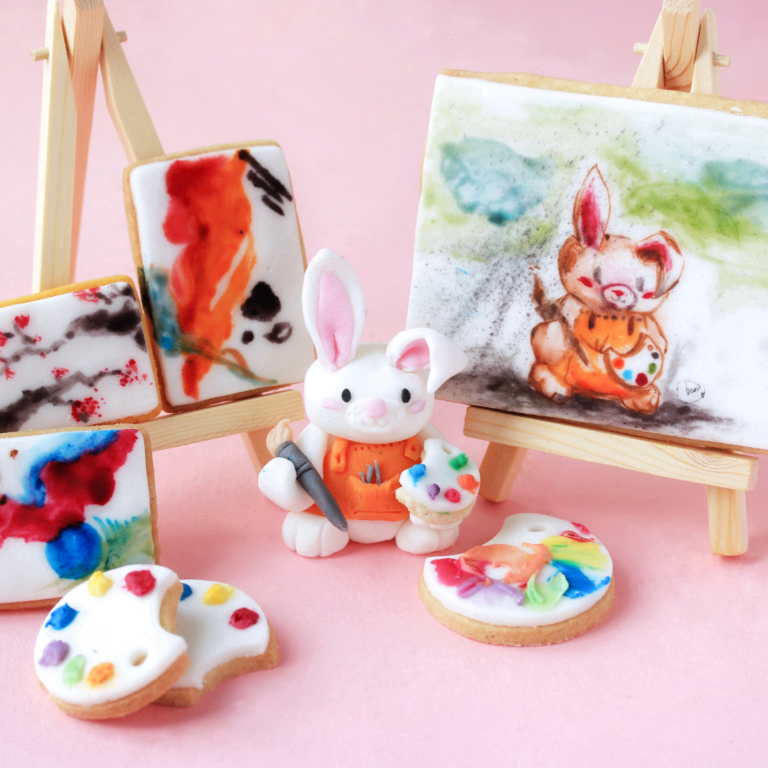
To add the edible paint to the palettes, use the Rainbow Dust ProGels to colour some Royal Icing into about 6 or 7 different colours. Use the handle end of a spoon to put dots of the icing on to the palettes. You can spread them and blend them a little if you like.
Step 8
For the paintings, create your own art (can be realistic or abstract) using ProGels mixed with a little water or vodka (vodka evaporates quicker and is ideal) until it is of a paintable consistency. You can use this paint similar to watercolour.
Step 9
For the bunny, use white icing to create a shape for the main body, then attach a round ball for the head.
Step 10
Next, roll out the orange icing and cut a shape for the apron. Use a little water to make this stick to bunny’s body. Add a little orange icing to create the apron straps and pocket.
Step 11
Next, shape the feet - just round balls of white icing, and indentations for the toes. Then add the arms.
Step 12
Shape the ears by rolling out white icing and cutting out ear shapes. Then add some pink icing on top and create a slight crease at the base. Use a little water and blend carefully to make the ears stick on the head.
Step 13
Use grey icing to create tiny tools for the apron pocket, and to make the mini paintbrush.
Step 14
Use white icing mixed with a little orange, for the paint brush end. Give the bunny the paintbrush to hold, and a little miniature easel.