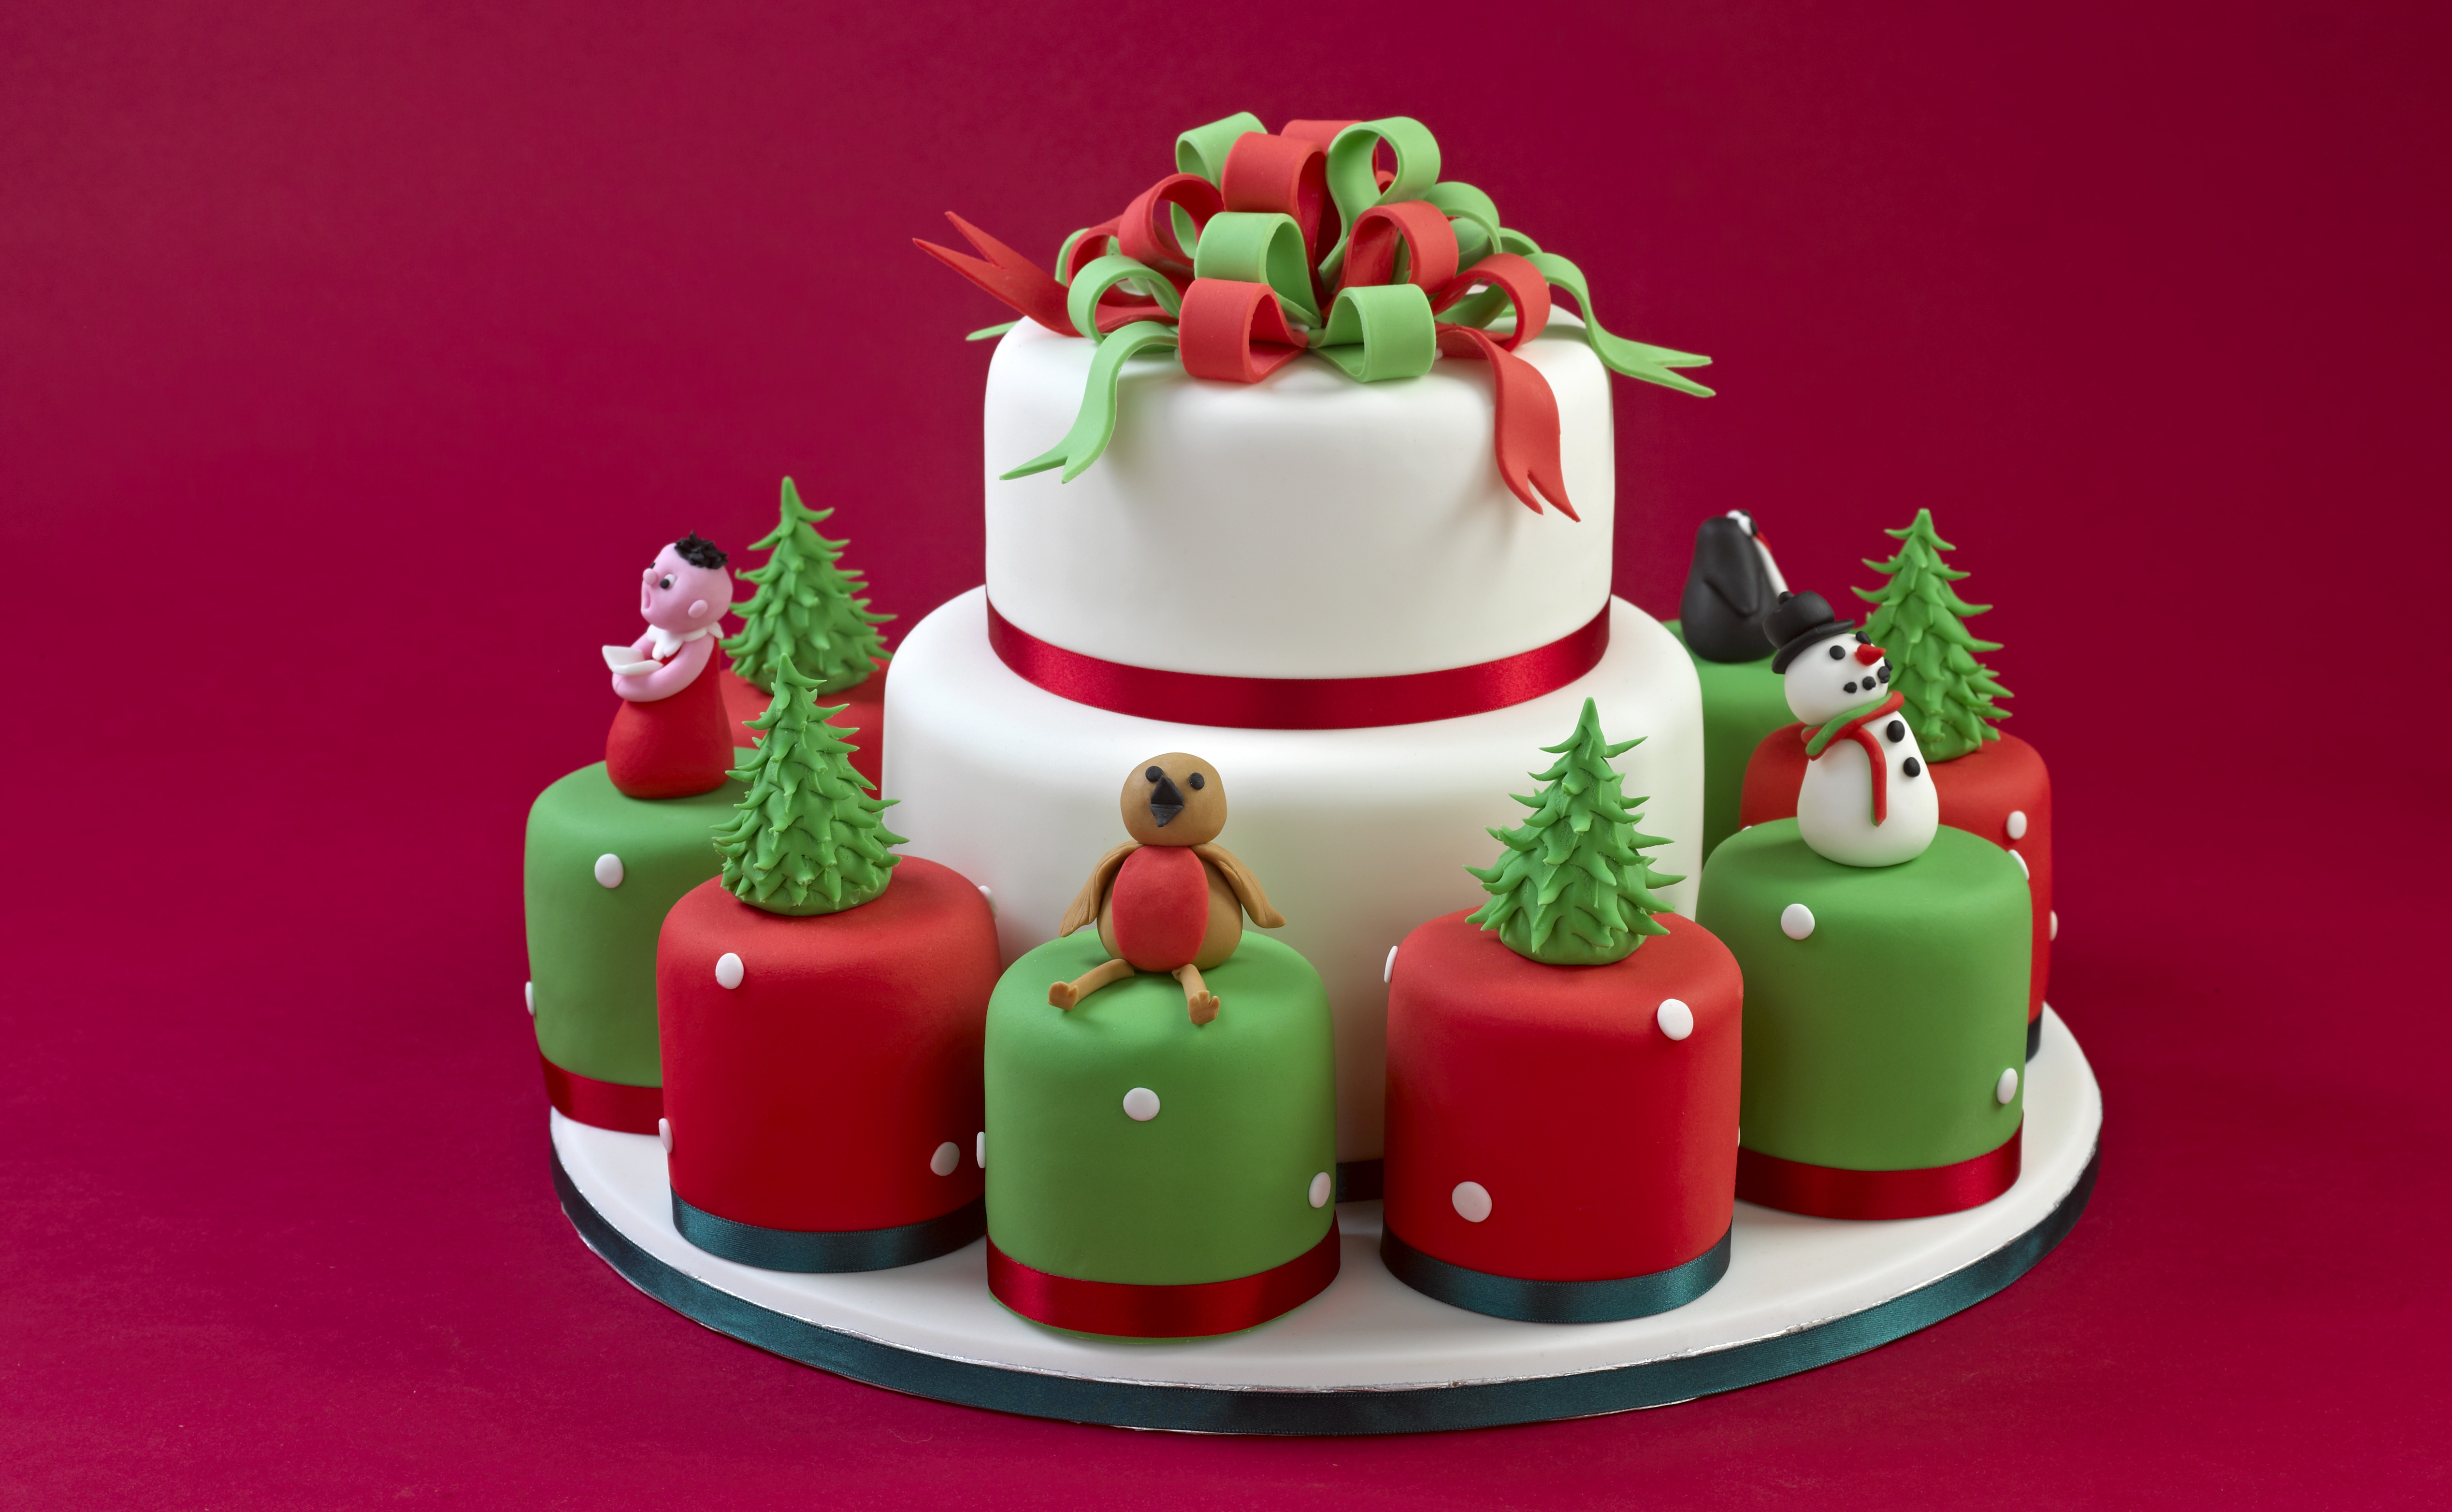
How to make a Penguin, Christmas Tree and Santa
Uploaded by Kayleigh McDonough
Decorating ingredients
- 250 g packets of Renshaw Ready to Roll Icing in; White, Jet Black, Poppy Red, Lincoln Green
- 100 g Renshaw White Ready to Roll Icing for the Penguin
- 100 g Renshaw Jet Black Ready to Roll Icing for the Penguin
- 100 g Renshaw Poppy Red Ready to Roll Icing for the Penguin
- 100 g Renshaw Lincoln Green Ready to Roll Icing for the Christmas tree
- 100 g Renshaw Poppy Red Ready to Roll Icing for Santa
- 100 g Renshaw White Ready to Roll Icing for Santa
- 100 g Renshaw Jet Black Ready to Roll Icing for Santa

Instructions
Decorating Instructions - How to make the Penguin:
Step 1
Knead 100g of the black icing until pliable and divide into three equal portions. Take one portion and roll into a ball, then roll it into a cone shape.
Step 2
Using a pair of small sharp scissors, make two cuts into the cone, one on each side as shown to create the two little wings. Lift the wings away slightly to make the look more effective.
Step 3
Knead some of the White Ready to Roll Icing until pliable and roll into a small ball, this should be about a sixth of the size of the penguin.
Step 4
Roll the white icing from a ball into a cone, flatten the cone by hand and attach to the body of the penguin to form the white chest.
Step 5
Roll out two small balls of white icing for the eyes and use a little black to form the pupils and attach to the head.
Step 6
Finish the penguin with a small cone of Renshaw Poppy Red Ready to Roll icing that has been flattened slightly to form the beak.
Decorating Instructions - How to make the Christmas Tree:
Step 7
Knead 100g of the Green Icing until pliable and divide into three equal portions.
Step 8
Take one portion of Green Icing and roll into a ball then a cone shape.
Step 9
Using a pair of small sharp scissors, cut into the cone of the icing at an angle, starting at the top of the cone working round and down to create the branches.
Step 10
Lift the branches away from the icing cone to create an angle.
Decorating Instructions - How to make Santa:
Step 11
Knead 100g of the red icing until pliable. Take one 50g portion and divide into two – one half will be used for the body and the other is for the arms and hat.
Step 12
To make the body, roll the red icing into a ball then into a cone. Flatten the top of the cone slightly so that you can easily attach the head and arms. Mark on two lines round the centre of the cone to mark out Santa's belt.
Step 13
Divide the remaining red icing in two and set one part aside for the hat. Roll the remaining piece into a thick sausage shape to make the arms. Roll the middle part of the sausage slightly thinner and cut in two with your knife. Using a small ball tool, gently make a small hole in the end of the arm shapes to represent the ends of the sleeves. Stick to the body using cooled boiled water.
Step 14
Roll two small round balls of black icing and stick to the bottom of the cone for Santa's boots, and a smaller ball of black icing for the belt buckle. Secure in place using cooled boiled water.
Step 15
Combine a small amount of white icing with the red icing to create a pink colour. Roll two small balls and stick these to the end of the arms using cooled boiled water to create hands.
Step 16
Roll a larger ball of the pink icing for the head, sticking on top of the body using cooled boiled water. Using the ball tools, mark in two small indentations for the eyes. Use a tiny ball of the pink icing for the nose and two small balls of white for the eyes. Dot the eyes with two tiny balls of Black Icing to make the pupils, sticking in place using cooled boiled water.
Step 17
Using the remaining piece of red icing, form into a cone shape for the hat. Flatten out the base slightly and curl over the top of the icing to add character to the hat, sticking in place using cooled boiled water.
Step 18
Knead a small amount of the white icing until pliable. Roll out a small piece on a surface dusted with icing sugar and cut a thin strip for the band around the hat. Stipple the band to make it look like fur using a small cocktail stick. Attach the band to the hat using cooled boiled water.
Step 19
Attach a small ball of white icing to the top of the hat to form the bobble.
Step 20
Use the remaining rolled out white icing to fashion a beard and stipple to make it look beard-like. Stick to the face using cooled boiled water.