Baking ingredients
- 125 g butter or margarine
- 55 g caster sugar
- 180 g plain flour – sieved
Decorating ingredients
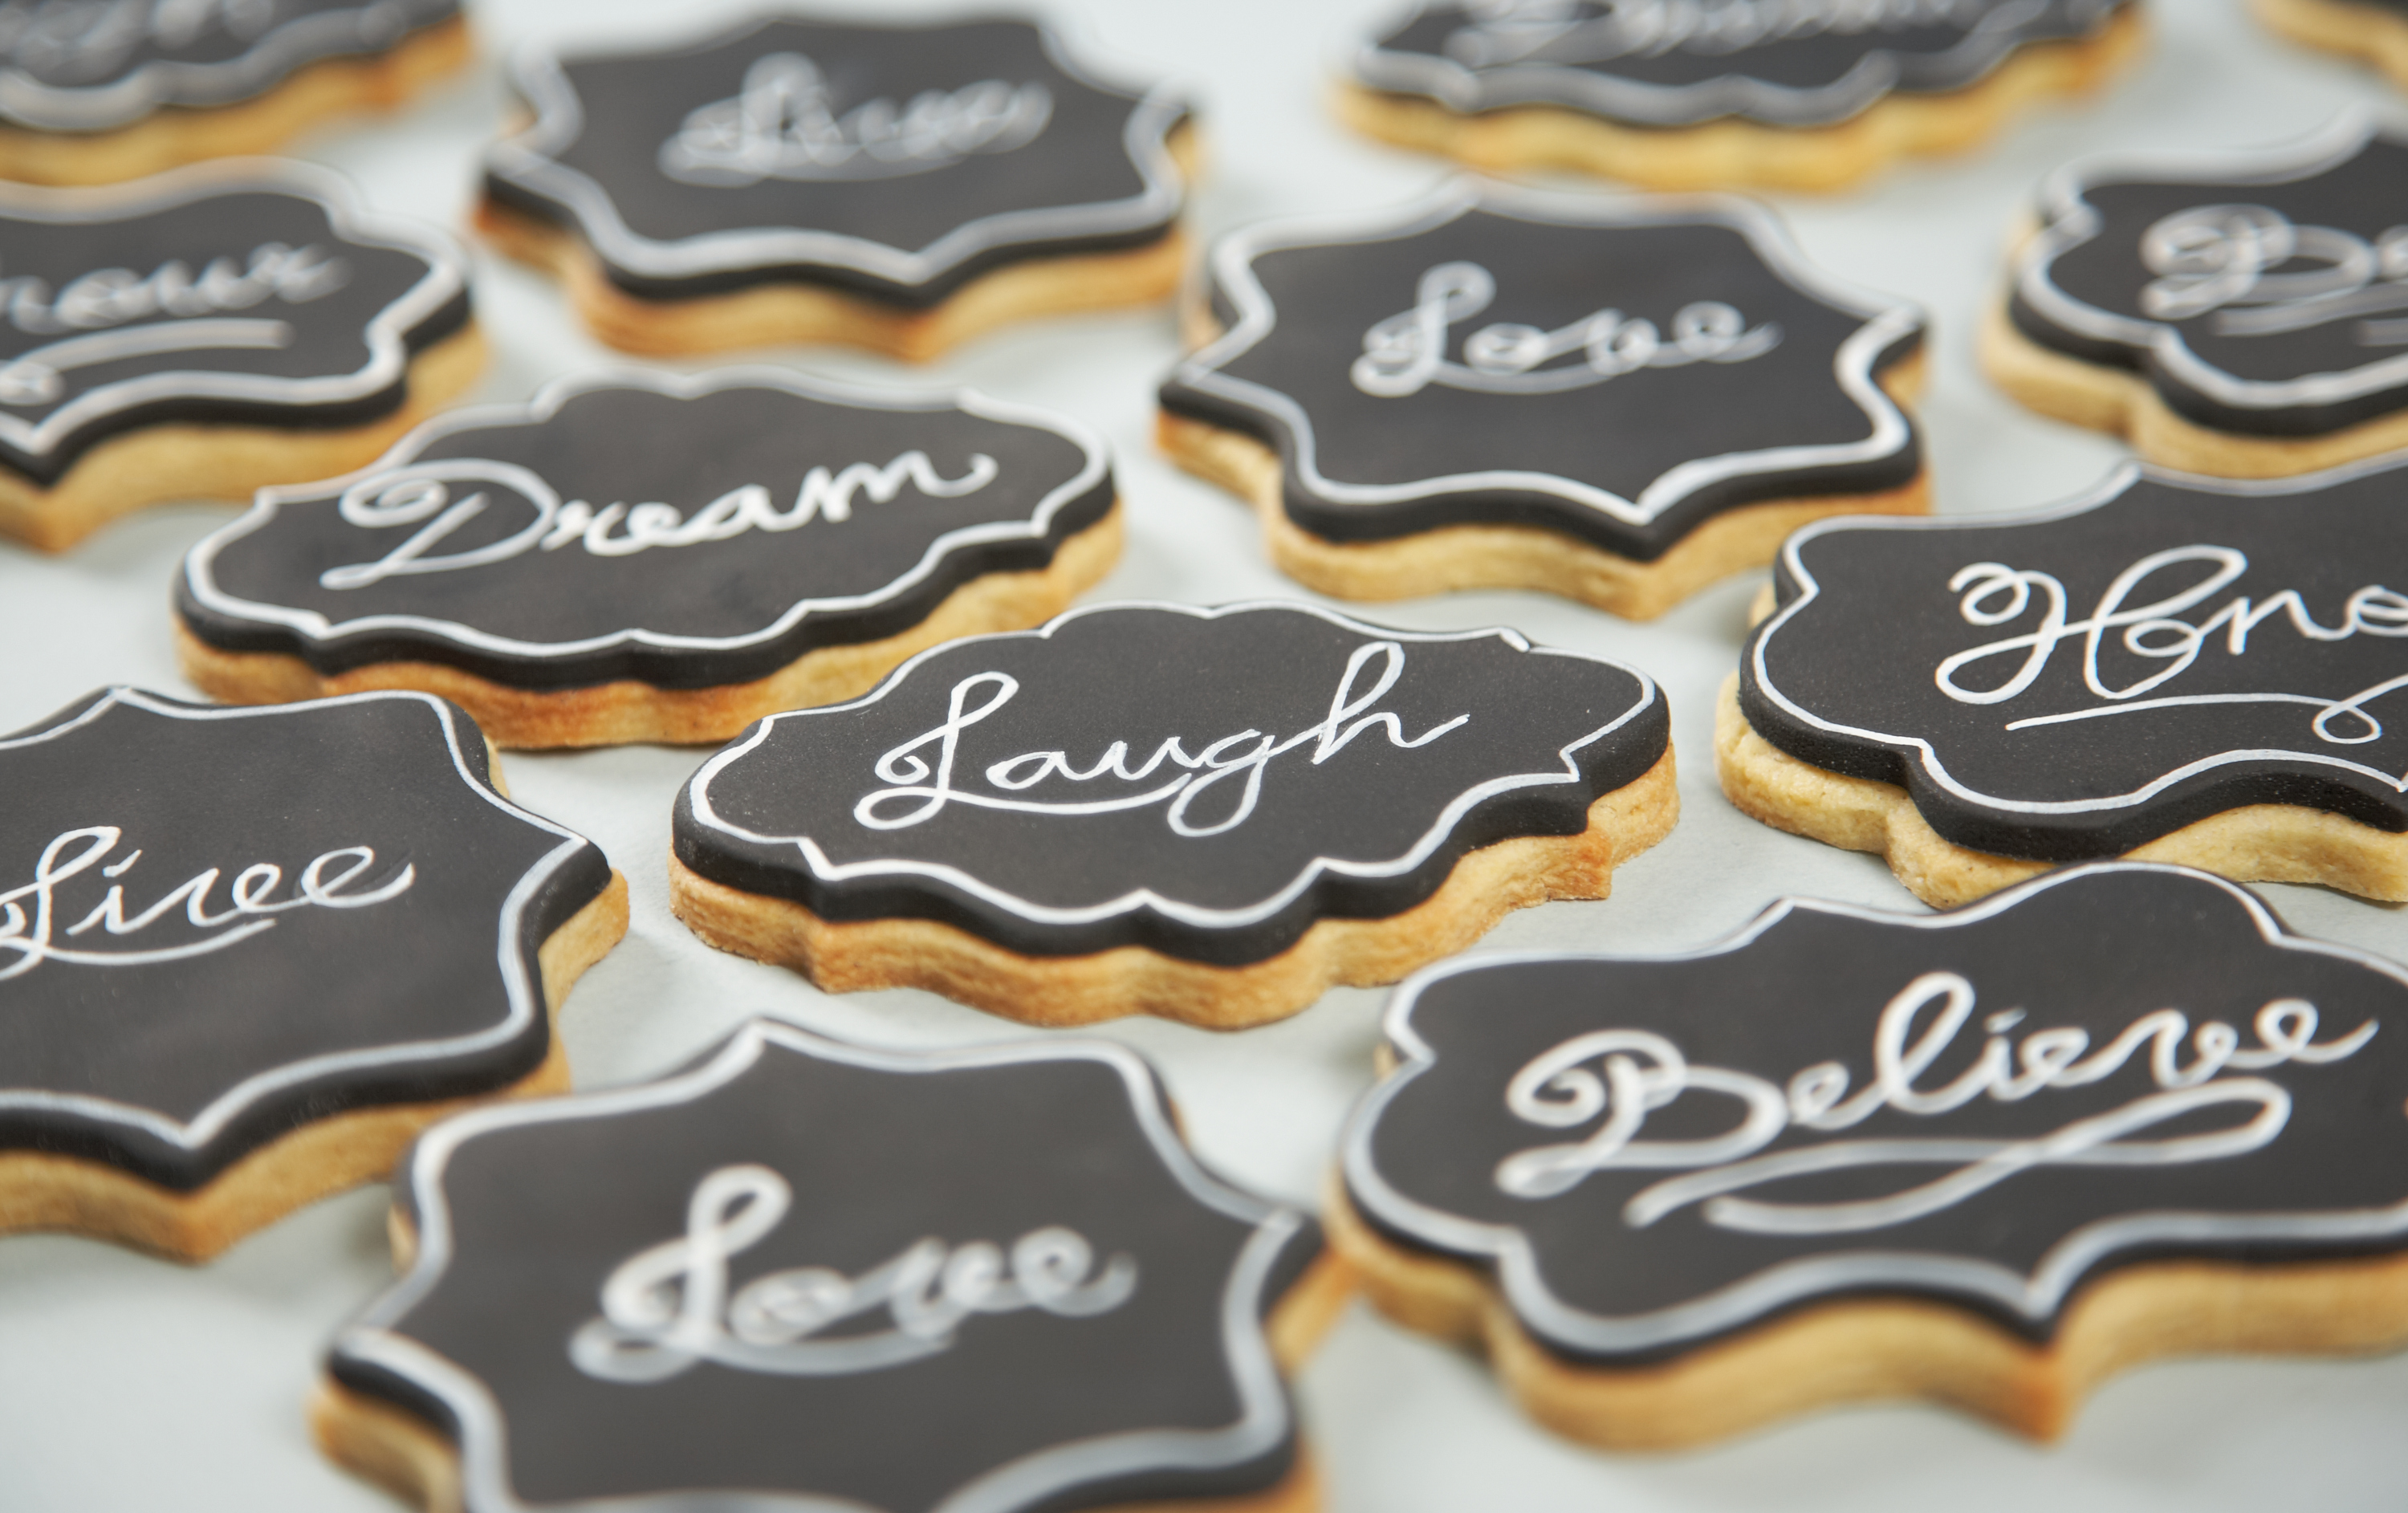
- Pre-baked ornate plaque shaped shortbread biscuits
- 250 g Renshaw Jet Black Ready to Roll Icing
- Apricot jam - warmed
- Super White Powder
Renshaw products used
Email this recipe
Instructions
Equipment:
Step 1
Rolling pin
Step 2
Palette knife
Step 3
Ornate plaque cutters (various sizes)
Step 4
Cooled boiled water
Step 5
Brushes
Step 6
Smoother
Baking Instructions:
Step 7
Heat the oven to 190°C/375°F/gas mark 5.
Step 8
Cream together the butter and sugar until it is nice and smooth then gradually stir in the flour to form a smooth paste.
Step 9
Wrap the shortbread in cling film and leave to rest in the fridge for 30 minutes.
Step 10
Knead the dough lightly and roll out to the desired thickness. Using your shaped cutters, cut out various shapes.
Step 11
Place the shapes on a greased and lined baking tray and bake in the oven for 15 to 20 minutes until pale-golden brown.
Step 12
Remove from the oven and leave to cool on a cooling rack for 30 minutes.
Decorating Instructions:
Step 13
Knead the Jet Black icing on a clean, dry surface until pliable. Dust surface with a little icing sugar if required then roll out to your desired thickness.
Step 14
Cut the ornate plaque shape out, using the same cutters used for the biscuits.
Step 15
Brush the front of the biscuit with apricot jam and place the Jet Black icing cut out to the prepared biscuit. Lightly press down using your smoother.
Step 16
Repeat this process for the other styles of plaques, making sure not to mark the front with the apricot jam.
Step 17
Once all biscuits are covered with the Jet Black icing, set to one side and allow to dry overnight. This will give you a good base to paint onto in the morning.
Step 18
Once your biscuits have dried overnight, take a small amount of the Super White Powder (roughly the size of a pea) and with a small paint brush add cooled boiled water to turn the powder into a paint consistency.
Step 19
Using a small paint brush, you can start to paint your inspirational words onto the biscuit. You can experiment with different fonts and styles, to get your desired finish.
Step 20
Having written your word onto the biscuit, use the same brush to make a line border around the edge (see picture).
Step 21
Once you have done one of the biscuits, repeat the same process for the remaining ones, changing the words on the different shapes. We have used the following words – laugh, love, dream, honour and believe.
Tips:
Step 22
These chalkboard biscuits are great for wedding favours or home made gifts.
Step 23
This technique can be used to decorate the other shaped biscuits, for example an apple shape. A thank you present for a teacher.

