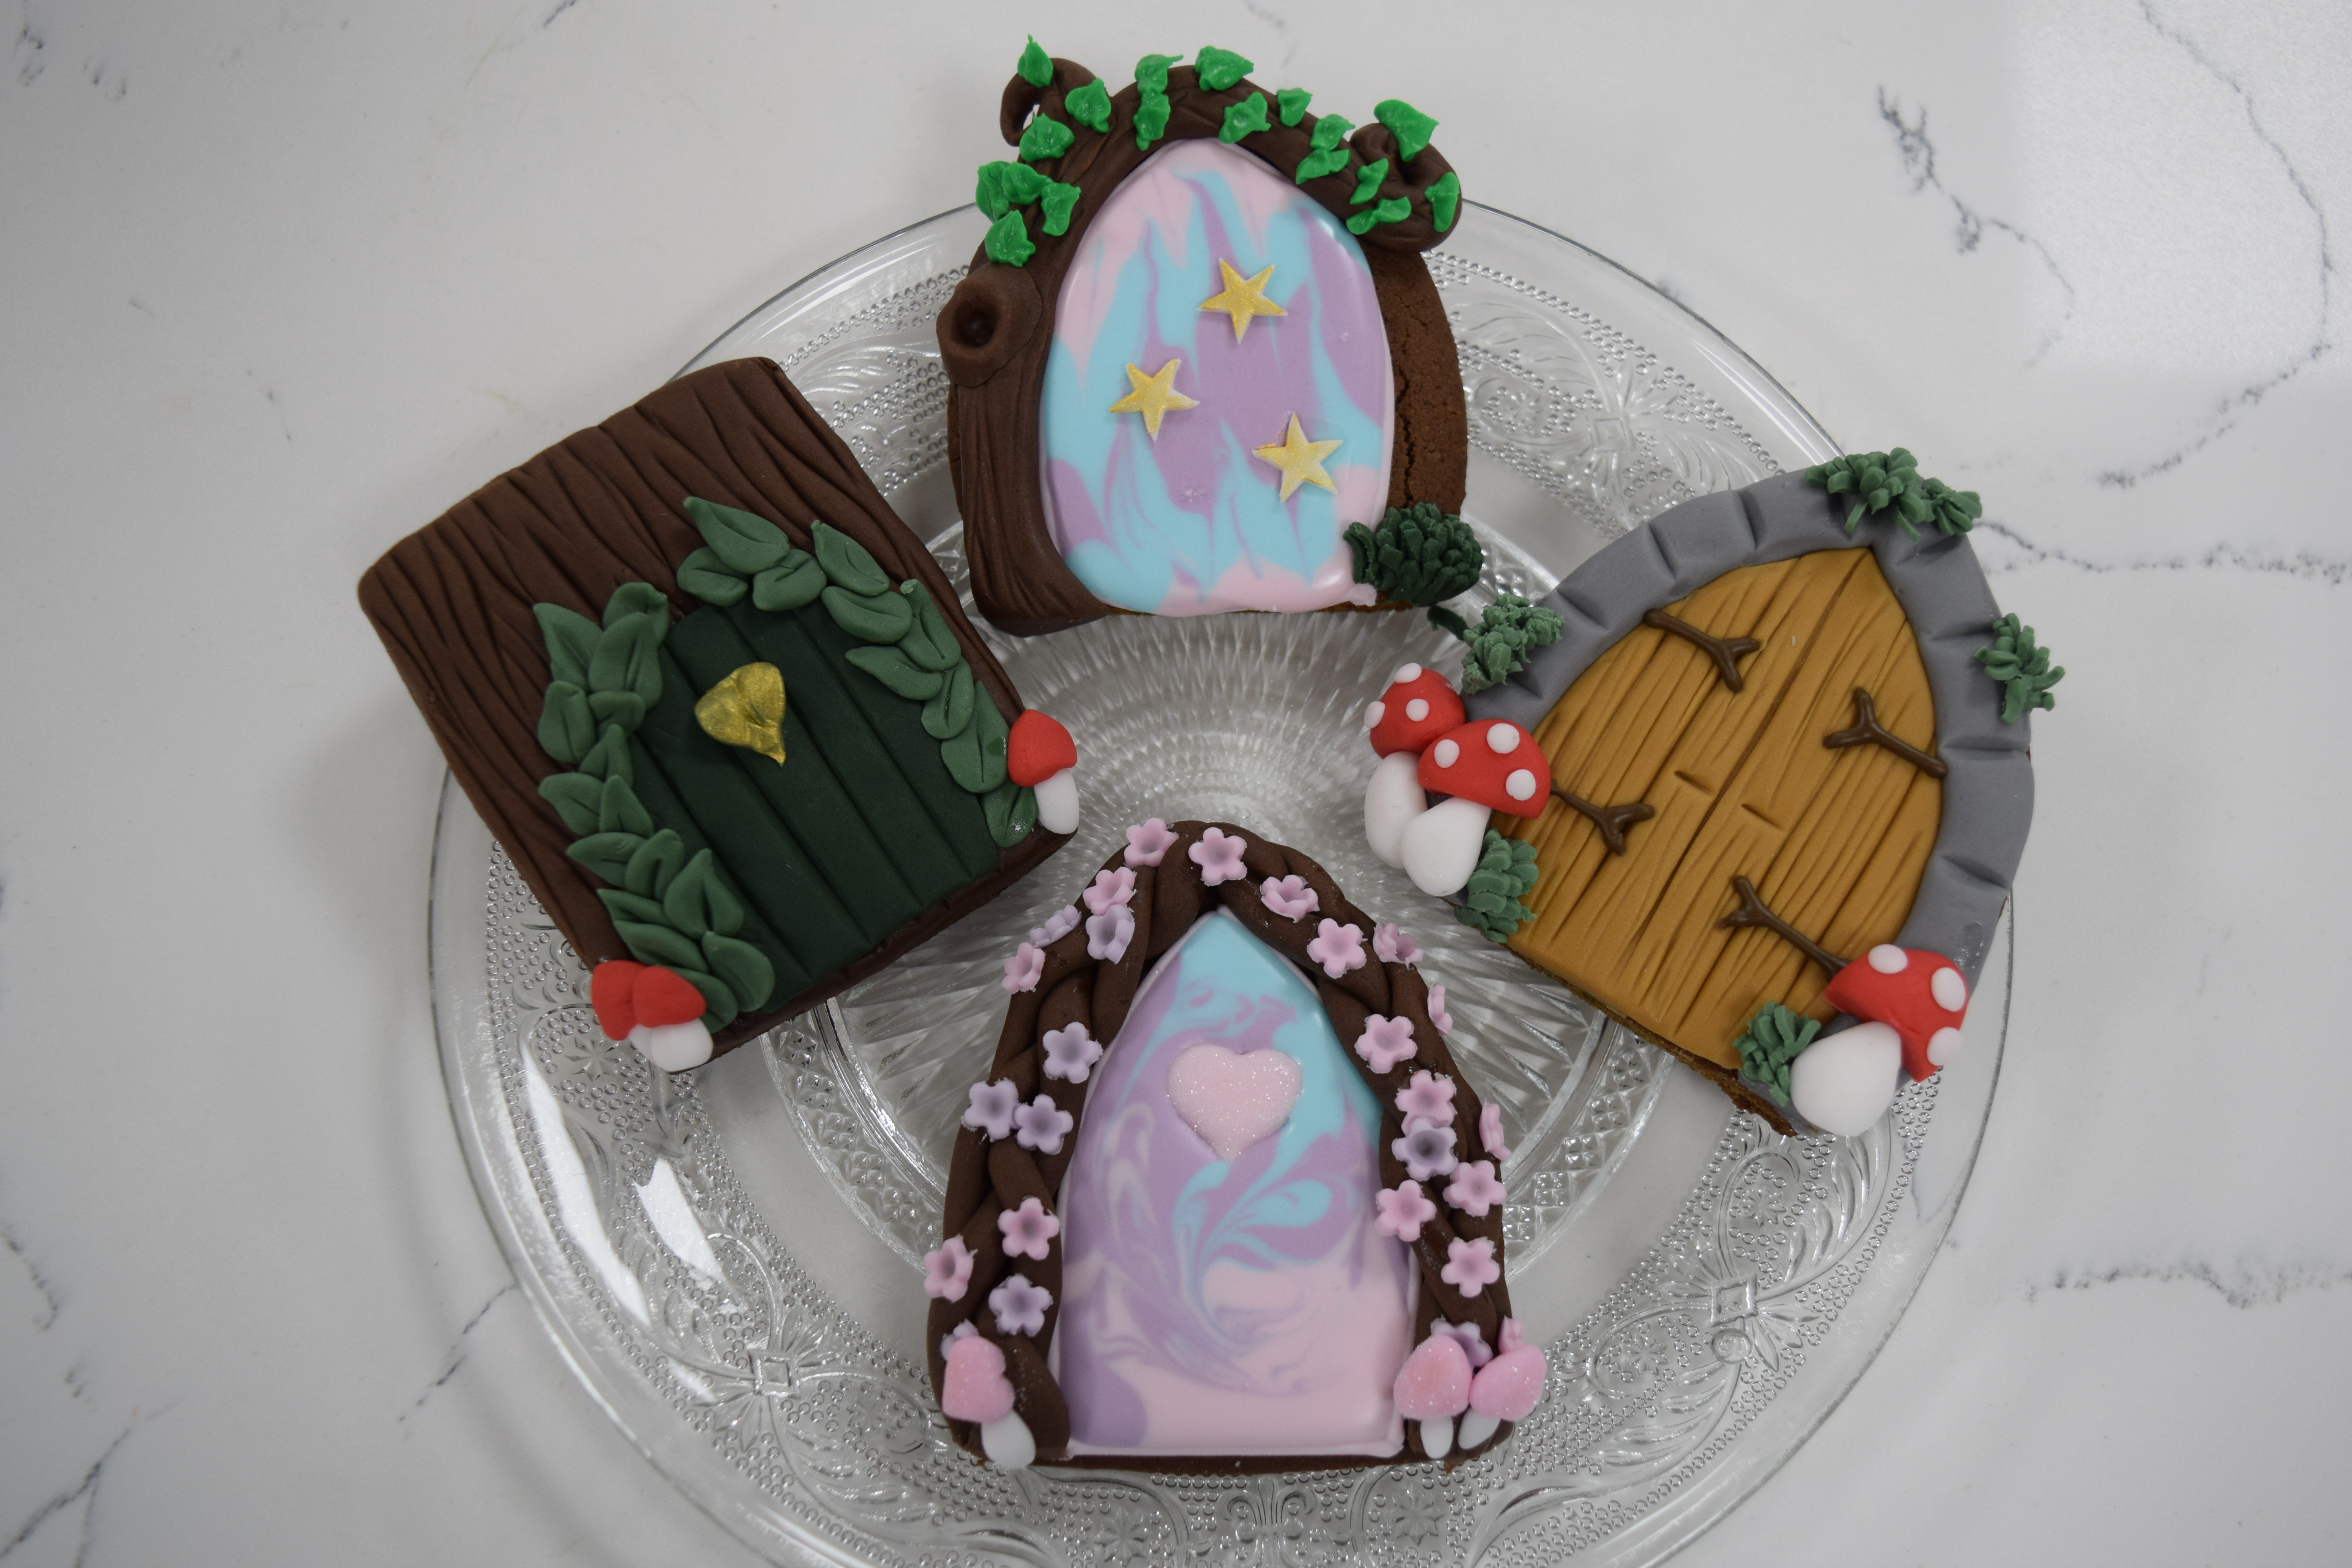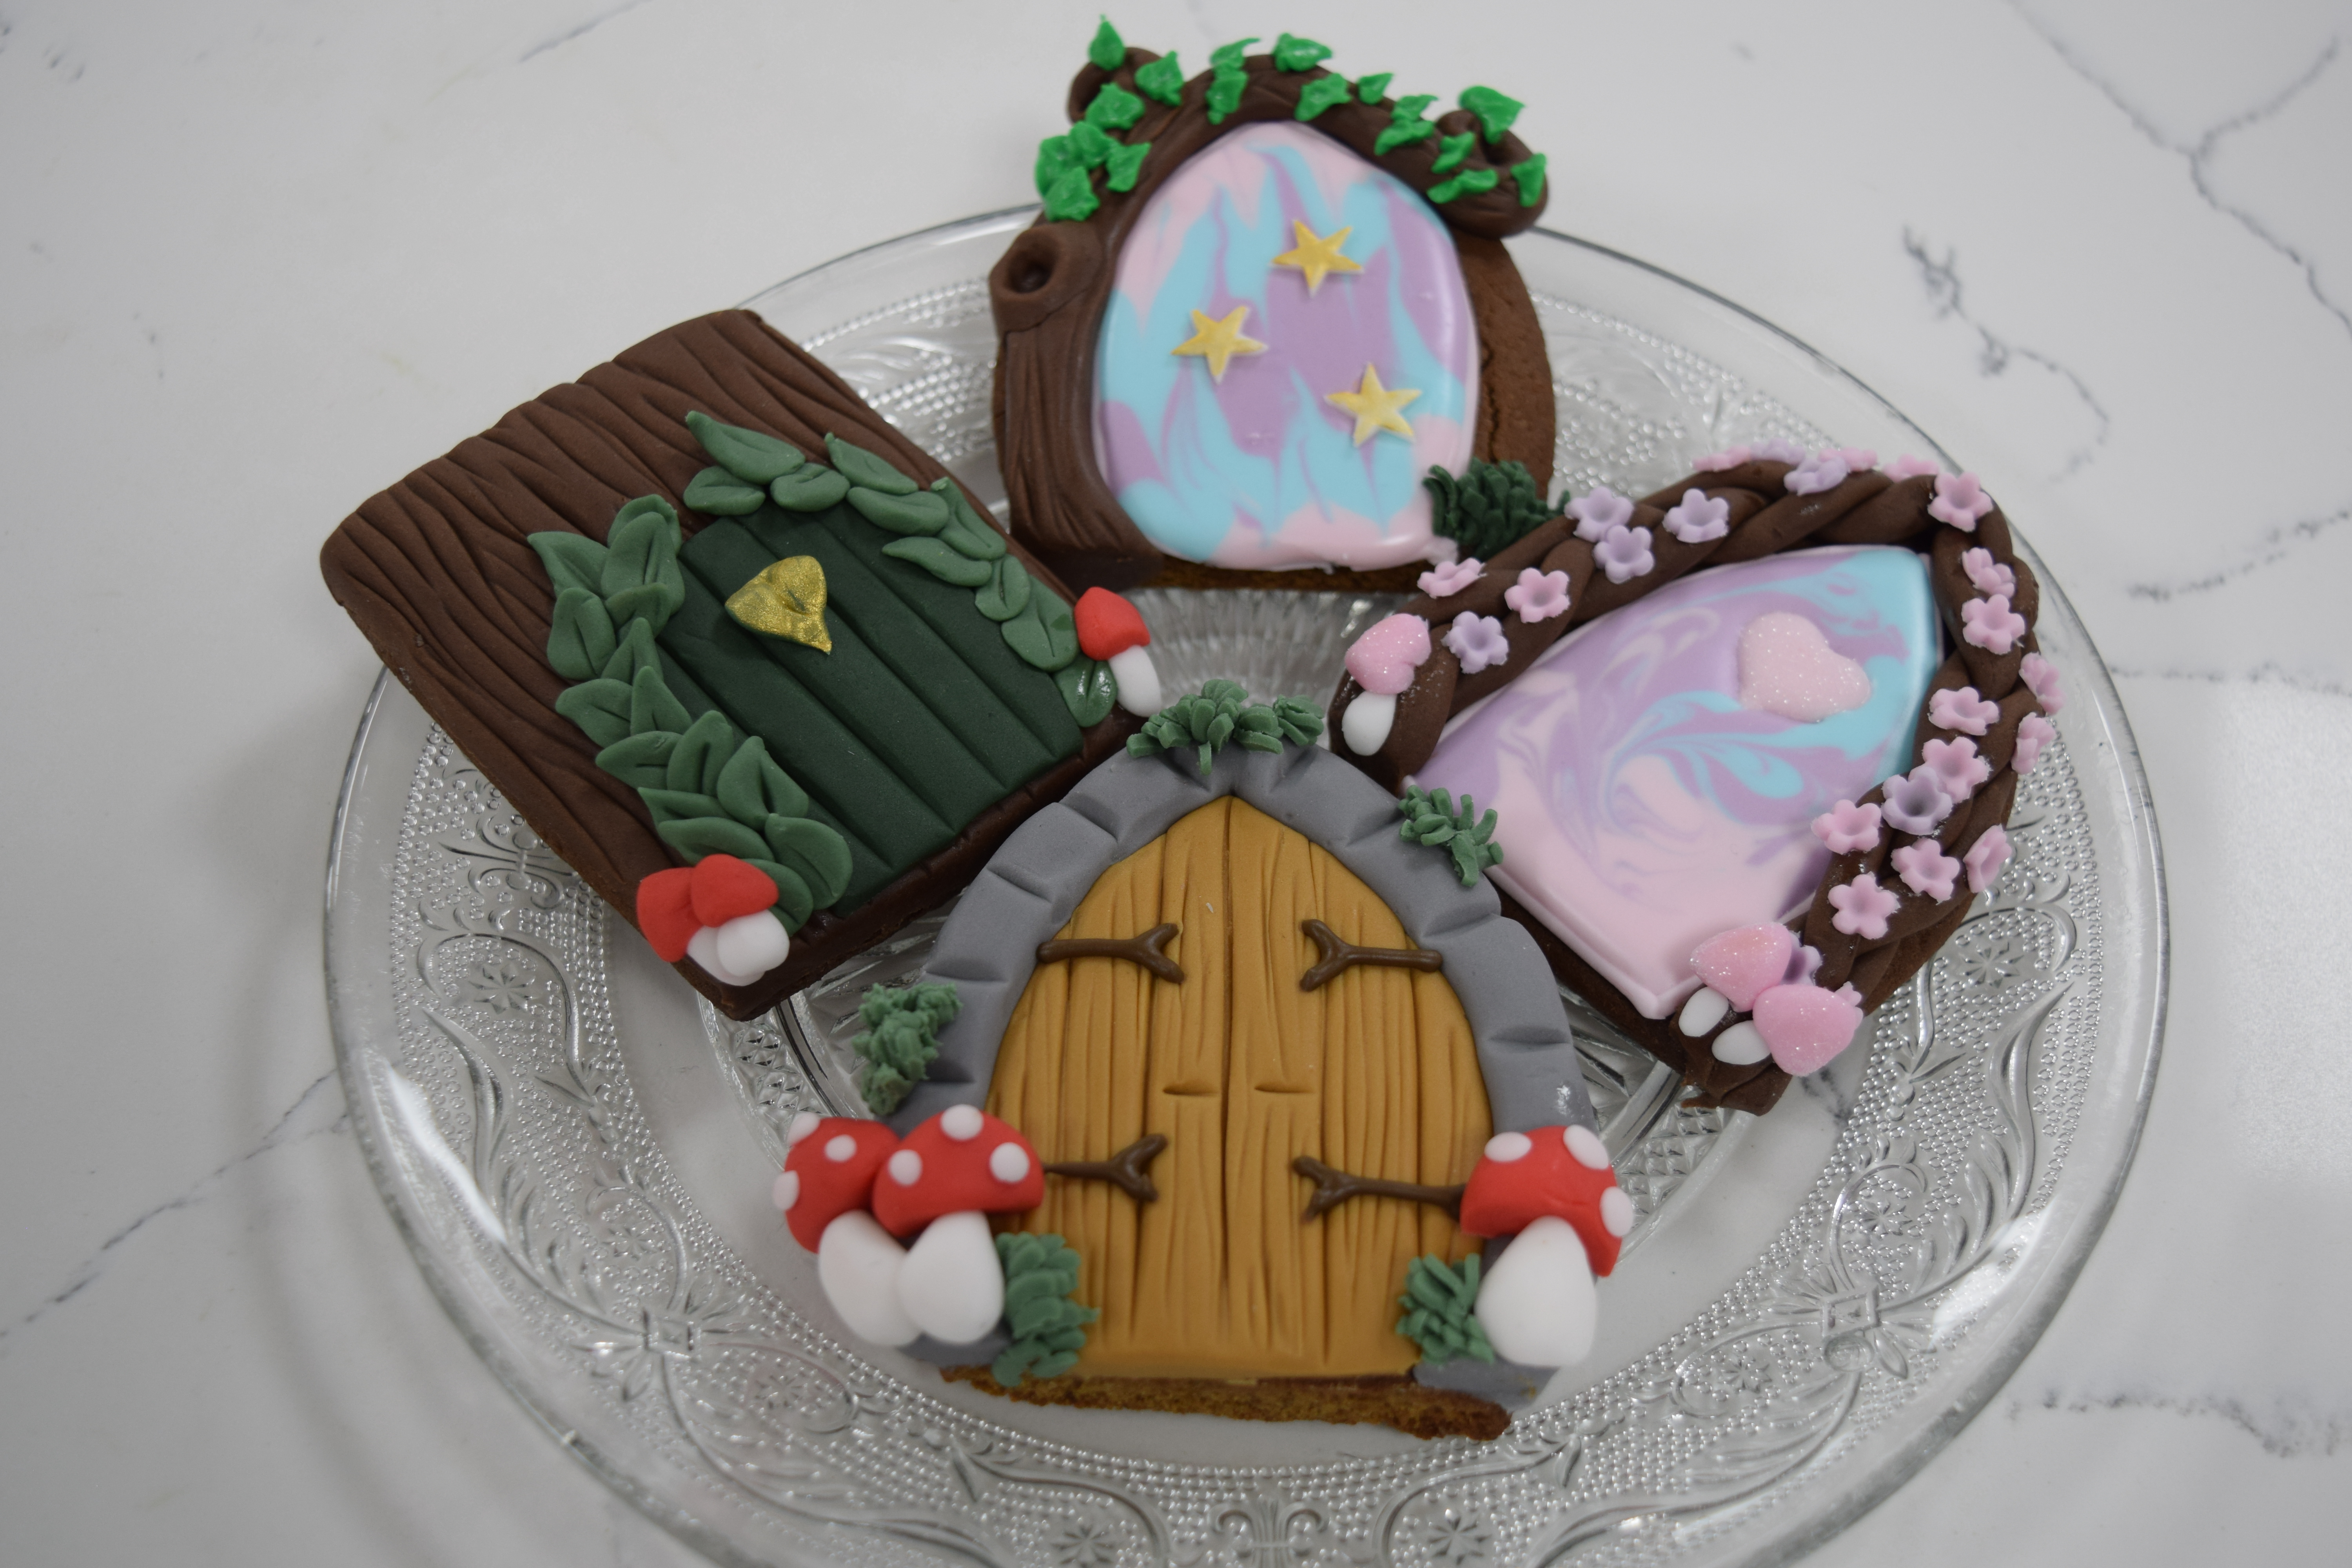
Gingerbread Fairy Doors with Ready to Roll Icing
Gingerbread Fairy Doors can be made in many different designs with ready to roll fondant icing, and are a great way to celebrate National Gingerbread Day on 5th June.
Uploaded by Kayleigh McDonough
Time to make
Skill Level
Intermediate
Serves
12 people
Baking ingredients
- 410 g self-raising flour
- 2 tsp ground ginger
- 1.5 tsp mixed spice
- 125 g firm unsalted butter, chilled
- 125 g black treacle
- 125 g dark muscovado sugar
- 1 egg, lightly beaten
Decorating ingredients
- 250 g Teddy Bear Brown Ready to Roll Icing
- 250 g Grey Ready to Roll Icing
- 250 g White Ready to Roll Icing (with added Holly Green ProGel)
- 250 g White Ready to Roll Icing
- 250 g Poppy Red Ready to Roll Icing
- 400 g White Royal Icing
- Rainbow Dust Brown ProGel
- Rainbow Dust Holly Green ProGel

Instructions
Baking the gingerbread:
Step 1
Preheat the oven to 200°C/ 400°F/ Gas Mark 6 and line two baking trays with greaseproof paper.
Step 2
Put the flour and spices in a bowl. Cut the butter into small pieces and add to the flour mix. Rub the ingredients together until they resemble breadcrumbs. Add the sugar, treacle, and the egg, mix to form dough.
Step 3
Wrap and chill in the fridge for 30 mins.
Step 4
Roll out the dough on a floured surface. Cut into required shapes - for pointed fairy doors, use a medium sized rugby ball shaped cutter then cut a straight edge to the bottom. Alternatively you can use a medium sized square or rectangle shaped cutter for different shaped doors. Transfer to the prepared baking trays.
Step 5
Bake for 12-15 mins.
Decorating the biscuit:
Step 6
Cover your gingerbread biscuits with jam ready to be covered with icing.
Step 7
Knead the brown icing until pliable and roll out. You can use the same rugby ball shaped cutter to get the shape of the door, or cut a square from the icing (big enough to cover the biscuit) and shaped the door whilst on the biscuit.
Step 8
Use a knife or modelling tool to add wood effect grooves into the door, and mark in door handles.
Step 9
Knead the grey icing until pliable and roll into a long sausage shape. Flatten slightly with the palm of your hand or a smoother, then stick around the brown door and trim off the excess with a knife.
Step 10
Use a Dresden tool to mark in stones around the grey border.
Step 11
Knead the white icing until pliable and roll into small cone shapes. Stick to the bottom corners of the door with a little water, and press the edges down slight so that it curves into the biscuit.
Step 12
Knead the red icing until pliable and roll into cone shapes. Cut the point off the cones and use the rounded edge for the top of the mushroom. Stick to the biscuit with a little water.
Step 13
Roll up small balls of white icing and stick to the top of the mushroom with a little water.
Step 14
Knead 250g of white icing until pliable and add a small amount of Rainbow Dust Holly Green ProGel at a time until you achieve the desired shade. Take a small ball of the green icing and push it through the back of a sieve to create moss/grass.
Step 15
Use a knife to move the moss from the sieve to the biscuit so that it stays together, and stick down with a little water.
Step 16
Take the amount of royal icing you need from the pot and move to a small bowl. Add a small amount of brown food gel paste at a time until you get the shade you want.
Step 17
Add the brown royal icing to a piping bag with a small nozzle tip, then pipe hinges onto the door.