Baking ingredients
- 1125 g unsalted butter - softened
- 1125 g caster sugar
- 6 tsp vanilla extract
- 20 large eggs
- 1000 g self-raising flour
- 125 g corn flour
- 18 tbsp milk
Decorating ingredients
- 625 g unsalted butter - softened
- 1200 g icing sugar
- 9 tbsp milk
- 5 tsp vanilla extract
- 12 tbsp raspberry jam
- 35 kg Renshaw Fuchsia Ready to Roll Icing
- 2 medium eggs - whites only
Renshaw products used
Email this recipe
Instructions
Baking Instructions:
Step 1
Preheat the oven to 180°C/ 350°F/gas mark 4.
Step 2
Grease and line 4 x 6in round cake tins and 4 x 8in round cake tins.
Step 3
In a large bowl, cream the unsalted butter and caster sugar and add 6 teaspoons of vanilla extract.
Step 4
Add the eggs, one at a time, adding a spoonful of flour between each.
Step 5
Fold in the rest of the self-raising flour and corn flour and when mixed in, add 18-20 tablespoons of milk.
Step 6
Divide the mixture between the eight lined cake tins and bake in two batches for about 25 minutes each until a cake skewer comes out of each cake clean.
Step 7
Leave cakes in their tins on a wire rack for 10 minutes, and then turn out on the wire rack and leave to cool completely.
Decorating Instructions:
Step 8
To make the buttercream, put the butter into a mixing bowl and beat until creamy in colour and light in texture. Sift the icing sugar into the bowl and combine, then add 9-12 tablespoons of milk and four teaspoons of vanilla extract and beat until smooth.
Step 9
Take half the prepared buttercream and the raspberry jam and sandwich the four layers of the smaller 6in cake and then the larger 8in cakes together. The cakes should be four sponge layers deep each. (Remember to cut the tops off each cake to give you a flat surface to work with)
Step 10
Cover the two cakes with a thin layer of the remaining buttercream.
Step 11
Knead 3.5kg Renshaw Fuchsia Ready to Roll Icing until pliable before rolling out.
Step 12
Lightly dust your work surface with icing sugar, roll out about 250g fuchsia icing and cover your 10inch cake drum, smoothing the edges. A fix the ribbon.
Step 13
Re-dust your work surface with icing sugar and roll out the icing to the desired thickness.
Step 14
Place the larger 8in sponge cake on a 10in iced cake drum, then lift the fuschia icing over the cake, smoothing down the sides with the palm of your hand. Using the smoothers push down the icing to create a line to trim excess icing from the edge of the cake. To give sheen to the surface, smooth with the palm of your hand.
Step 15
Repeat the process to cover the smaller 6in cake.
Step 16
Evenly space and insert four long pieces of plastic cake dowelling into the center of the larger 8in cake, ensuring that the smaller 6in sponge cake will cover the dowels when placed on top. Trim the dowels to the same height as the larger 8in cake using wire cutters or strong scissors. Place a 5in thin cake board on top of the dowels, making sure its rests on the dowels.
Step 17
Gently stack the smaller 6in fuchsia icing covered cake on top of the larger 8in iced cake. Using smoothers to push any icing down.
Step 18
Set to one side and make the royal icing. Do this by slowly beating the egg whites into the icing sugar until light and fluffy with a soft peak consistency.
Step 19
Add a N'o2 piping tube to a small piping bag and fill the bag half full with royal icing. (Do not over fill or add too much royal icing to your bag or you will find it difficult to add pressure and pipe).
Step 20
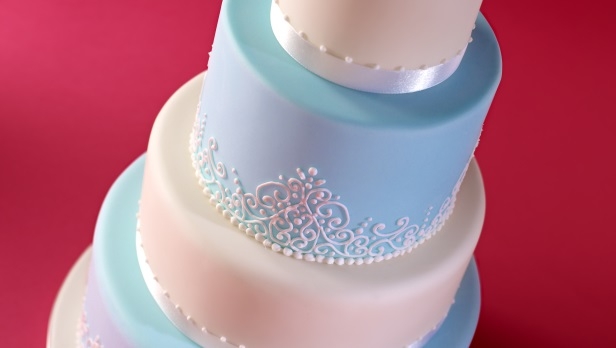
Now it's time to start piping the snail trail around the cake. Simply hold the piping bag at a 60 degree angle and create a teardrop of icing by applying pressure and then easing off. Continue to pipe teardrops positioning the bulb of each on top of the tail of the previous one. This makes a smooth line.
Step 21
Repeat the process for the other tier.
Step 22
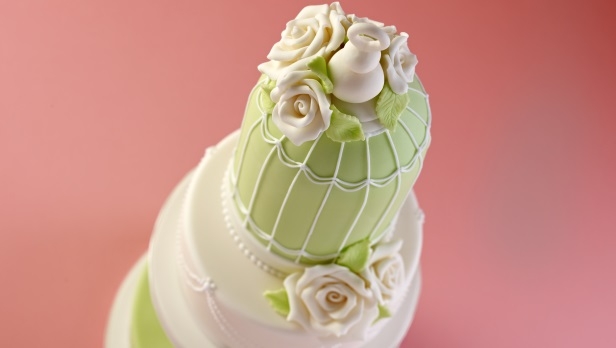
To create the brush embroidery floral patterns, pipe around one petal edge at a time. Then dip your paintbrush in the water then dab it on the paper towel, you want the brush to be damp only not dripping wet. Use the damp paintbrush to pull/stroke the icing in from the inside edge of the icing towards the center of the flower. (The outer edge line of the icing should remain unbroken and you want to see the brush strokes.)
Step 23
Repeat the process above with all the petals and leaves in your design, doing one at a time to ensure the royal icing piped lines don't set in place. (If you do not get defined lines either the brush is too wet or the icing is too runny). Dampen the paintbrush every time the brush starts to drag through the icing or no longer pulls it.
Step 24
Once you have covered all of your petals and leaves take the piping bag and pipe a couple of little dots in the centers of the flowers.