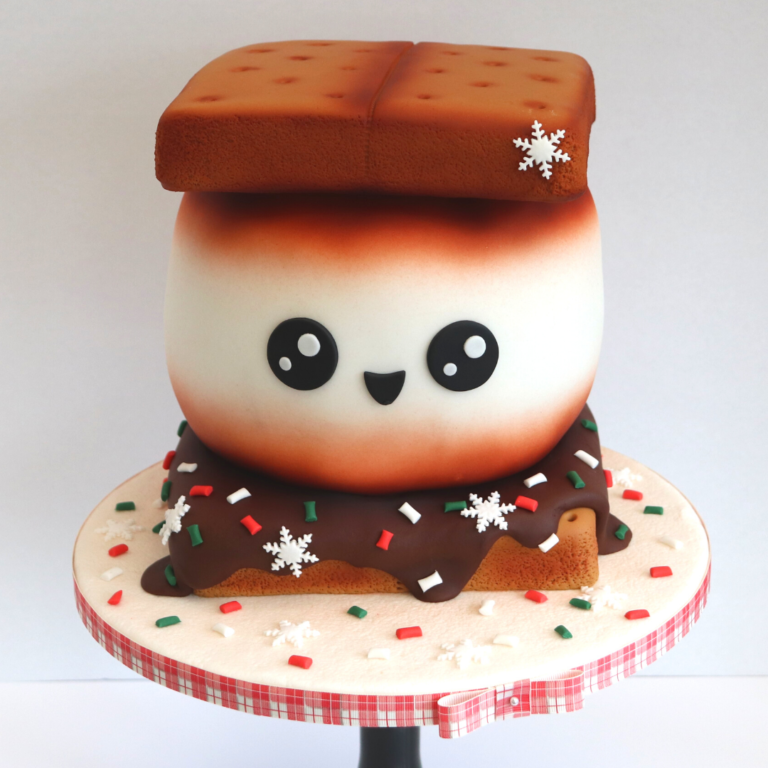
Festive S’mores Cake by Rob Baker-Gall
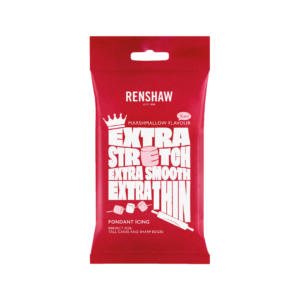
Have you tasted our brand-new Marshmallow Flavour Extra Ready to Roll Icing yet?
We wanted to do something special to help celebrate its release, so we asked cake blogger and YouTuber, Rob Baker-Gall of Mr Baker’s Cakes to create a marshmallow-inspired festive tutorial as part of the Renshaw Academy 12 Days of Christmas.
And in his words, when it comes to designing a special cake to celebrate the awesomeness of marshmallows, there could only be one option! FESTIVE S’MORES!
Rob’s delightful tutorial combines all the tasty flavours of a real s’more, with a cute and adorable Kawaii design that is sure to put a smile on anyone’s face this Christmas!
Uploaded by Kayleigh McDonough
Decorating ingredients
- 2 kg Renshaw Marshmallow Flavour Extra Ready to Roll Icing
- 1 kg Renshaw Teddy Bear Brown Ready to Roll Icing
- 500 g Renshaw Chocolate Flavour Ready to Roll Icing
- 250 g Renshaw Black Extra Ready to Roll Icing
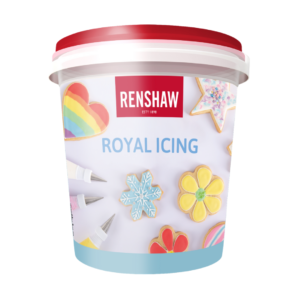
- 400 g Renshaw Royal Icing
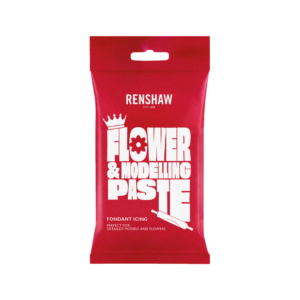
- 250 g Renshaw White Flower & Modelling Paste
- 250 g Renshaw Carnation Red Flower & Modelling Paste
- 250 g Renshaw Leaf Green Flower & Modelling Paste
- Rainbow Dust Colour Flo Liquid Food Colour in Brown
Renshaw products used

Email this recipe
Instructions
Prepare what you need:
Step 1
For the cake: Two 7” round chocolate cakes (Rob used a deliciously moist chocolate mud cake), One 7” square cake (Rob baked a biscotti flavoured cake, using the Sugar & Crumbs flavoured icing sugars), Milk chocolate ganache, Crushed Graham Crackers (or digestive biscuits if in the UK), Marshmallow Fluff Spread, Palette knife, Edge scraper, Flexi smoother, Cake smoother
Step 2
For the decoration: 12” round cake board, 6” round cake card, Two 7” square cake cards, 1kg Renshaw Ready to Roll Icing in Teddy Bear Brown, 2kg Marshmallow Flavour Renshaw Extra Ready to Roll Icing, Renshaw Royal Icing, 500g Renshaw Chocolate Flavour Ready to Roll Icing, 250g Renshaw Extra Ready to Roll Icing in Black, Eight food safe dowels, Rainbow Dust Colour Flo Liquid Food Colour in Brown, Renshaw Flower and Modelling Paste in White, Renshaw Flower and Modelling Paste in Carnation Red, Renshaw Flower and Modelling Paste in Leaf Green, Circle plunger cutters in extra small and medium, Snowflake plunger cutter in small, Small circle cutter, Craft knife, Rolling pin, Cornflour dusting pouch
Cutting, filling and ganaching your cakes:
Step 3
Begin by torting all of the cakes into 1” layers. For the square cakes, we are simply going to place each 1” layer on a cake card and cover in milk chocolate ganache. For the ‘marshmallow’ cake, we are going to carve it before filling, as otherwise this can be quite messy.

Step 4
Stack the four layers of the chocolate cake and, using the 6” cake card as a guide, round off the corners.

Step 5
Invert the pile of cakes and trim diagonally through one layer, before rounding off the corners once more.

Step 6
Place the new base layer on to your 6” cake card and spread with a thin layer of ganache, before piping a thicker dam around the edge. Fill the inside of the dam with a generous layer of Marshmallow Fluff Spread (this can be microwaved on your microwaves defrost setting for 10-15 seconds to make it easier to spread) and top with a layer of crushed biscuits.
 and top with a layer of crushed biscuits.")

Step 8
Crumb coat the cake with milk chocolate ganache and place in the fridge to chill for around 20-30 minutes, before applying a second layer of ganache.

Step 9
While the main cake is chilling, roll out 500g of Renshaw Ready to Roll Icing in Teddy Bear Brown and use it to cover one of your 7” squares, trimming off any excess.

Step 10
Use modelling tools to create the recognisable Graham Cracker features: score a seam down the centre of the ‘biscuit’ and poke in the ‘steam holes’ as per the image.

Step 11
Use a clean, new scrubbing brush to impress a crumbly texture around the edges of the ‘biscuit’. Repeat steps 9-11 for the second 7” square cake.

Step 12
Roll out 1.5kg of Marshmallow Flavour Renshaw Extra Ready to Roll Icing. Cover the main cake, smoothing the top before working your way down the sides of the cake. Remove the excess icing, being careful to work it under the curved edge of the cake. An edge scraper works well for this.

Step 13
With the remaining Marshmallow Flavour Renshaw Extra Ready to Roll Icing, roll this out and cover your 12” cake board, before using the scrubbing brush to impress more texture (make sure you have brushed off any Renshaw Ready to Roll Icing in Teddy Bear Brown that may be caught in the bristles).
.")
Step 14
When you are read to assemble your cake, spread a small amount of Renshaw Royal Icing to the rear of the covered board. Place your least favourite ‘biscuit’ layer on to the board towards the back.

Step 15
Take 500g of Renshaw Chocolate Flavour Ready to Roll Icing and roll it out slightly, before hand-shaping it to pull out various drip shapes.

Step 16
Place your Renshaw Chocolate Flavour Ready to Roll Icing on to the ‘biscuit’ cake and continue to manipulate the drips until you are happy with the final effect.

Step 17
Insert four food-safe dowels into the ‘biscuit’ cake before applying a little Renshaw Royal Icing to the tops of these.

Step 18
Carefully place the ‘marshmallow’ cake onto the ‘biscuit’, ensuring that the tallest side is at the front.

Step 19
Dowel the ‘marshmallow’ cake with the remaining four dowels, before applying a little more Renshaw Royal Icing to the tops and adding the second ‘biscuit’ cake.

Step 20
Fill your airbrush with Rainbow Dust Colour Flo Liquid Food Colour in Brown and use this to gently apply a layer of colour to the edge of the ‘biscuits’, along the centre seam and to the ‘steam holes’. You can use a folded square of kitchen roll in your other hand to mask the parts of the cake that you don’t want to colour. To create the charred effect on the ‘marshmallow’, build up several layers of colour, concentrating these where the ‘marshmallow’ meets the ‘biscuits’. You can also add a little Rainbow Dust Colour Flo Liquid Food Colour in Black if you want to make the colour even darker.

Step 21
Set the airbrushed cake aside to dry and grab your Renshaw Flower and Modelling Pastes – it’s sprinkles time! Roll out the Renshaw Flower and Modelling Pastes into thin sausages and use a knife to cut these into 5mm lengths. Set these aside to dry and roll out a little more Renshaw Flower and Modelling Paste in White. Use a small plunger cutter to cut a selection of snowflakes to add to your sprinkle selection. You can use your plunger cutters to cut your eye highlights now too.

Step 22
Roll out a small amount of Renshaw Extra Ready to Roll Icing in Black. Use your circle cutter to cut two eyes, before hand-cutting a small mouth shape with your craft knife.

Step 23
Time for the finishing touches! When attaching additional embellishments to an airbrushed cake, I prefer not to use a brush with water or edible glue as this can smear the paint. Instead, I prefer to steam the entire cake and use this to adhere the additional elements.


Step 25
Add your sprinkles to the ‘chocolate’ and all over the board. Finish by adding an appropriately festive ribbon to the cake board and you are done!

Step 26
And there you have it, your very own Festive S’mores Cake – a celebration of all things marshmallow and sure to be a hit at your next celebration. We hope you enjoyed finding out how to make Rob’s Festive S’mores Cake - if you have a go at it, make sure you tag both Renshaw and Mr Baker’s Cakes on social media so we can see the result! We love seeing what you’ve been baking at home!