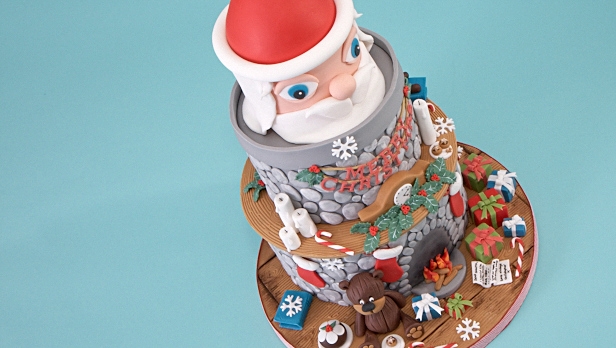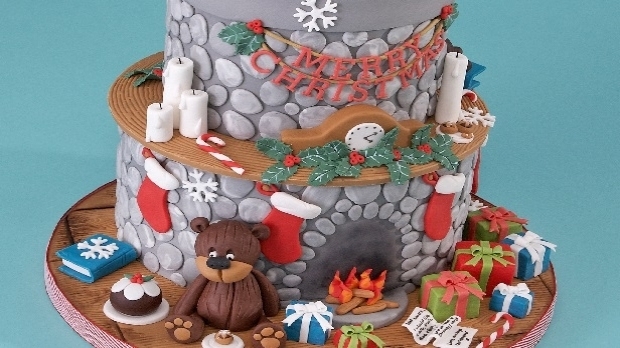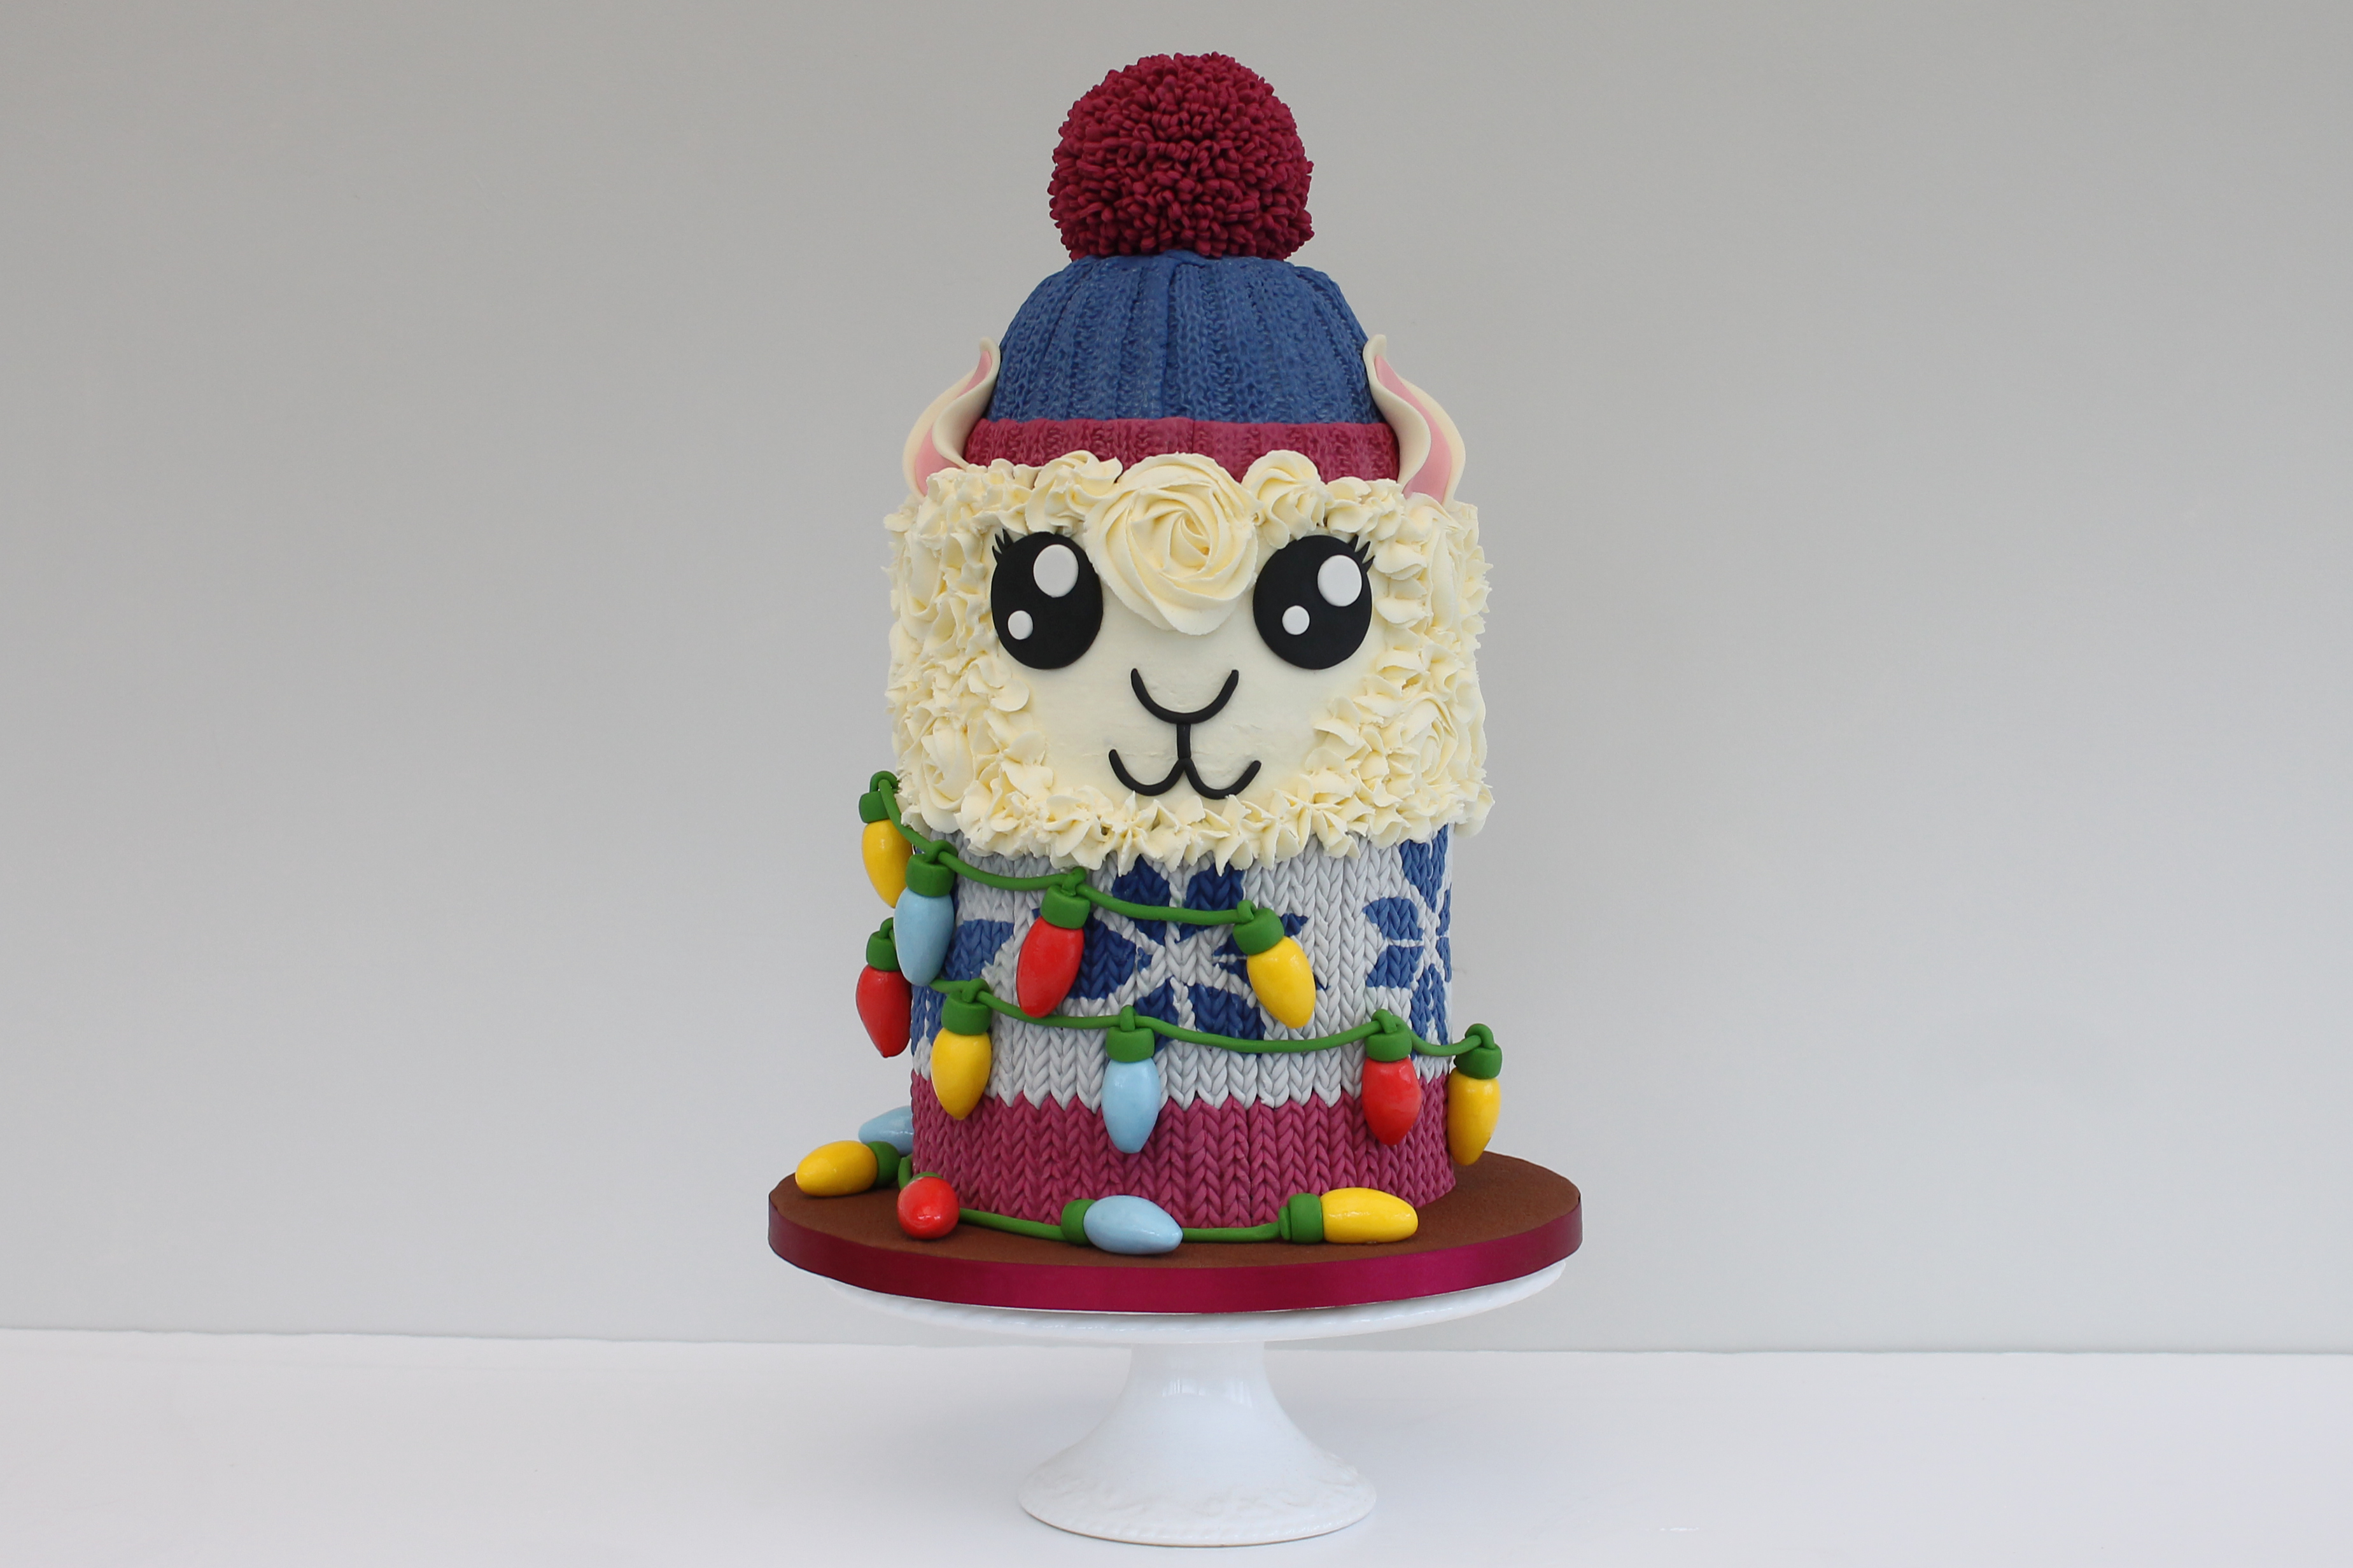
Festive Llama Cake by Rob Baker-Gall
You’ve seen unicorn cakes, you’ve seen reindeer cakes… but now, it’s time to avoid the Christmas drama with our Festive Llama Cake.
We asked Rob Baker-Gall to design a Christmas cake with a difference to showcase our four brand-new Renshaw Ready to Roll Icing colours; Cassis, Sapphire Blue, Cool Grey and Dark Brown!
Rob is the mastermind behind Mr Baker’s Cakes – an award-winning hobby and passion project that keeps him sane alongside a very demanding full-time career as a primary school teacher.
In the four years since he exploded on to the cake scene, Rob has become well-known for his fun-packed sculpted cakes, with multiple appearances in both print media and on television, and he loves that his passion for all-things-sugar is able to bring joy to so many.
Rob also runs the hugely successful Mr Baker’s Blog – one of the UK’s top-rated baking and caking blogs and the home of his weekly online magazine, Something Sweet. His blend of topical articles and posts, recipes, tutorials and interviews with some of the most recognisable faces in cake have made Rob’s blog an essential resource for any caker and he is passionate about sharing and celebrating the incredible talents out there in the world of cake.
Uploaded by Kayleigh McDonough
Decorating ingredients
- 4-5 x 7" cakes (see step 2)
- Buttercream (see step 3)
- 2 x 250g Renshaw Ready to Roll Icing in Dark Brown
- 3 x 250g Renshaw Ready to Roll Icing in Cassis
- 2 x 250g Renshaw Ready to Roll Icing in Sapphire Blue
- 3 x 250g Renshaw Ready to Roll Icing in Cool Grey
- 1 x 250g Renshaw Extra Ready to Roll Icing in White
- 1 x 250g Renshaw Extra Ready to Roll Icing in Yellow
- 1 x 250g Renshaw Extra Ready to Roll Icing in Blue
- 1 x 250g Renshaw Extra Ready to Roll Icing in Green
- 1 x 250g Renshaw Extra Ready to Roll Icing in Red
- 1 x 250g Renshaw Extra Ready to Roll Icing in Black
- 300g Rice Cereal
- 300g Marshmallows
- Rainbow Dust ProGel in Pink
Renshaw products used

Email this recipe
Instructions
Prepare your equipment:
Step 1
You will need: Chunky Knit Mould from Karen Davies Sugarcraft Ltd, Chunky Rib Mould from Karen Davies Sugarcraft Ltd, 12” cake board, 1m Cassis ribbon, New clean scrubbing brush, Food safe cake dowels, Palette knife, Edge Scraper, Flexi smoother, Cake smoother, Small circle cutter, Circle plunger cutters in extra large and medium, Piping bag with an Open Star piping tip – 1M, Daisy plunger cutter in medium, Craft knife, Sharp kitchen knife, Rolling pin, Cornflour dusting pouch
Bake your sponge cakes:
Step 2
Begin by preparing your cakes. I used four layers of my 3” deep Spiced Orange Cake – a tasty alternative to a traditional Christmas cake. Find the recipe over at Mr Baker’s Blog.
Make your buttercream:
Step 3
Next, prepare a batch of zesty orange buttercream. I used 1kg of icing sugar, 500g of slightly salted butter, 2tbsp of royal icing powder and 2tbsp of orange extract. Because you will be using this to pipe the fur texture, you want this as pale as possible so be sure to whip the butter as much as possible. You can also use titanium dioxide powder to pump up the whiteness if you’d like.
Fill and stack your cakes:
Step 4
Fill and crumb coat two of the cakes with your orange buttercream and place these in the fridge to chill. Then dowel these and place a 6” cake card on top before adding the third and fourth layers of cake. Crumb coat the entire cake, before chilling and giving a final layer of buttercream.

Step 5
Return this to the fridge to chill (or leave to set at room temperature if your fridge isn’t tall enough).
Covering the board:
Step 6
Lightly spray or brush cooled, boiled water on to your cake board, before rolling out the dark brown sugarpaste to 3-5mm thick and using it to cover the board.

Step 7
Use the kitchen knife to trim the excess icing around the edge of the board using only a downward motion and regularly cleaning the knife to avoid any dragging or tearing.


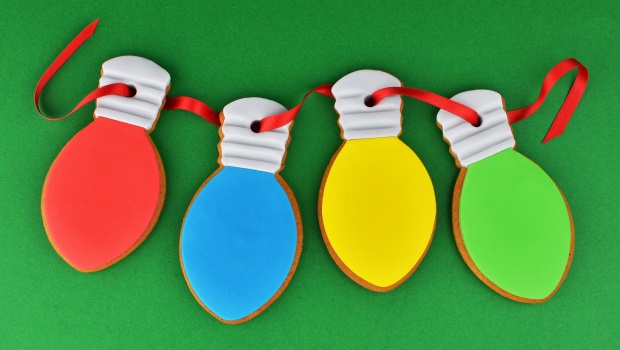
Making the Christmas lights:
Step 10
Next, we are going to make the Christmas lights. Take a selection of Renshaw Extra Ready to Roll Icings – I used red, yellow and baby blue.

Step 11
Hand shape small amounts of the sugar paste into narrow egg-shapes – ensuring one end is slightly pointy and the other is flat.


Step 13
Using the Renshaw Extra Ready to Roll Icing in green, hand shape fat, round discs – one for each of the bulbs you have made.

Step 14
Using a small amount of cooled, boiled water, attach the green discs to the flat end of each bulb. Leave to dry.

Creating the hat shape:
Step 15
Next, prepare your rice cereal mixture by melting 300g of marshmallows in the microwave. Start by heating on full power for one minute, before removing and stirring. Return to the microwave for another 30 seconds and then remove and stir again. Repeat until all of the marshmallows have fully melted.
Step 16
Pour in 300g of rice cereal and combine thoroughly.
Step 17
Pour out on to a greased worktop and knead together.
Step 18
Prepare a suitable hat mould (I used a 6” Pyrex bowl), by greasing it with a little oil, before lining it with two layers of cling film. Fill to the top with your rice cereal mixture and press in thoroughly (reserving a little aside for your hat bobble which you'll need to shape into a ball). Leave to stand for a few minutes before removing from the mould and leaving to set fully.
, by greasing it with a little oil, before lining it with two layers of cling film. Fill to the top with your rice cereal mixture and press in thoroughly (reserving a little aside for your hat bobble which you'll need to shape into a ball). Leave to stand for a few minutes before removing from the mould and leaving to set fully.")
Step 19
Add a small amount of buttercream to the centre of your prepared board and then place the cake on top.

Step 20
Use the buttercream to crumb coat the rice cereal hat to ensure that no lumps and bumps show through when you cover it with sugar paste.

Making the Christmas jumper:
Step 21
Next, we are going to tackle the knit-effect ‘Christmas jumper’. To use regular Renshaw Ready to Roll Icing with Karen Davies Sugarcraft moulds, you will need to strengthen it slightly. You can do this by adding around 1/2tsp of tylose powder to each 250g packet of Renshaw Ready to Roll Icing. Knead this in until it has been entirely absorbed. Place in an airtight plastic bag and set it aside until you are ready to use it.

Step 22
Prepare the moulds, following the instructions provided.
Step 23
Line the Karen Davies Sugarcraft Chunky Knit Mould with a good dusting of cornflour and tap out the excess.
Step 24
Start to roll out your Cassis Renshaw Ready to Roll Icing to fit the mould. Lay the paste into the mould and start to press into one edge of the mould before rolling your way up with a small rolling pin.
Step 25
Turn over and release the paste onto the worktop. Use a sharp kitchen knife or a pizza wheel to slice the paste in half lengthways, before attaching these to the cake using cooled, boiled water. If you want the pattern to match perfectly, you will only be able to use the top half of each moulded piece. Wrap these around the base of the cake until they meet at the back.
Step 26
Next, roll out your dark blue Renshaw Ready to Roll Icing as thinly as possible and cut out 24 small diamonds using a sharp kitchen knife (or a geometric cutter if you have one).
.")
Step 27
Place six diamonds into the mould (as per the image) before adding a layer of Cool Grey Renshaw Ready to Roll Icing on top. Repeat the same technique to mould the paste and then trim the piece to the edges of the star pattern. Attach this to the front centre of the cake and then repeat two more times to complete the jumper pattern. Fill in the rest of the jumper using plain Cool Grey Renshaw Ready to Roll Icing until it meets at the back of the cake.
 before adding a layer of Cool Grey Renshaw Ready to Roll Icing on top. Repeat the same technique to mould the paste and then trim the piece to the edges of the star pattern. Attach this to the front centre of the cake and then repeat two more times to complete the jumper pattern. Fill in the rest of the jumper using plain Cool Grey Renshaw Ready to Roll Icing until it meets at the back of the cake.")
Covering the hat:
Step 28
Next take the Karen Davies Sugarcraft Chunky Rib Mould and your Sapphire Blue and Cassis Renshaw Ready to Roll Icings and repeat the above methods to apply the knit effect to your hat.

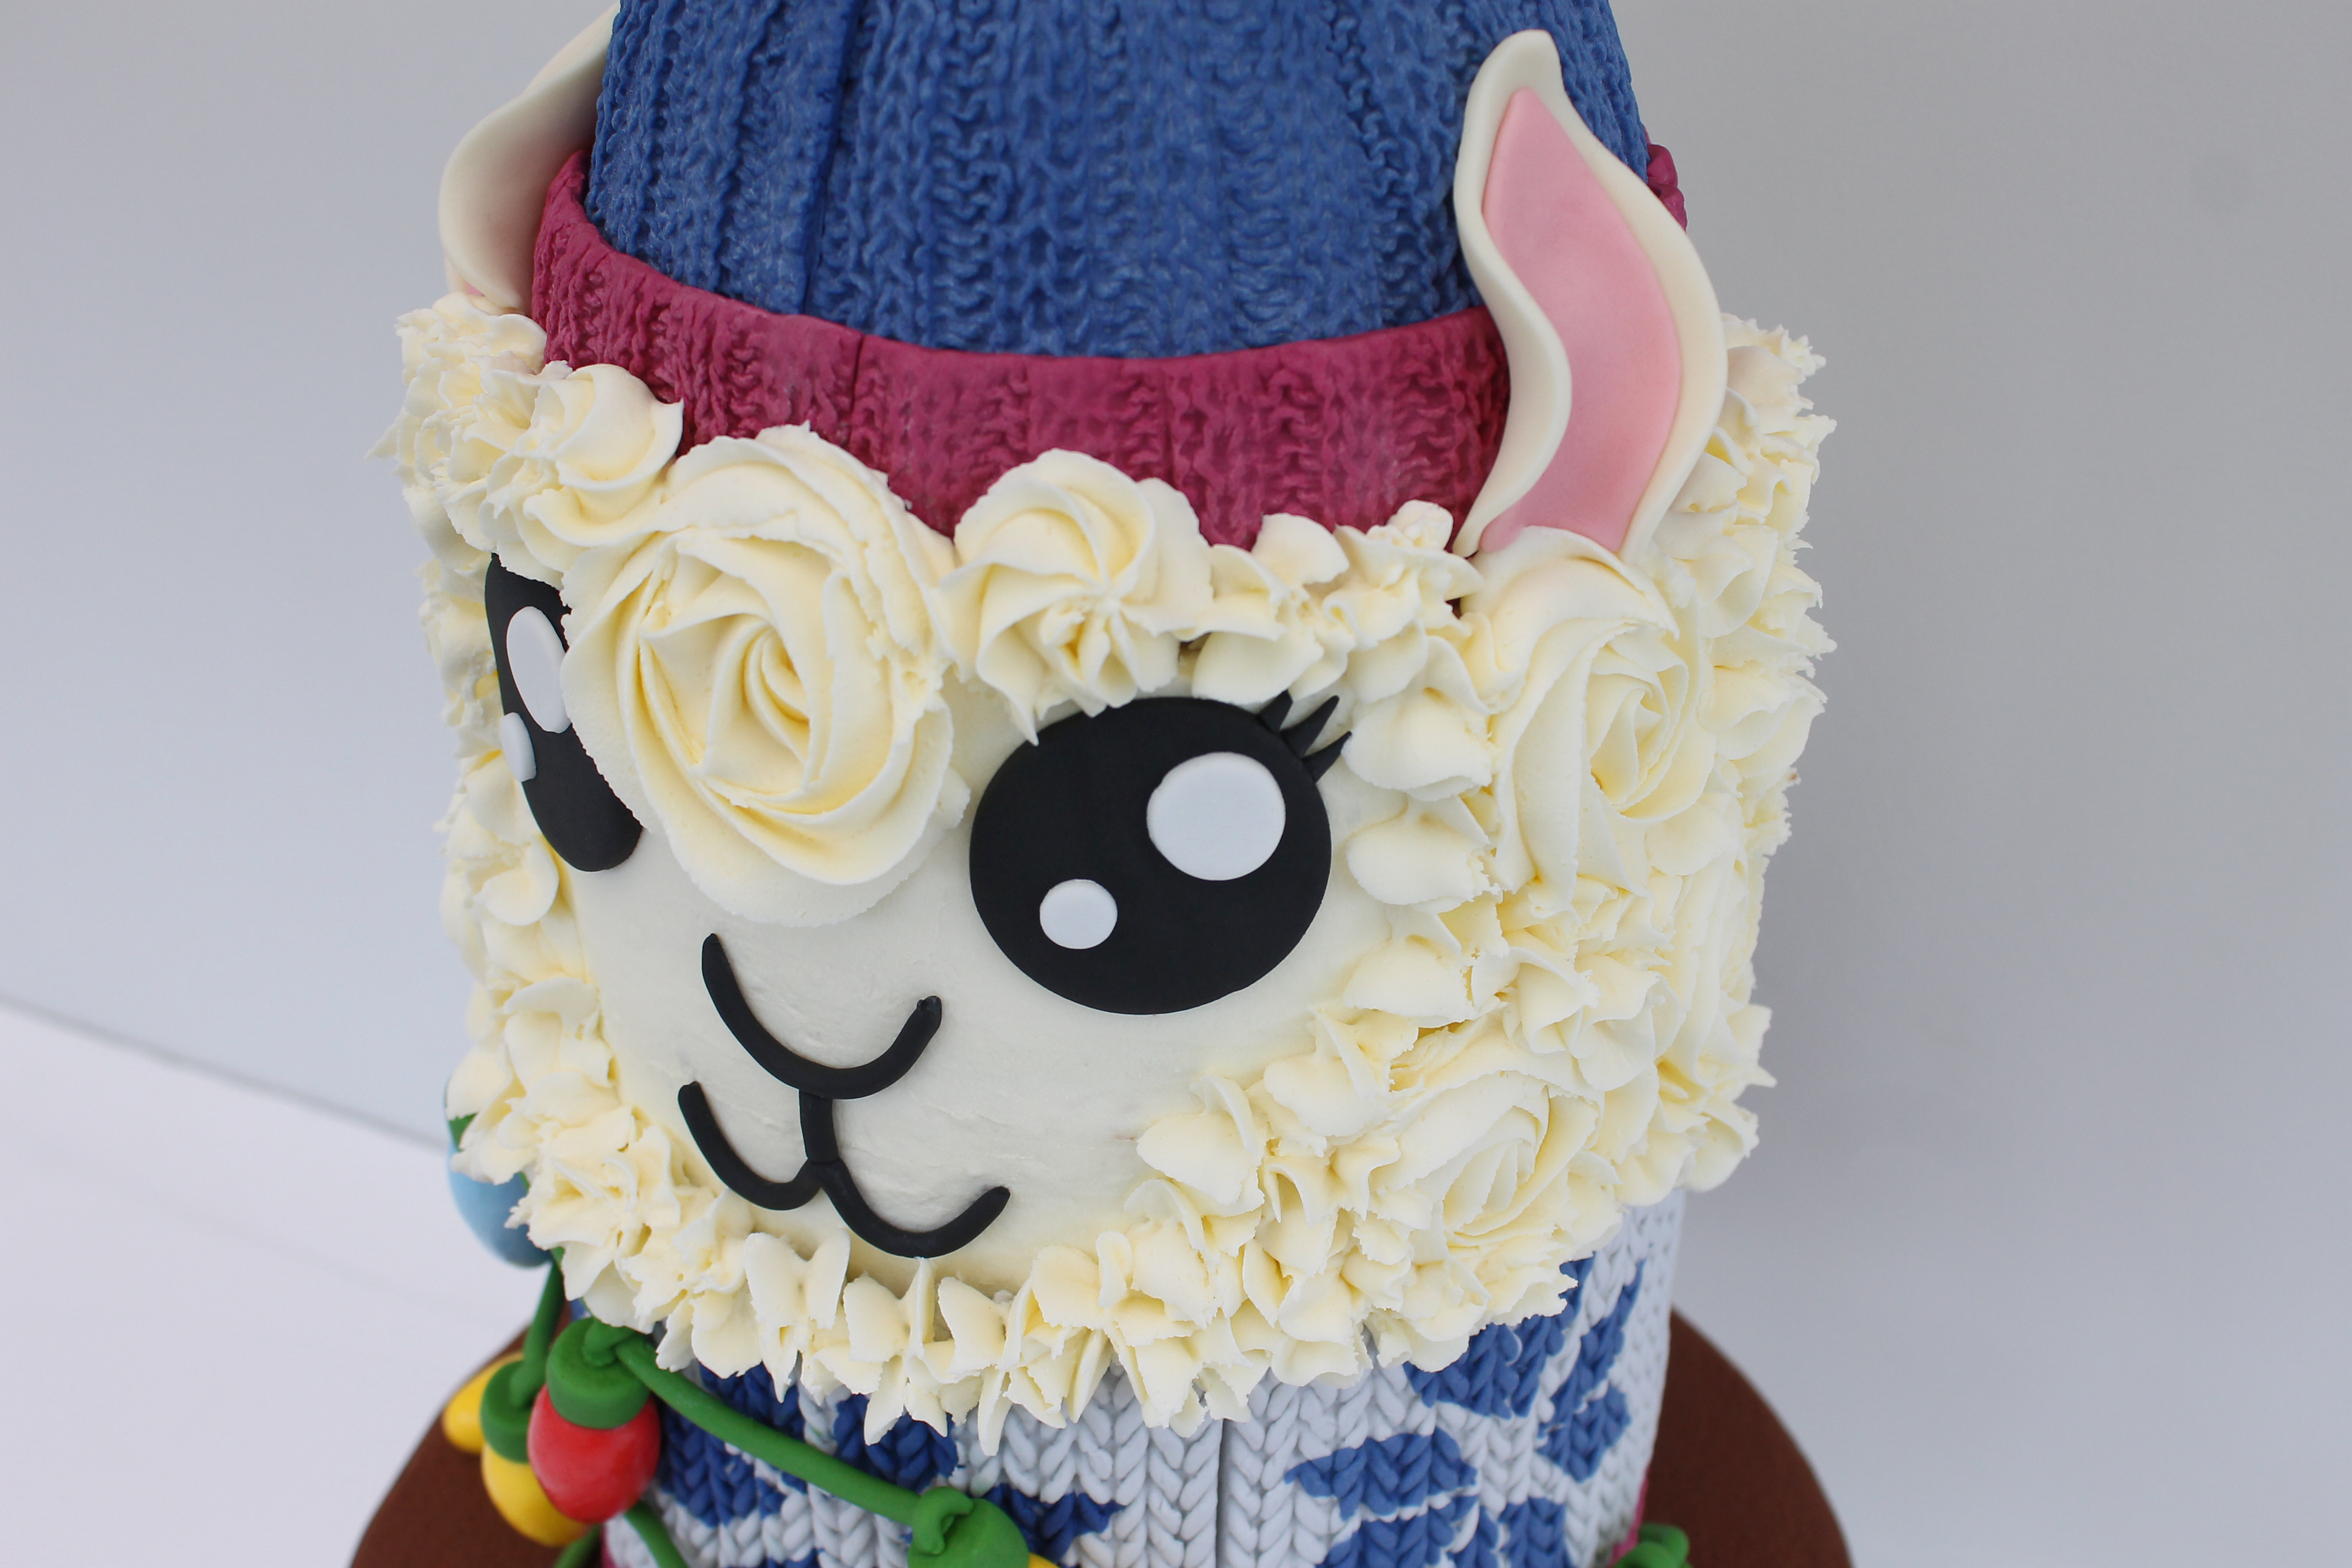
Making the eyes:
Step 29
Take a small amount of your Renshaw Ready to Roll Icings in Black and White and roll these out to about 2mm thick. Use a small circle cutter to cut two circles from the black icing.


Step 31
Next, use a medium and an extra-large plunger cutter to cut out two circles from the white icing in each size and attach these to the eyes using some cooled, boiled water.

Creating the nose and mouth:
Step 32
To create the nose and mouth, I hand-rolled a long thin sausage of Black Renshaw Ready to Roll Icing. Top tip: use a cake smoother to ensure a neat, smooth sausage with no lumps and bumps from your hands.

Step 33
Slice this into pieces, and hand shape these to form the desired shapes. I also made some small tear drop shapes to use as eyelashes. Leave these to stand for a while to begin to set before adding them to the cake.

Attaching the hat:

Step 35
Using a cake steamer, steam away the excess cornflour from your knitted elements. (You may notice from the pictures that I forgot to do this step here – I did it later and ran the risk of melting my buttercream. Don’t make the same mistake as me!)
Piping the fur:
Step 36
Transfer your remaining buttercream into large piping bag, fitted with a large open star piping tip (1M). Pipe a large rosette at the top of the front of the cake and then surround the eyes with alternating miniature rosettes and stars.
. Pipe a large rosette at the top of the front of the cake and then surround the eyes with alternating miniature rosettes and stars.")
Step 37
Continue to work your way around the cake, using a combination of large rosettes, miniature rosettes and stars, ensure that the top of the knit effect jumper and the bottom of the hat are covered. This will create the effect of fur bursting out. Leave to stand at room temperature to set – the addition of a little royal icing will ensure you achieve a good crust on your buttercream.

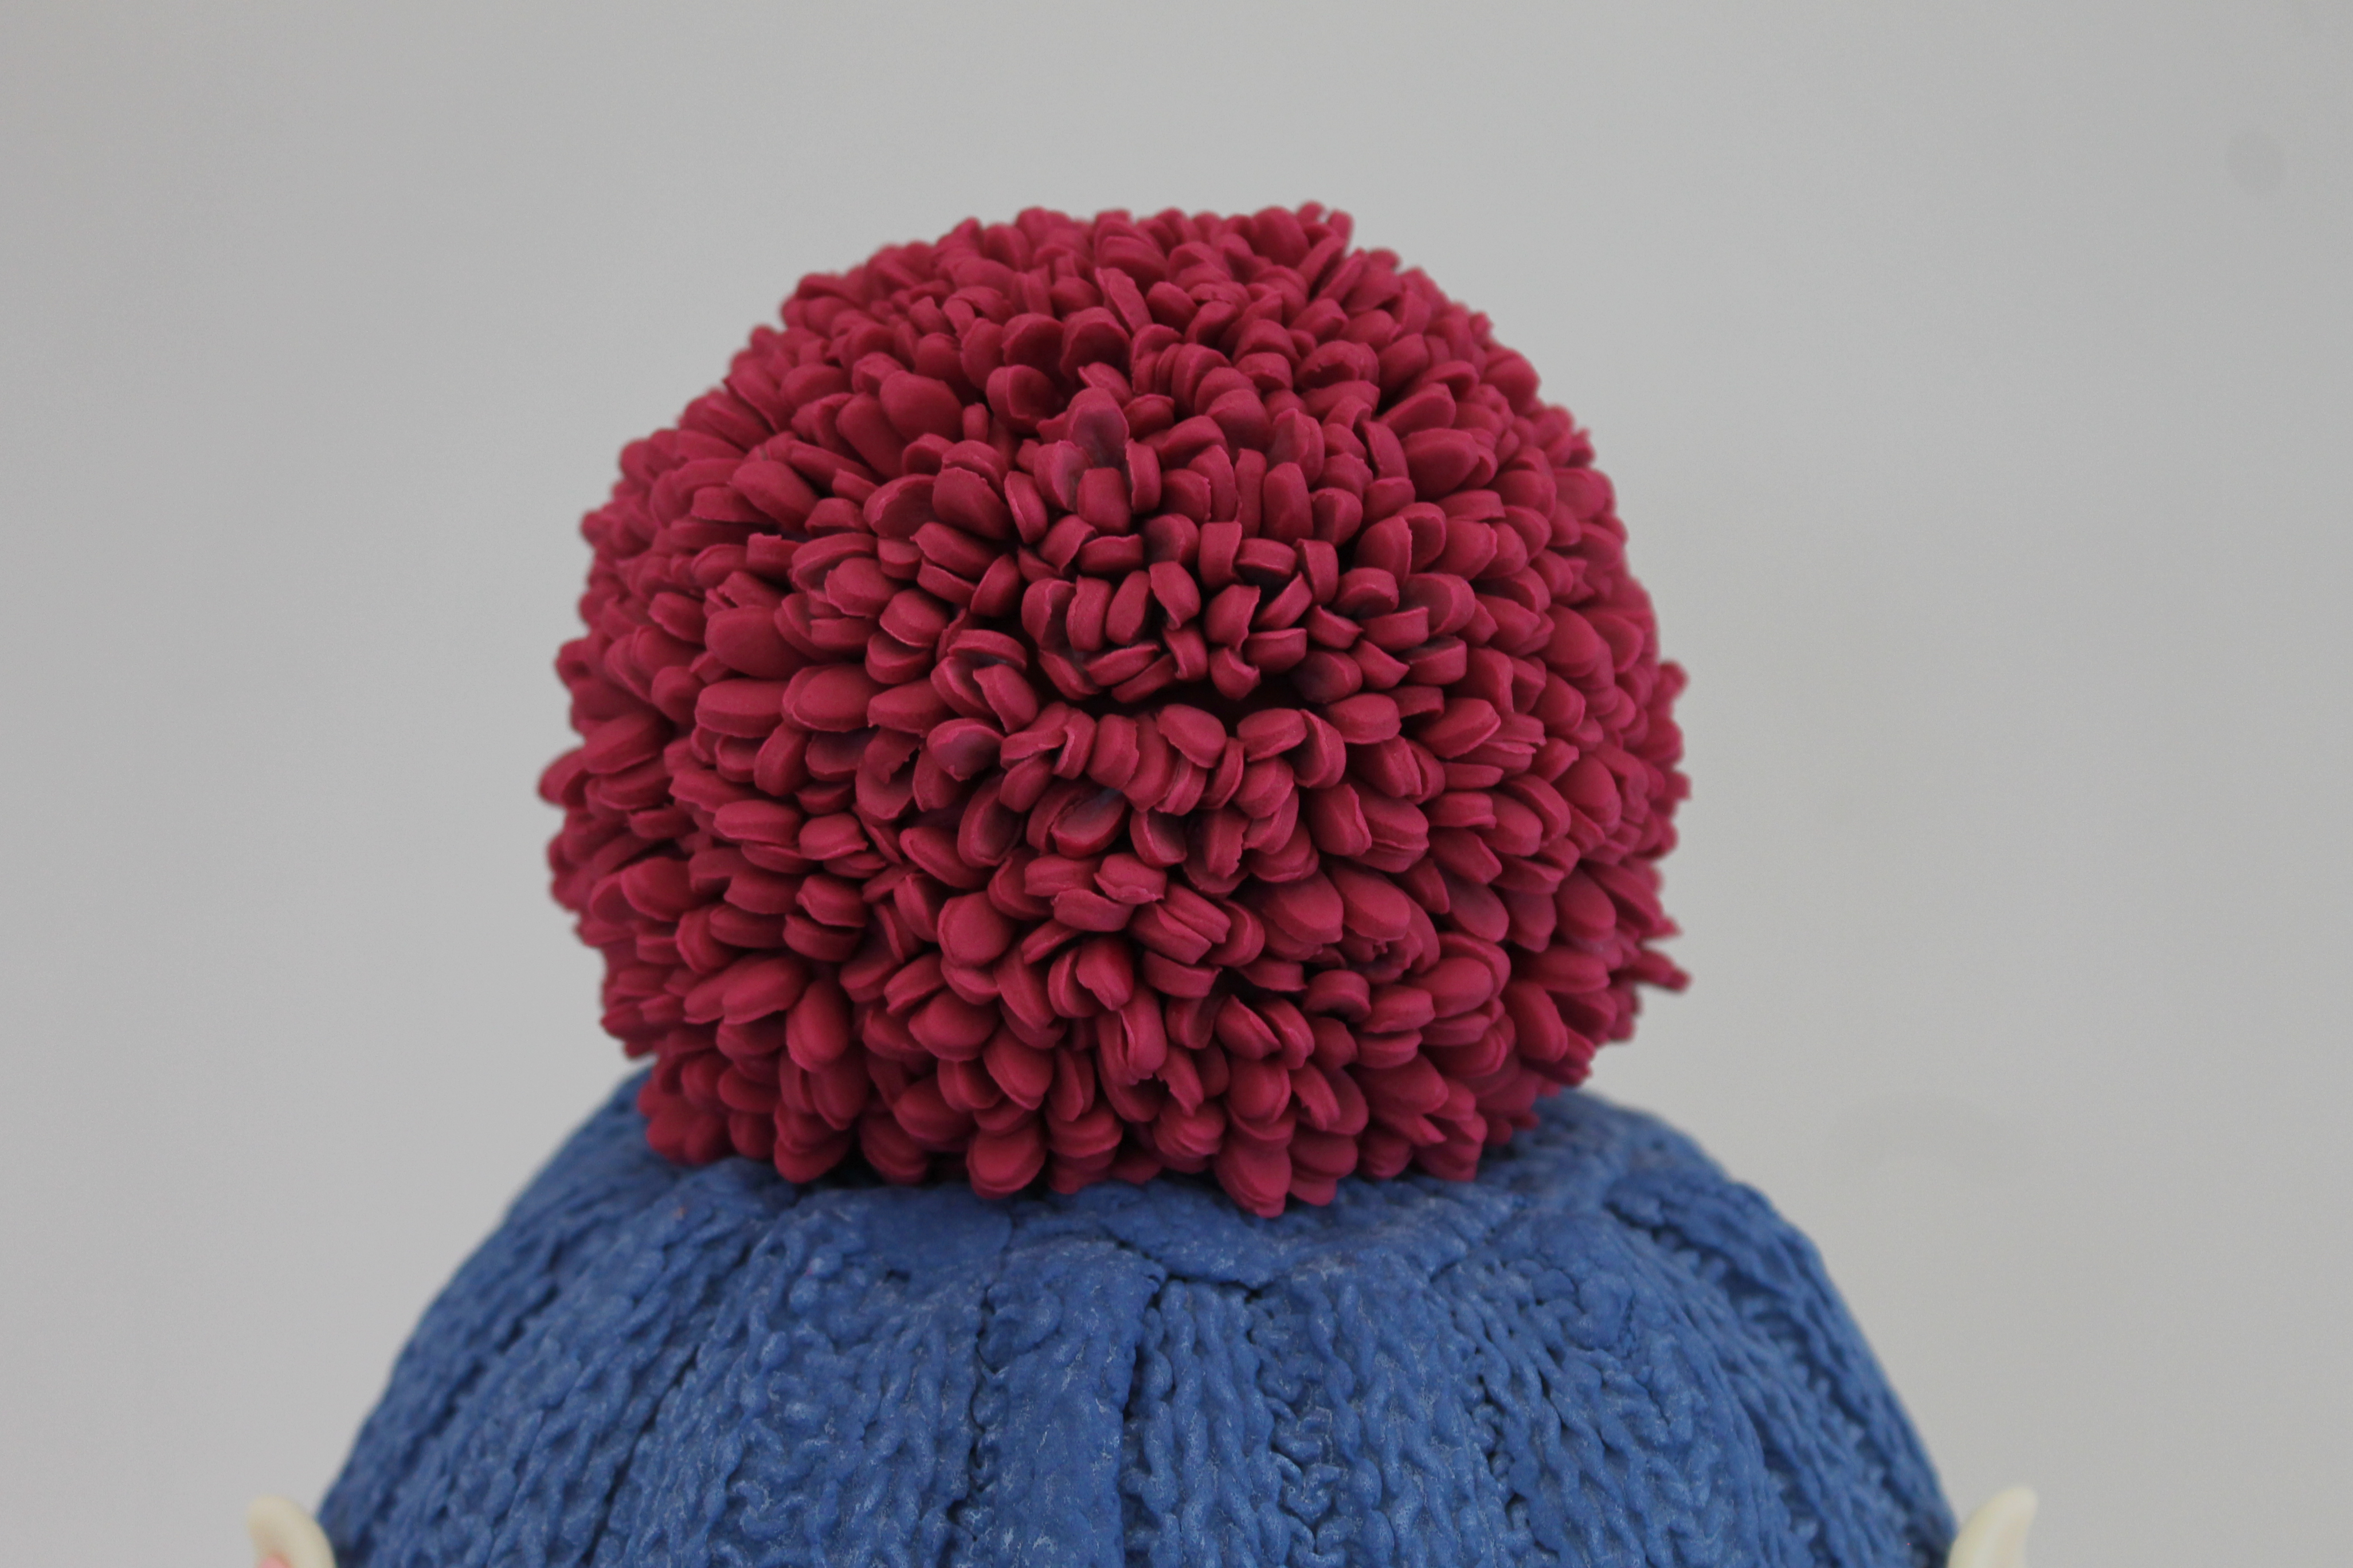
Making the bobble:
Step 38
Next, roll out some more of the Cassis Renshaw Ready to Roll Icing (with added tylose) and brush this with water.
 and brush this with water.")
Step 39
Use this to cover the rice cereal bobble and trim away any excess. Finally, cover your hands with a little cornflour and hand roll the bobble a final time to blend away any seams.

Step 40
Roll out some more Cassis Renshaw Ready to Roll Icing (with added tylose) as thinly as possible, before cutting out some daisies with your medium daisy plunger cutter. Brush an area of the bobble with cooled, boiled water and then begin to scrunch the daisies at the centre to create the effect of the bobble texture. Attach these to the bobble and repeat until it is entirely covered (warning: this took about three hours!). Leave the bobble to dry (ideally overnight).
 as thinly as possible, before cutting out some daisies with your medium daisy plunger cutter. Brush an area of the bobble with cooled, boiled water and then begin to scrunch the daisies at the centre to create the effect of the bobble texture. Attach these to the bobble and repeat until it is entirely covered (warning: this took about three hours!). Leave the bobble to dry (ideally overnight).")
Making the ears:
Step 41
Take some more Renshaw Extra Ready to Roll Icing in White and split in half. Colour one half using a little Rainbow Dust ProGel in Pink.

Step 42
Use a craft knife to cut two ear shapes from each colour. I found it handy to use an image of a real llama for reference.

Step 43
Layer the pink onto the white, adhering with a little cooled boiled water and soften the edges with your fingers.

Step 44
Attach these to the cake by pushing the bottoms into the buttercream and sticking the sides to the hat with cooled, boiled water. Adjust the position until you are happy with them.

Attaching the Christmas lights:
Step 45
Next, take your bulbs and using a small amount of Renshaw’s ready-to-use Royal Icing, attach these to the cake. I needed to use a few new, clean acupuncture needles to hold these in place while the royal icing dried. If you do need to do this too, please ensure that you remove them all before serving the cake!

Step 46
Next, roll out a thin sausage of Renshaw Extra Ready to Roll Icing in Green and wrap this around the cake, resting on top of each of the bulbs. Finally, with offcuts from your long, thin sausage, attach a loop to the top of each bulb to wrap the wire and make it look attached.

Step 47
Finally, leave everything to dry and set.
Step 48
And there you have it, your very own Festive Llama Cake – a quirky, fun and original addition to any Christmas or winter celebration. I hope you enjoyed finding out how to make my Festive Llama Cake and, as always, if you have a go at it, don’t forget to get in touch and let me know! I love to see what you’ve been baking at home!