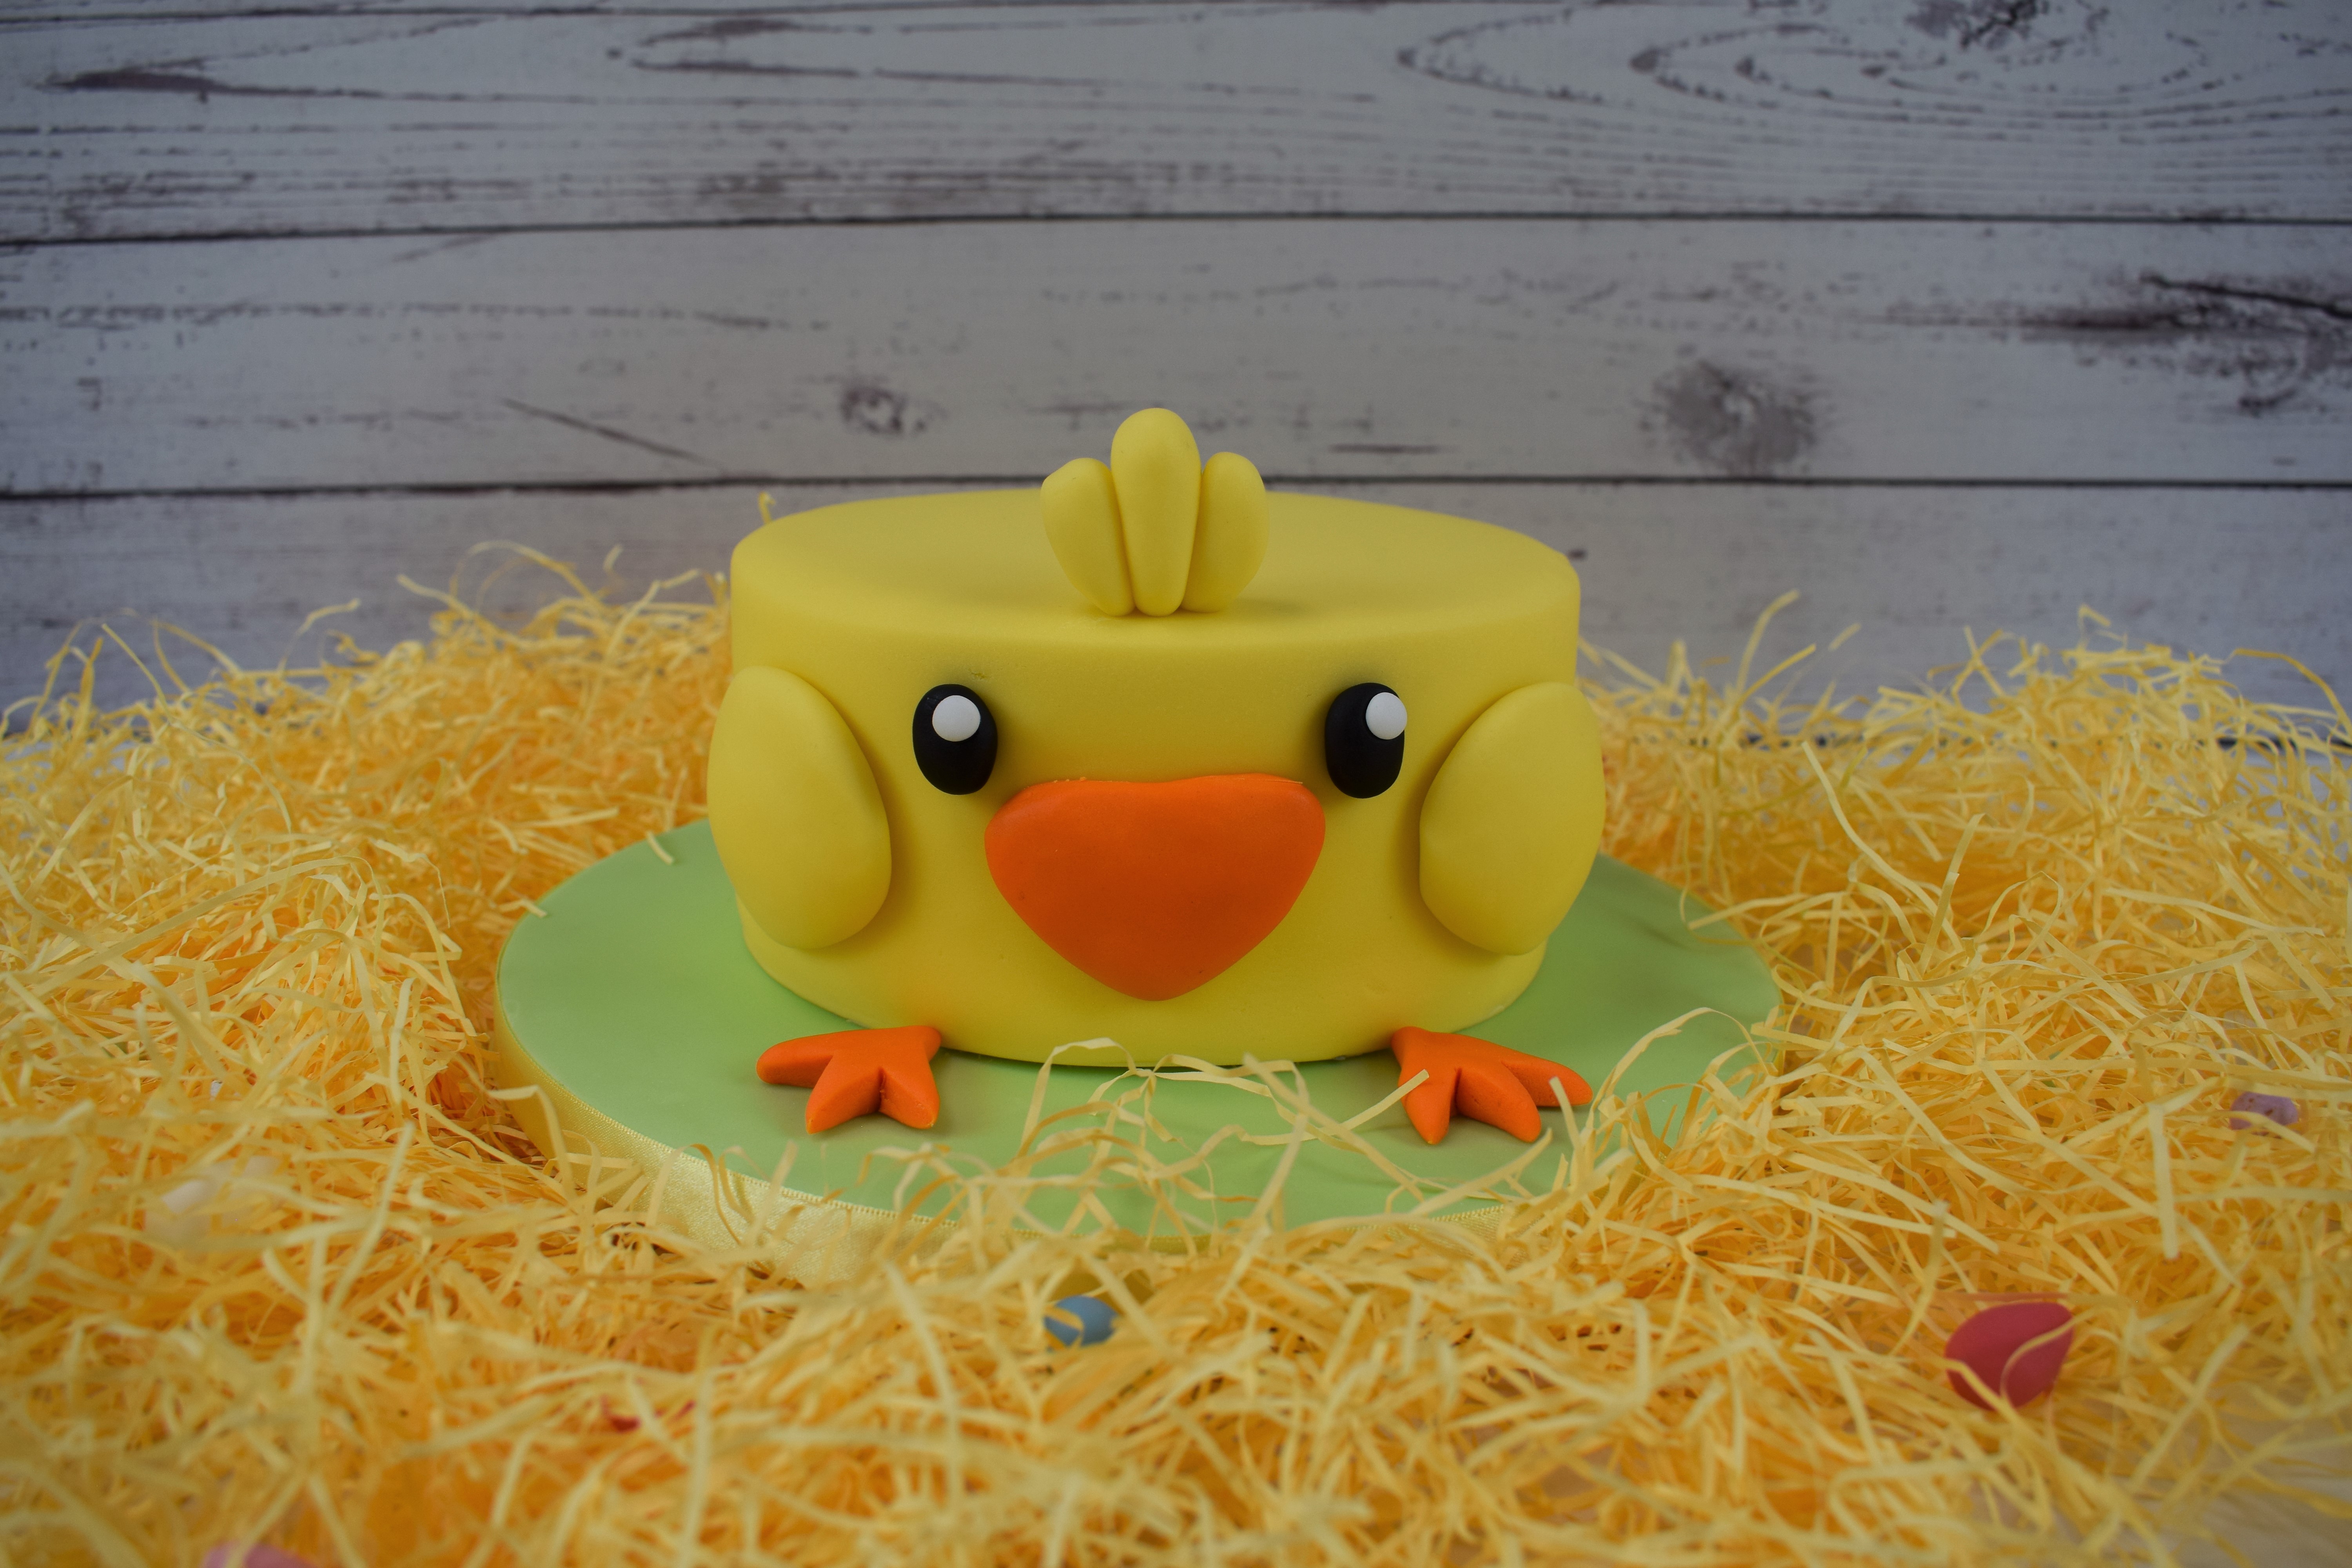

Easter Chick Cake with Sharp Edges for Beginners
This Easter chick cake is such a cute design, not only is it perfect for Easter but it can also be adapted to a range of seasons, animals or occasions. Learn how to achieve easy sharp edges and create this seasonal design!
You will need to prepare a 6-inch cake (3 layers of sponge) for this cake.
Uploaded by Kayleigh McDonough
Skill Level
Easy
Decorating ingredients
- 500 g Renshaw Pastel Yellow Ready To Roll Icing
- 250 g Renshaw Jet Black Ready to Roll Icing
- 250 g Renshaw Tiger Orange Ready To Roll Icing
- 250 g Renshaw White Ready to Roll Icing
- 400 g Renshaw Vanilla Frosting
Renshaw products used

Email this recipe
Instructions
Coating the cake:
Step 1
Fill and stack your 3 layers of 6-inch round sponge cake, however do not overfill as then the filling will ooze out of the sides, which will make it harder to create a smooth topping.
Step 2
Coat your cake with a thin layer of Renshaw Vanilla Frosting, aiming for a smooth and even surface both on the sides as well as across the top of the cake, for the icing to cover later on. If you spread the frosting in one direction, this will help reduce crumbs being mixed in. Wipe your knife/palette knife regularly too to remove excess frosting or crumbs. You can leave the coated cake in the fridge for a few hours or overnight.
Covering the cake:
Step 3
To cover a 6-inch round cake, knead two packs of Pastel Yellow icing together until smooth and pliable.

Step 4
Shape it into a smooth ball and then after lightly dusting the work surface and rolling pin with icing sugar, roll the icing out. Rotate the icing after each roll to prevent sticking.

Step 5
Once the icing is rolled out into a large enough circle to cover the cake, smooth the icing surface down using a smoother, then use your rolling pin to lift the icing and then drape it over your coated cake.
Step 6
Gently smooth the icing on to the top of the cake and on the edges with the palms of your hands. Start to gently smooth down the icing on the sides of the cake, lifting out pleats as you go and smoothing these over again.

Step 7
Seal the bottom edge of the cake by gently pressing down the outside with a smoother and then using a knife trim around the bottom removing any excess paste.

Creating sharp edges - Beginners method:
Step 8
To start creating the sharp-edged effect, place a flat-edged smoother vertically at the side of the cake and a rounded smoother horizontally on top, smooth around the edges of the cake whilst smoothing the top paste out, so that both smoothers meet.
Step 9
After that, change to an acetate smoother on top of the paste to start gently sharpening the edge of the icing, while still using the flat edged smoother vertically at the side of the cake at the same time.

Step 10
Continue to smooth the edges and top of the cake towards each other using the smoothers. Use a pin or cocktail stick to remove air bubbles, then smooth these over.
Step 11
Use a second acetate smoother around the edge and continue to smooth the top and sides towards each other at the edge. Using thin smoothers will help to shape the icing into a sharp edge. Once you have created the sharp edges, put the cake to one side.

Decorating the cake:
Step 12
Knead and shape the Tiger Orange icing into a rounded triangle for the beak, then use a little cooled boiled water to attach the beak to the front of the cake.
Step 13
Knead and roll Jet Black icing into two small and equal, slightly flattened oval shapes for the eyes, place the eyes on the front of the cake using a little more water.

Step 14
Knead and roll two equal balls of Pastel Yellow icing and shape and flatten them into ovals for the wings, thinning the outer edges out slightly more. Attach these to the sides of the cake using a little more water.
Step 15
Knead and roll out three teardrop shapes from the remaining Pastel Yellow icing, and stick together with water. Bend the thinner end of these backwards, and place on top of the cake as feathers.


Step 17
Shape two balls of Tiger Orange icing into triangle shapes, cut two triangles from the wider end and thin out the other end to create feet.

Step 18
To attach your cake to a pre-covered cake board, mix your Vanilla Frosting and spread over a small area for your cake to sit over. Use a knife (such as a palette knife) to gently lift your cake and place it on the board.
 to gently lift your cake and place it on the board.")
Step 19
Attach the feet using a little water and finish off the board with a ribbon.