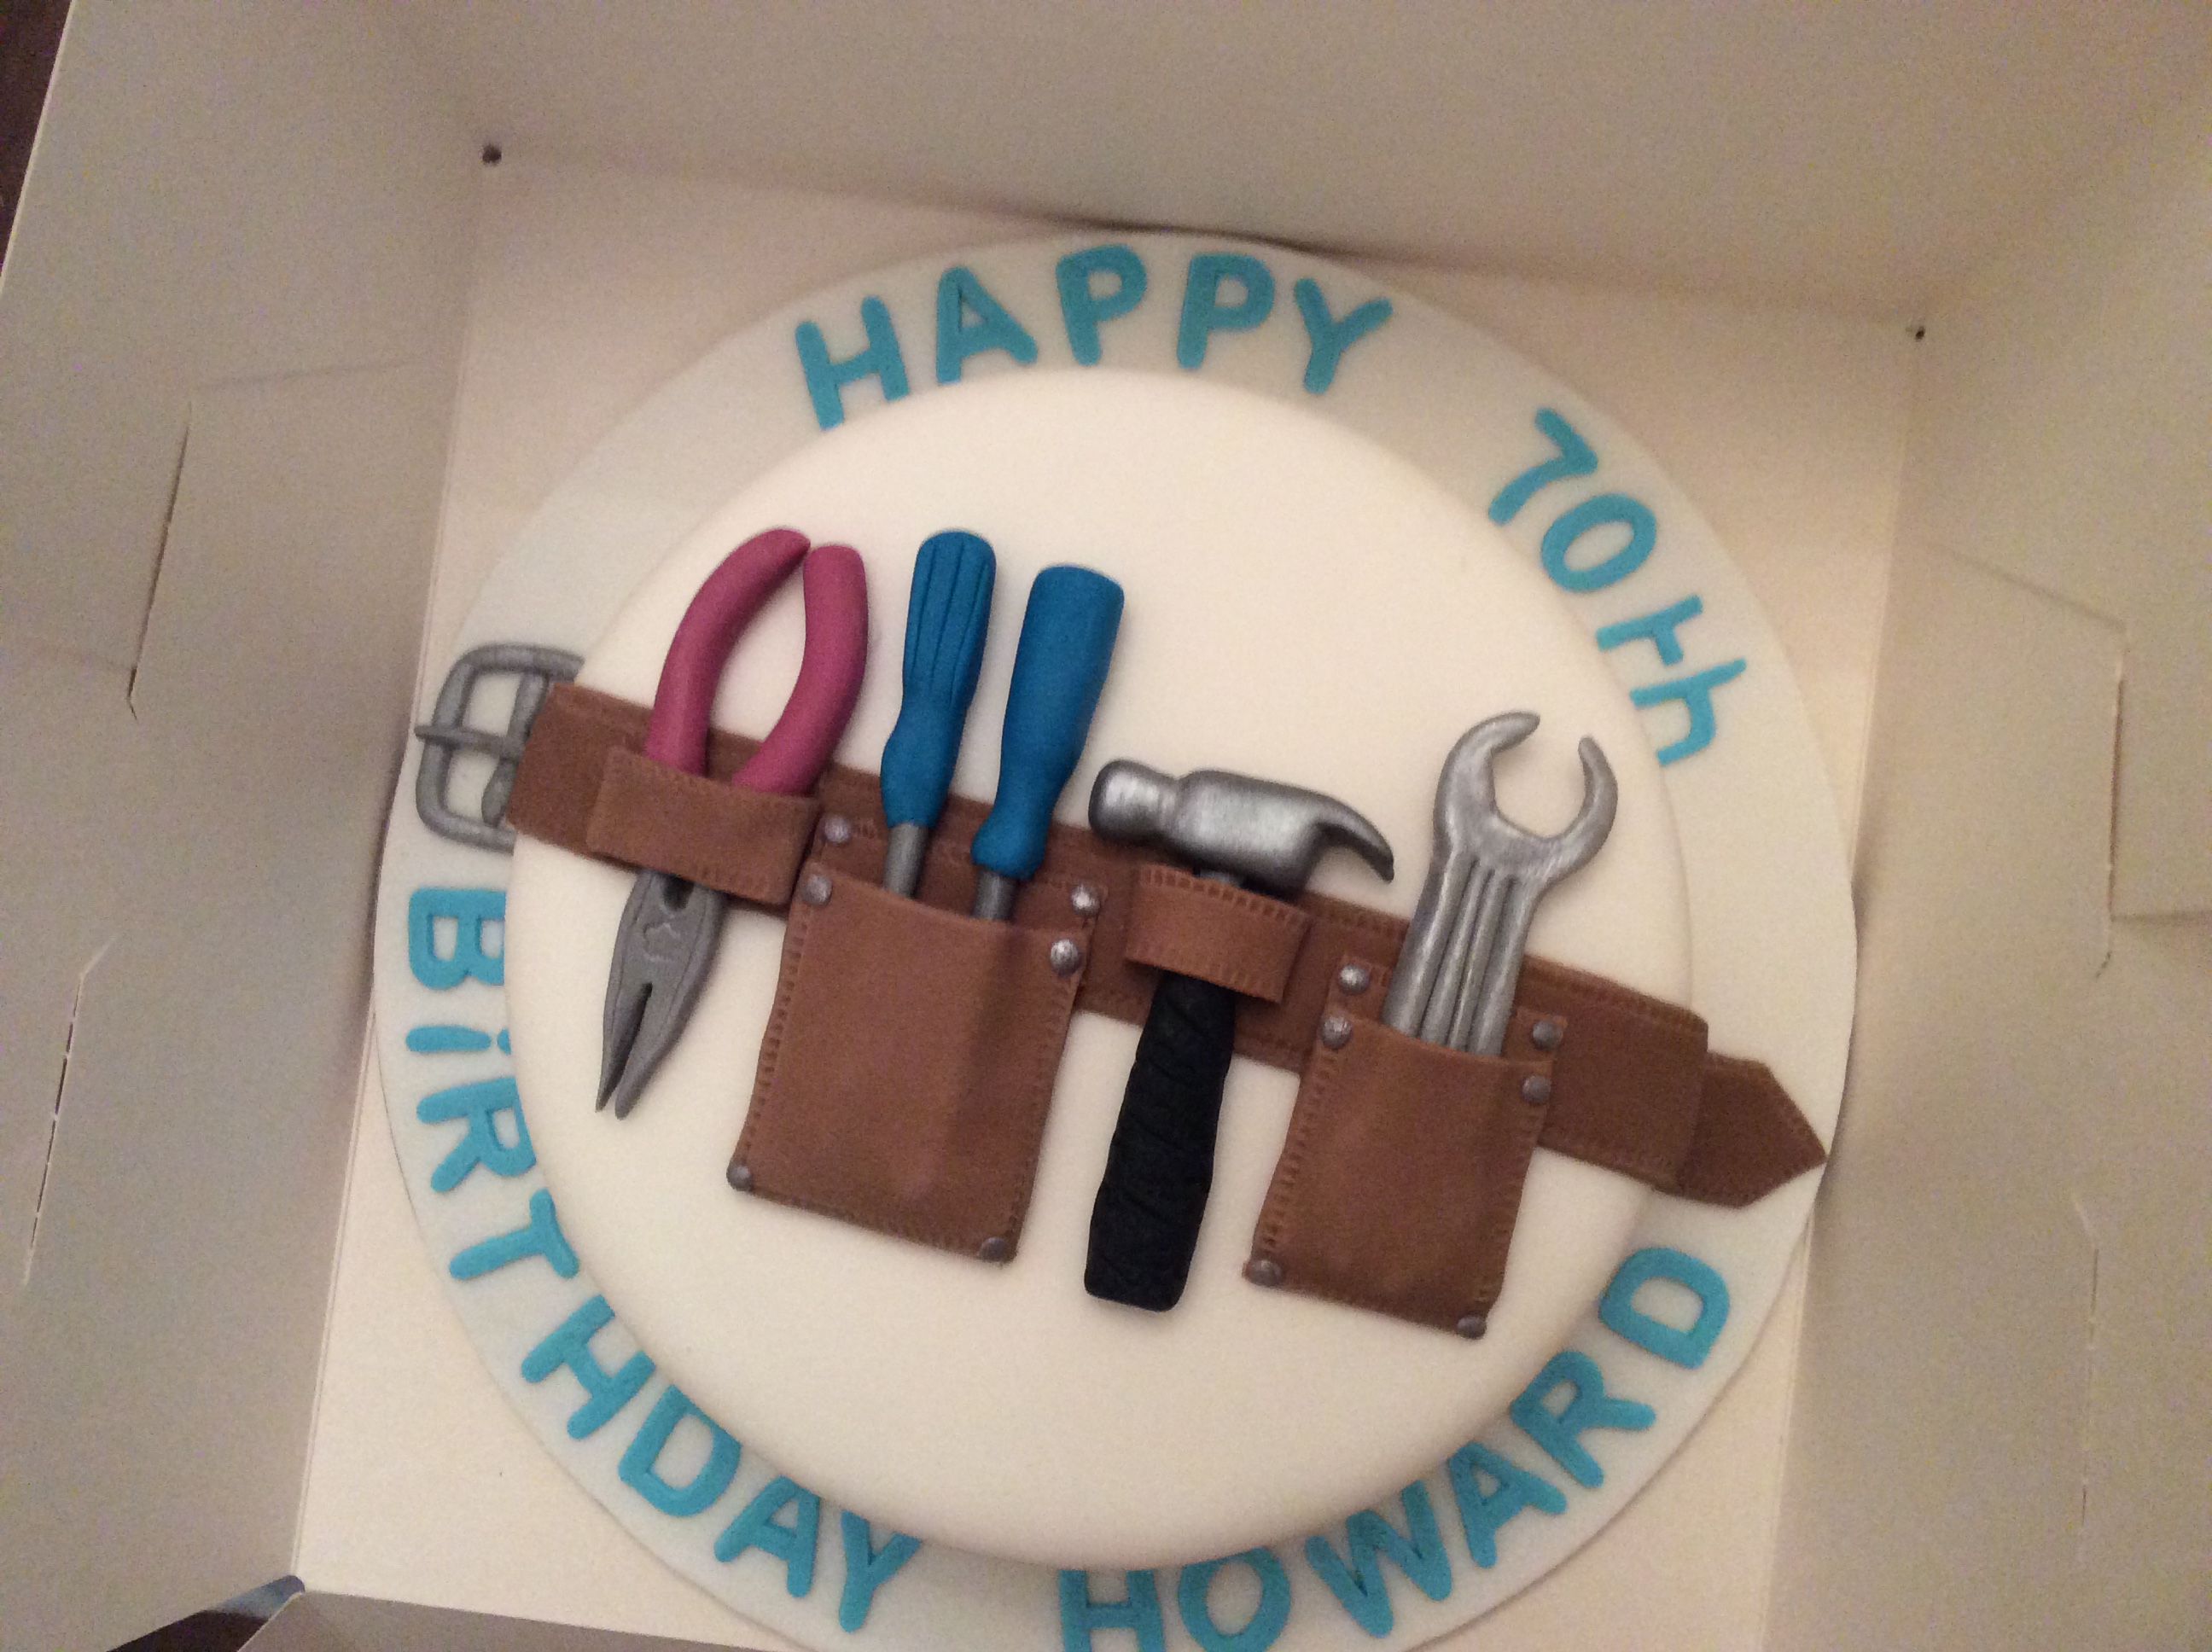
DIY Tool Belt Cake
How to decorate a tool belt cake with Renshaw Ready to Roll Fondant Icing and Flower and Modelling Paste.
Recipe by Lynn Evans
Uploaded by Lynn Evans
Time to make
Skill Level
Intermediate
Serves
20 people
Baking ingredients
- 10 oz self-raising flour
- 10 oz caster sugar
- 10 oz Clover spread
- 5 eggs
- 3 oz white chocolate
Decorating ingredients
- 500 g Renshaw White Ready to Roll Icing
- 250 g Renshaw White Flower and Modelling Paste
- 250 g Renshaw Dahlia Black Flower and Modelling Paste
- 250 g Renshaw Teddy Bear Brown Ready to Roll Icing
- 75 g Cream cheese
- 75 g Butter
- Icing sugar for buttercream (Sainsbury's)
- Seedless raspberry jam
- Various food gel colours

Instructions
Step 1
Make Victoria sponge with added melted white chocolate at the creaming stage.
Step 2
Once the sponge is baked, cover and fill with jam and cream cheese buttercream.
Step 3
Knead and roll out the white icing, wide enough to cover the cake, then lift over and smooth down.
Step 4
Roll out the brown fondant icing (or modelling paste coloured with brown food gel) and cut a strip that is long enough to cover the top and sides of the cake. Add this across the middle of the cake to start the tool belt.
Step 5
Prepare the modelling paste you'll be using for the tools by adding gel food colours and kneading in until you have an even colour throughout. Wrap up any paste you're not ready to use yet.
Step 6
Use templates or pictures to help you model the tools, and use modelling tools to make in grooves on some of the tools. It may be better to model these in advance of making the cake so that they set firm. Once the models have hardened, use silver food paint to cover whichever of the tools you'd like.
Step 7
Add the tools to the belt with a little cooled, boiled water and cover these with more rolled out brown icing cut into pocket shapes.
Step 8
Add additional details like a buckle and fastenings, and finish these with edible silver paint.