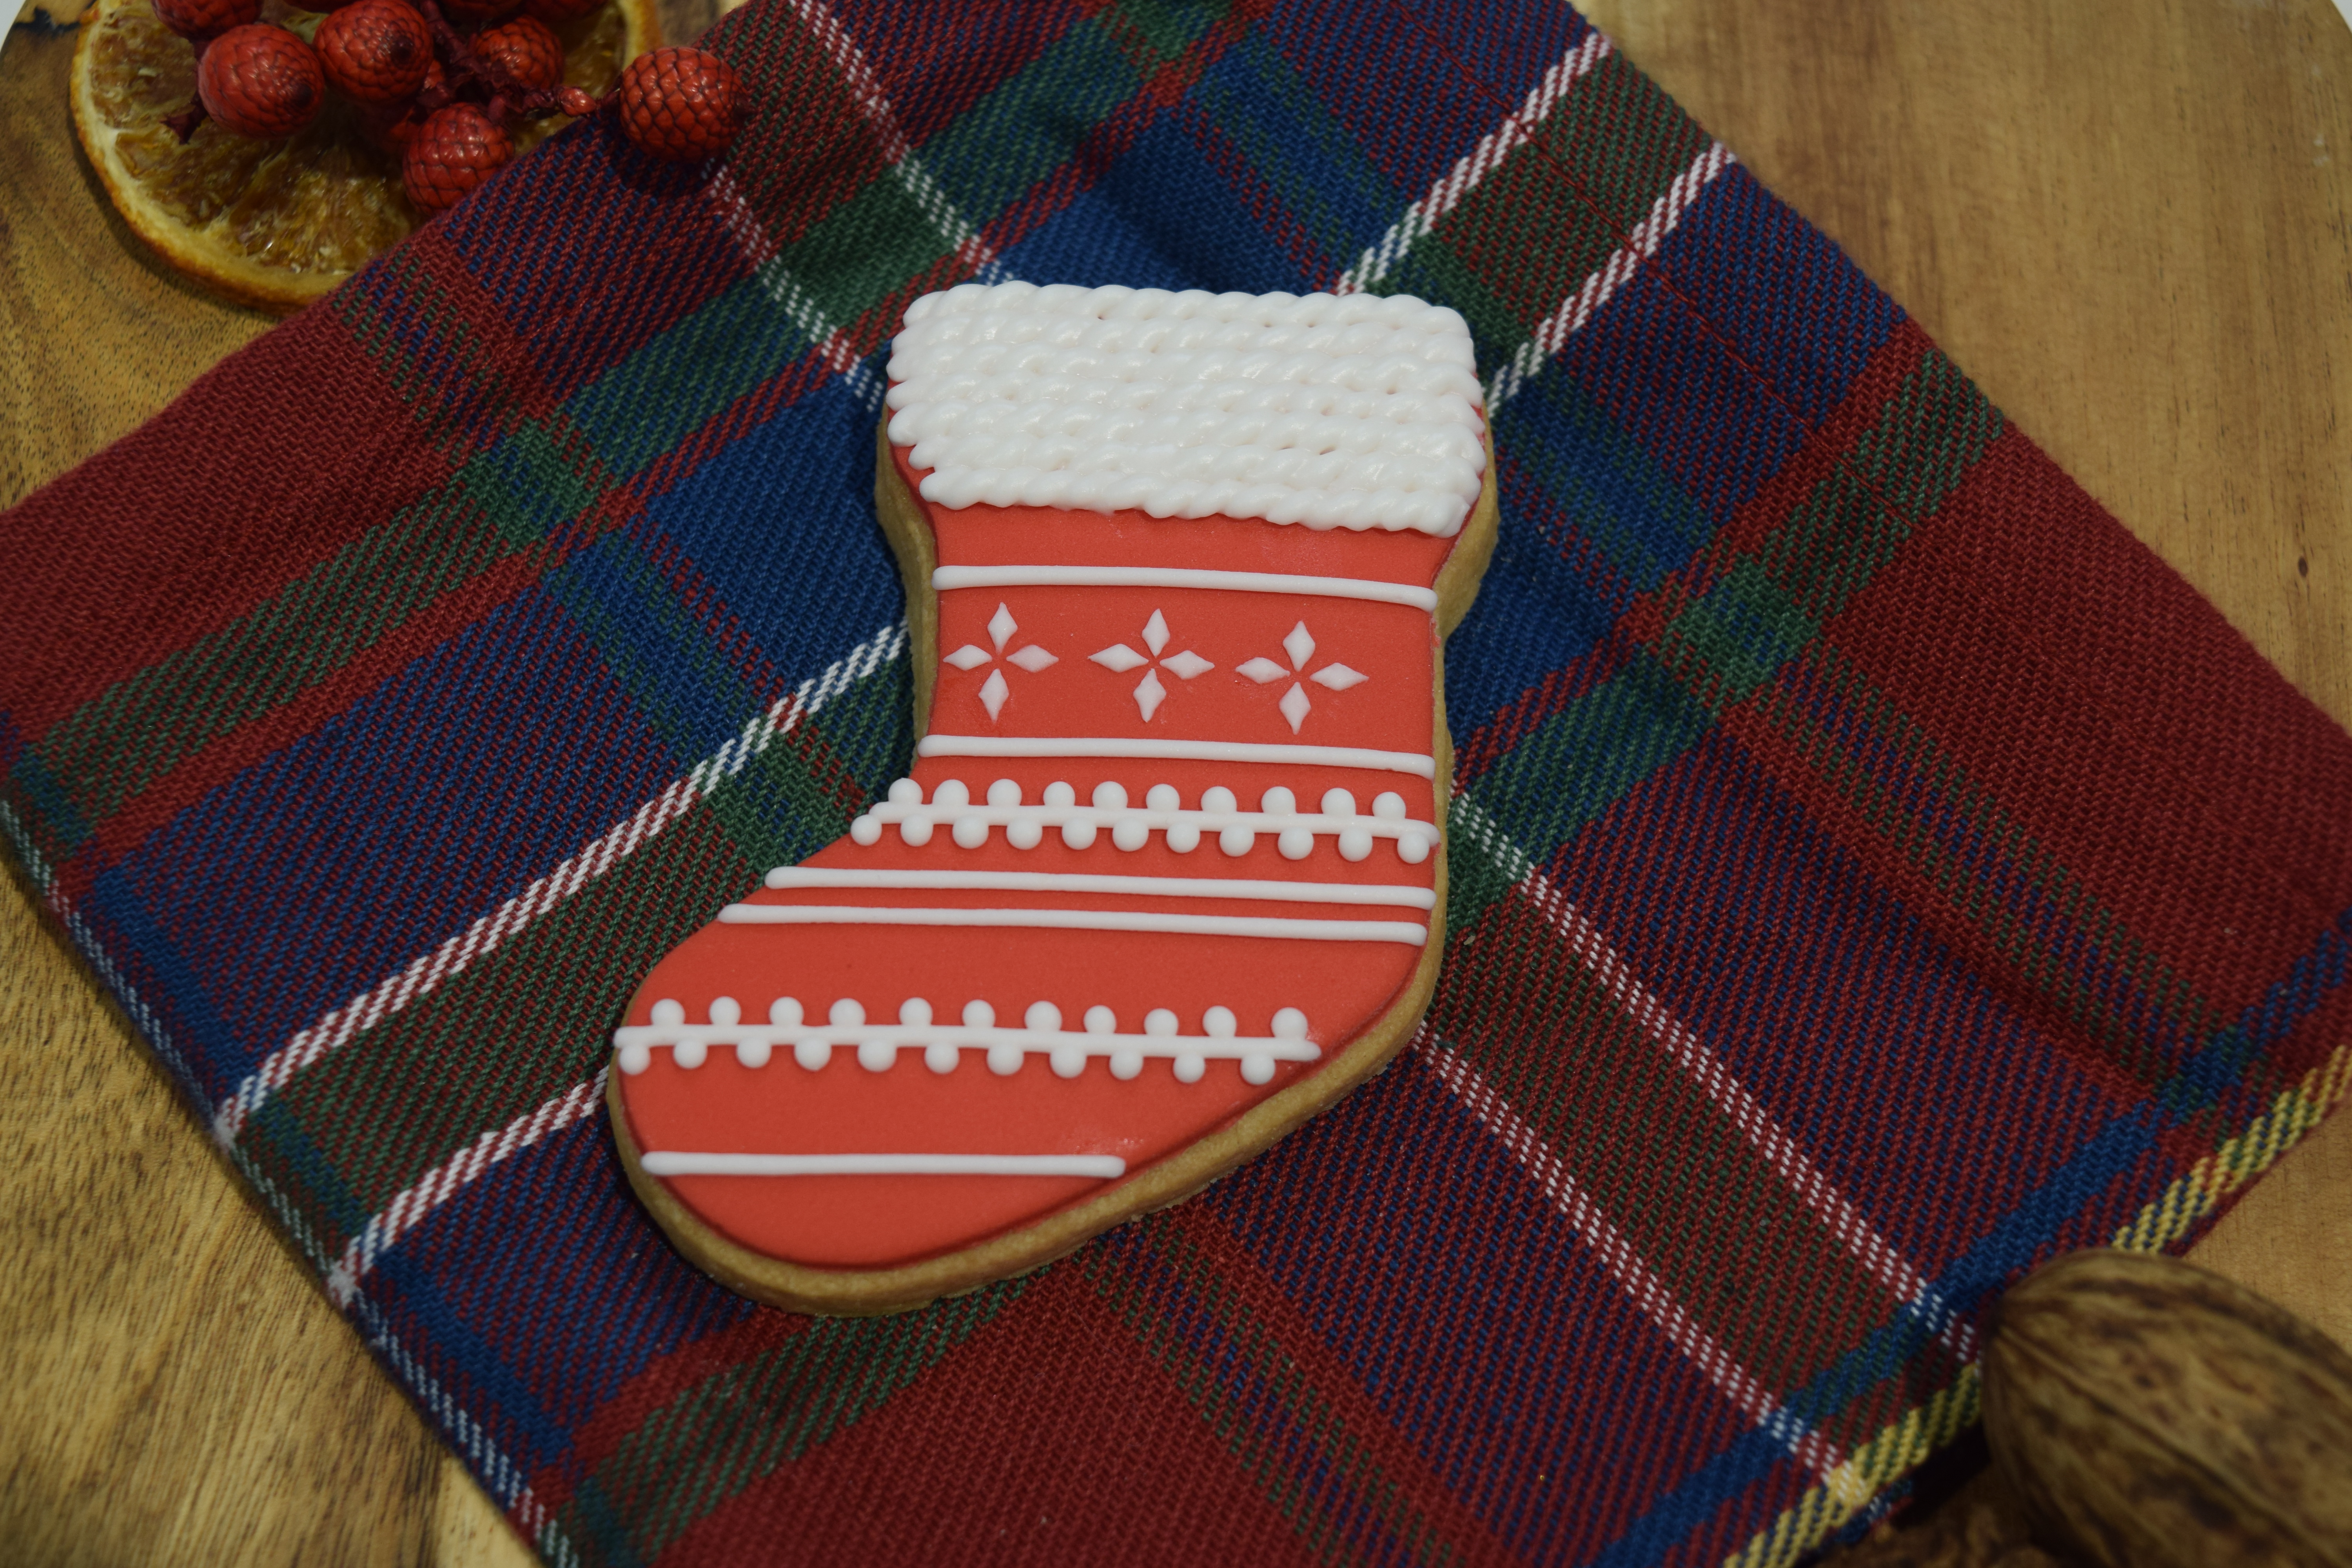
Christmas Stocking Biscuits
Serve these Christmas stocking biscuits up on Christmas Eve, and maybe personalise them with your families names.
Uploaded by Kayleigh McDonough
Skill Level
Intermediate
Baking ingredients
- 125 g butter or margarine
- 55 g caster sugar
- 180 g plain flour – sieved
Decorating ingredients
- 250 g Renshaw Poppy Red Ready to Roll Icing
- 400 g Renshaw White Royal Icing
- Apricot jam – boiled and cooled
- Water – boiled and cooled
Renshaw products used

Email this recipe
Instructions
BAKING INSTRUCTIONS:
Step 1
Heat the oven to 190°C/375°F/gas mark 5.
Step 2
Cream together the butter and sugar until it's nice and smooth then gradually stir in the flour to form a smooth paste. This is your shortbread dough mix.
Step 3
Wrap the shortbread in cling film and leave to rest in the fridge for 30 minutes.
Step 4
Remove from the fridge and knead the dough lightly and roll out to the desired thickness. Cut as many shapes as required using a 3” stocking cutter.
Step 5
Place the stocking shapes on a greased and lined baking tray and bake for 15-20 minutes or until the shortbread is golden brown.
Step 6
Remove from the oven and leave to cool on a cooling rack for 30 minutes.
DECORATING INSTRUCTIONS:
Step 7
Prepare your equipment; Lined baking tray, rolling pin, stocking cutter (3”), icing sugar, pastry brush, piping bags (paper or disposable), No 3 piping tube, 2 x No 2 piping tube, small paintbrush, scissors, tablespoon, bowl, scribing tool, palette knife
Step 8
Prepare the biscuits by brushing over the surface with a thin layer of apricot jam.
Step 9
On a clean, dry surface knead the Poppy Red Icing until pliable.
Step 10
Dust the work surface with icing sugar and pin out the icing until 2-3mm thick.
Step 11
Using the same stocking shaped cutter used for the biscuit dough, cut shapes out of the rolled out icing and place onto the prepared biscuits, gently smoothing down with the palm of your hand.
Step 12
Royal Icing preparation: Make 3 piping bags with 1 x No 3 and 2 x No 2 tubes.
Step 13
Royal Icing preparation: Make 3 piping bags with 1 x No 3 and 2 x No 2 tubes.
Step 14
Create a softer piping icing by adding a couple of drops of water to 100g of the icing and mixing in. Add to one of the No 2 piping bags. This is for the lines and dots.
Step 15
Let down 100g of royal icing to flood consistency by adding a tablespoon of icing to a bowl, adding a few drops of water at a time and mixing after each addition of water. To test the consistency, take a spoonful of icing and drizzle it back into the bowl. It should take between 14-16 seconds for the icing to disappear back into itself. Add to the other No2 piping bag for the snowflake.
Step 16
To create the knitted cuff at the top of the stocking, use the No3 piping bag and pipe a series of interconnected backward “S” shapes in a straight horizontal line. Repeat directly underneath the line above until you have 7 lines of ropes. This will create a knitted effect.

Step 17
To create the snowflakes, use the flood consistency royal icing in the No2 piping bag. Pipe a small dot 1cm below the ropes, in the centre of the stocking. Then, use the scribing tool to gently drag the top of the dot upwards and the bottom downwards. Do the same for the left and right hand side by dragging the icing in an outward direction with scribing tool. This will create a diamond shape. Pipe another 3 dots, one just underneath the first diamond, and two in-between: one to the left and one to the right. Drag these dots in the same way as the first to create three more diamond shapes. These four diamonds will create your first snowflake. Repeat this step twice more to create your other two snowflakes, either side of the first.
Step 18
To create the line and dot detailing, use the softer piping consistency icing. Begin to pipe straight lines across the stocking using medium consistency royal icing. Leave some lines plain. For the other lines, pipe small dots along the top and bottom. Tip: If the royal icing is too firm and creates a peak, take a small paint brush, slightly dampen with a wet cloth and gently pat down the peak.