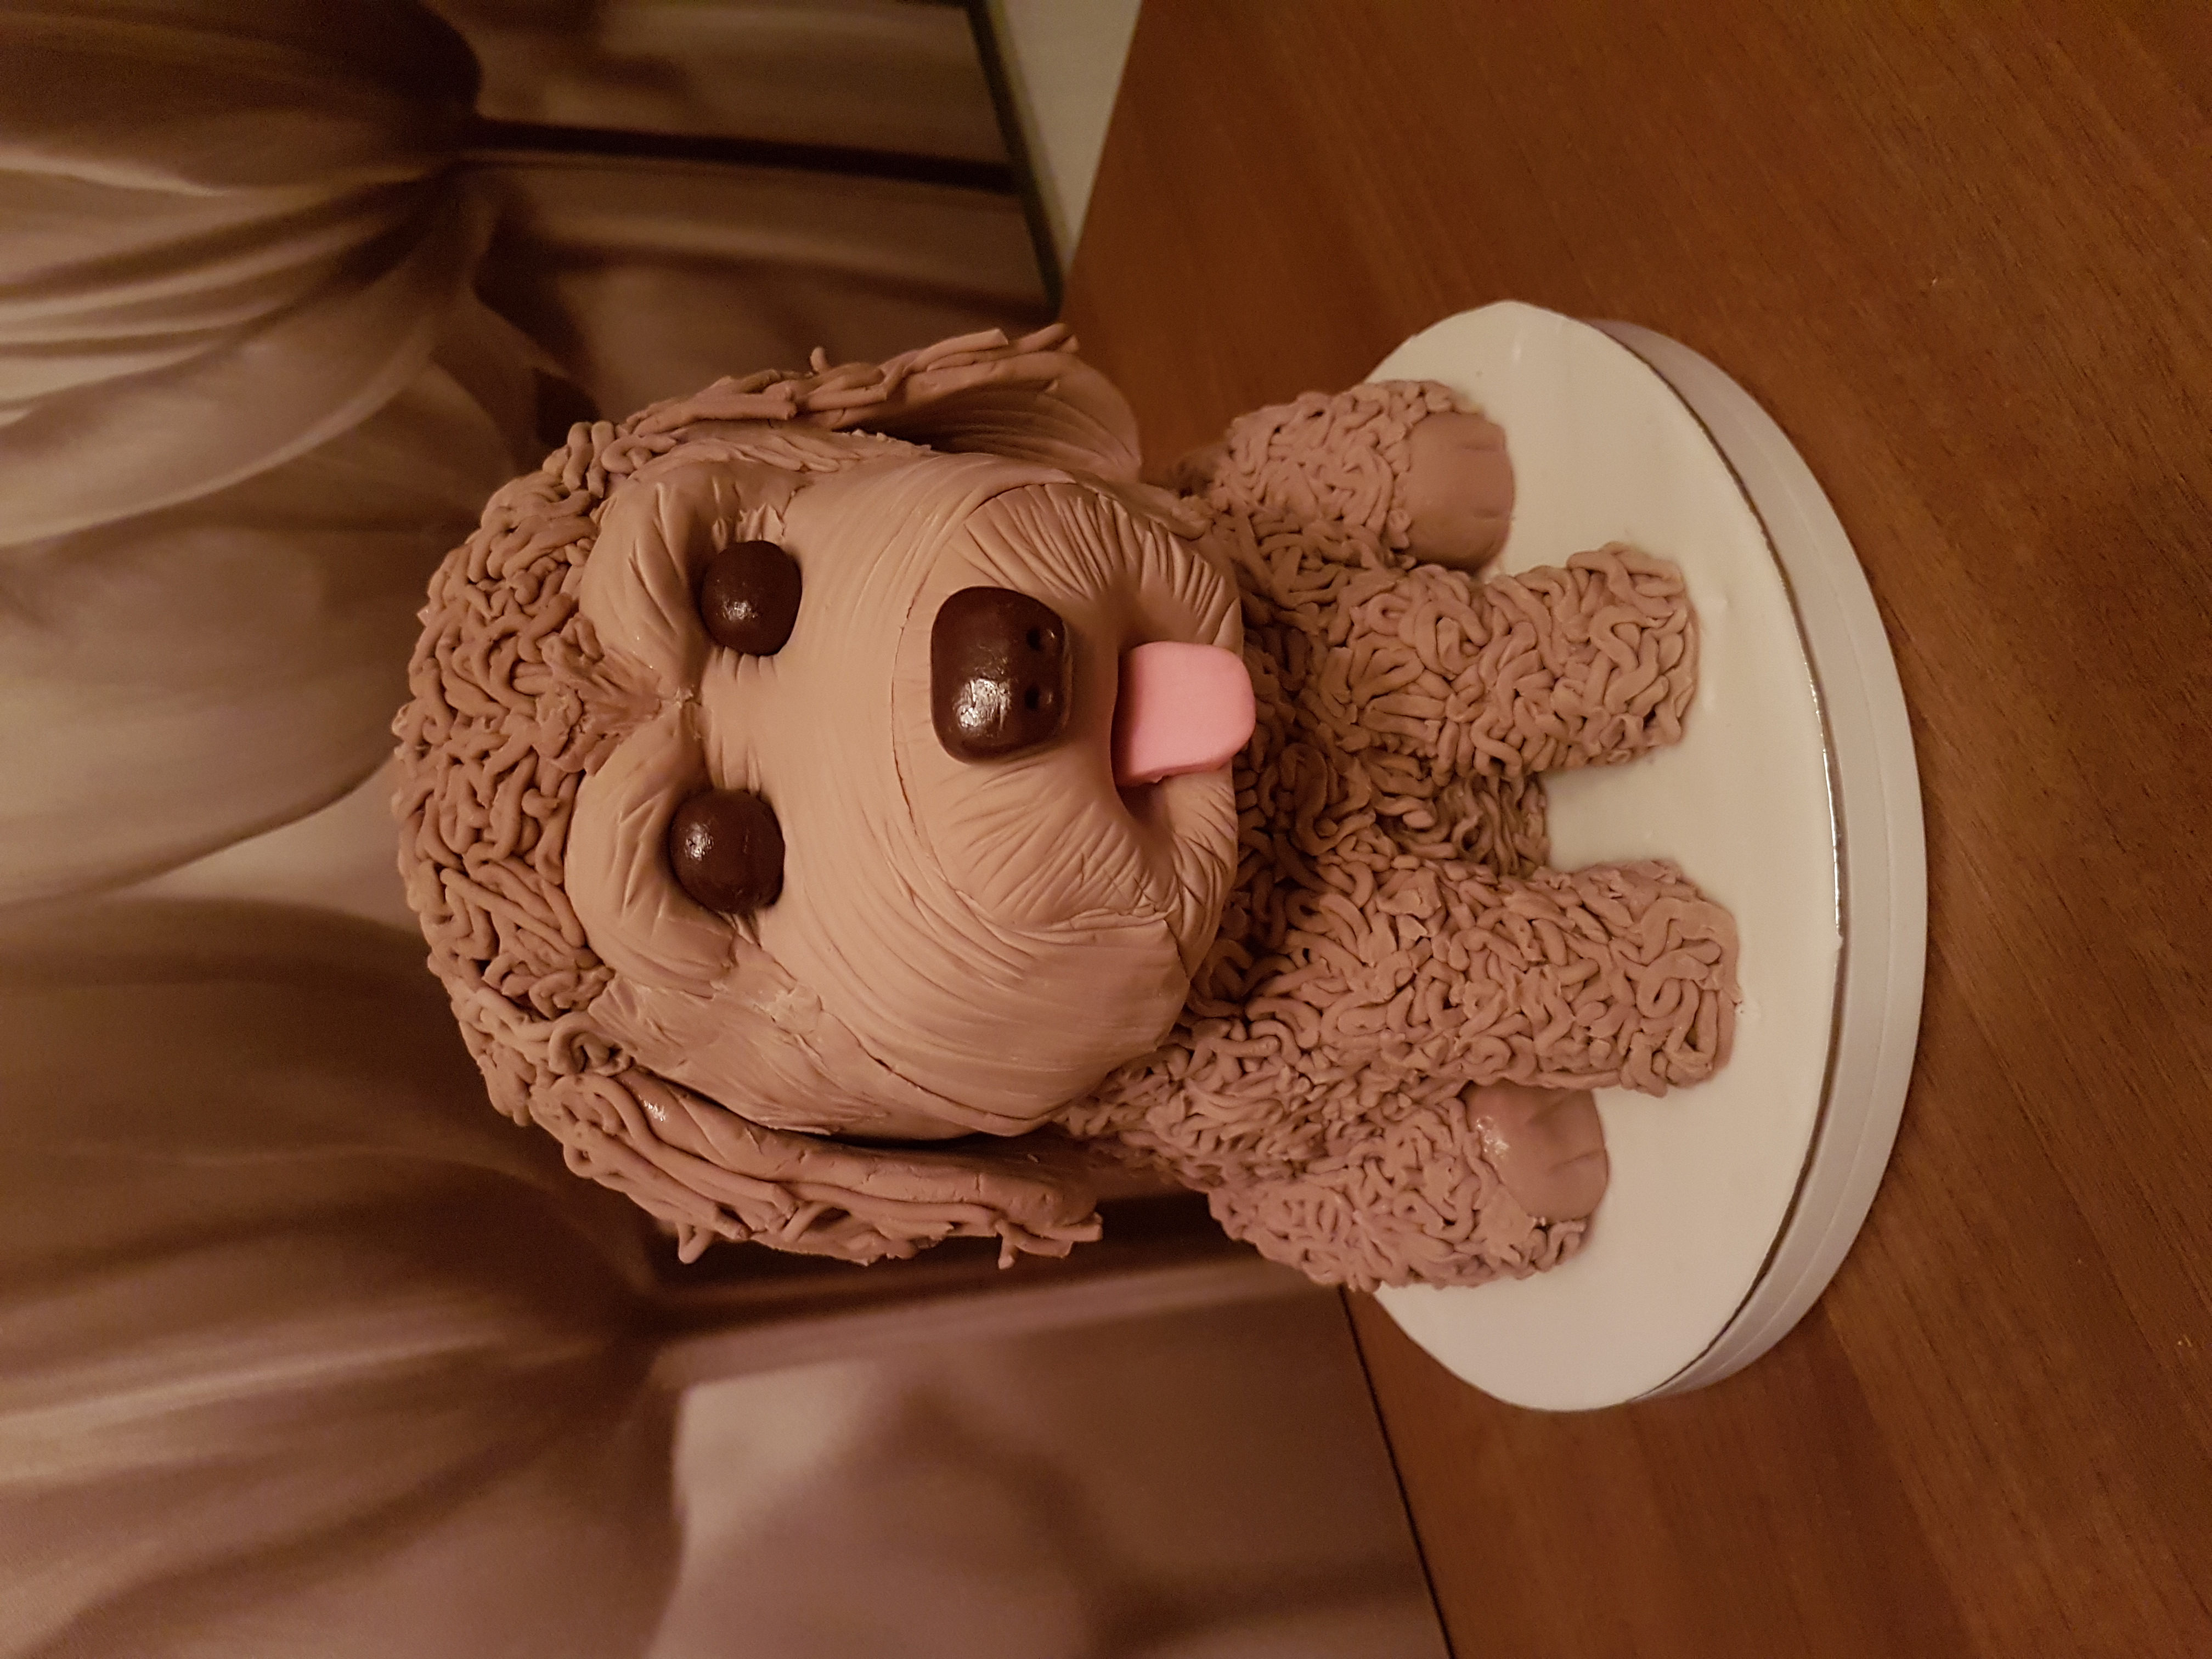
3D Dog Cake Tutorial
This tutorial was shared by Pien Punt as part of the Renshaw ‘Battle of the Bakes’ competition.
For this tutorial you’ll need the following: Renshaw White Ready to Roll Icing or Renshaw Extra, Rolkem Colours (Buttercup, Terracotta, Black, White, Apricot, Rose, Raw Amber), a little vodka for making the paint with dusts, needle and ball tool, rolling pin, template rolling pin, brushes, cake drum, prepared cake, 1 toothpick, sponge, 1 cupcake case, aluminium foil.
Uploaded by Kayleigh McDonough
Baking ingredients
- Pre-prepared sponge cake
Decorating ingredients
- Renshaw White Ready to Roll Icing
- Selection of edible coloured dusts
Renshaw products used

Email this recipe
Instructions
Step 1
The whole cake is 30 cm in his length. Start with cutting from the cake. This you do by making an oval from about 8 cm high at the front, ascending to about 15 cm to the top. Make sure you keep a bit cake left over to make the paws later.
Step 2
Crumb coat your cake with buttercream, chill then give a second coat for a smooth finish.
Step 3
Knead your Renshaw icing until smooth and pliable and then roll out until big enough to cover the whole cake. Put the fondant over your cake and smooth this over the shape. No worry if it is a little bit bumpy!

Step 4
Make a triangle from white icing about 3 cm big and 2 cm thick. This will become the nose. Make sure you make the corners from the triangle a bit round. Use your needle tool to mark a stripe in the middle of the triangle, from top till bottom, and a line slightly diagonally either side of this like the markings on a nose. Place the nose at the front of your cake, just under the middle. Use some aluminium foil to give the nose some structure.

Step 5
Make 2 ovals with fondant, about 5 cm wide, and place them in length under the nose at the left and the right side. This will be a part of the mouth.

Step 6
Now make a little roll from fondant about 6 cm long, this will be the lower lip. Place it at the bottom front of the cake, at the chin. Make more rolls from fondant, this will become the wrinkles above the nose. Start with the shortest where you want the wrinkles to begin and add a longer one next, and so on until you reach the nose.

Step 7
Start making the eyes; make 2 shallow pits in your fondant, this will become the eyes. You do this just a little under the forehead. Make a little ball from fondant about 3 cm wide and push it lightly in the pits.

Step 8
Above the eyes you now place a big roll of fondant (wrinkle), like continuous eyebrows. Under the eyes you put a little roll, and you also do this above the eyes like eyelids. Fill the “empty spaces” between the nose and eyes with rolls/wrinkles.
, like continuous eyebrows. Under the eyes you put a little roll, and you also do this above the eyes like eyelids. Fill the “empty spaces” between the nose and eyes with rolls/wrinkles.")
Step 9
Roll out 2 little pieces fondant about 8 cm big. Make them a bit oval. These will become the ears. Place them at the left and right side of the head and put a little aluminium foil under it, so the ears can dry a little bit “hollow”. Make some more wrinkles and place the behind and between the ears. Also make from fondant a little tongue and place it in the mouth.

Step 10
The dog has a sort of lower lip, and you are now going to make the teeth for it. Make little balls of fondant and knead a little. Shape these into 2 big teeth and 2 smaller teeth. Carefully place them at the lower lip with a little edible glue.
Step 11
Now we go further with the paws. Cut 2 rectangular pieces of leftover cake from 7 by 5 cm big. Coat these nicely with buttercream and also place fondant over the paws, so it covers the whole paws. You'll also need to shape and attach nails for the paws.

Step 12
Pick up your needle tool and start to make little short scratches over the whole dog. So, the paws, the whole head, the wrinkles…everything but the ears, eyes and mouth. This will take a while, but it will make the fur so realistic!


Step 14
Put a drop of Vodka with the Rolkem Terracotta dust. Paint the whole body with this, except the nose, lips, tongue and eyes.


Step 16
Mix also some Vodka with the colour Raw Amber mixed with Terracotta and paint it between all the wrinkles, to create a 3D effect.

Step 17
Mix some black Rolkem dust with Vodka and paint some more spots on the body. Also paint the nose and eyes black.


Step 19
Mix some Vodka with rose dust to paint the tongue. Also paint the cupcake “cream” pink and the cherry on top red. Cover the empty pieces from the cake drum with fondant and color it to your own choice.