How To: Pipe Brush Embroidery Lace
Monday 19th May 2014
Royal icing and the art of piping lace is a tough one to master, but worth it for the realistic and awe-inspiring effect it can inspire if done well. From simple piping and filigree designs to the intricate detail of brush embroidery, a lace decorated cake is always a thing of beauty and worth persevering over, especially if you are keen on tapping into the sugar craft skills that are coming back in a big way in 2014.
Vintage is a still a big fashion trend, and whilst you can cheat and make use of stencils and paint to create the effect, or moulds to fashion lace out of fondant icing, nothing is more memorable than a hand piped lace-adorned cake.
Our cake decorating experts Jayne Frost and Claire Bailey have shared all the hints and tips you need to create stunning lace detail through the use of brush embroidery. All you need is soft consistency royal icing, a piping bag, a selection of nozzles, and clean dry paintbrush and a cake to decorate. Go on, get fancy!
LACE MOULDS
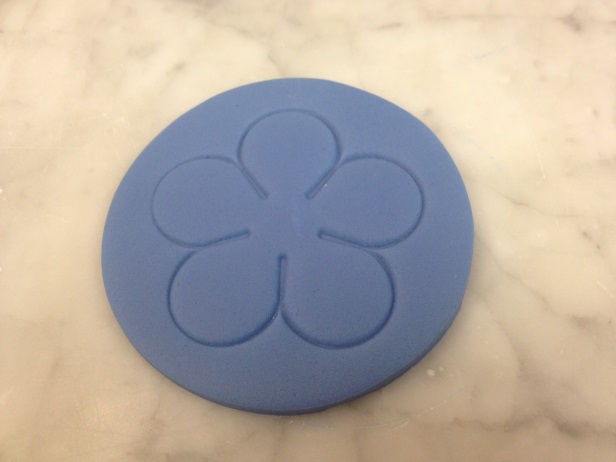
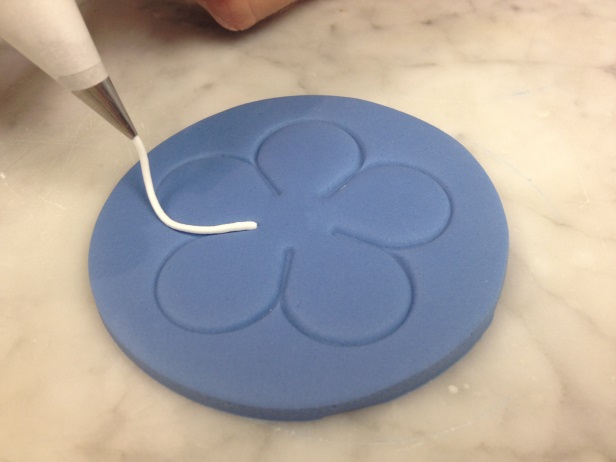
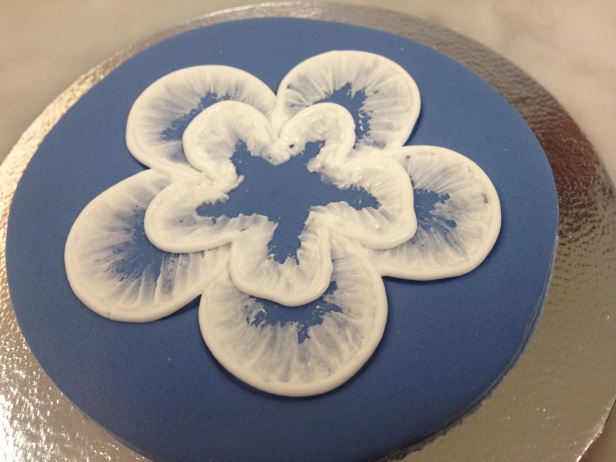
1. Draw out your own lace design, or use a plunge cutter design of your choice to lightly emboss your cake and follow the outlines. Floral patterns work well with brush embroidery.
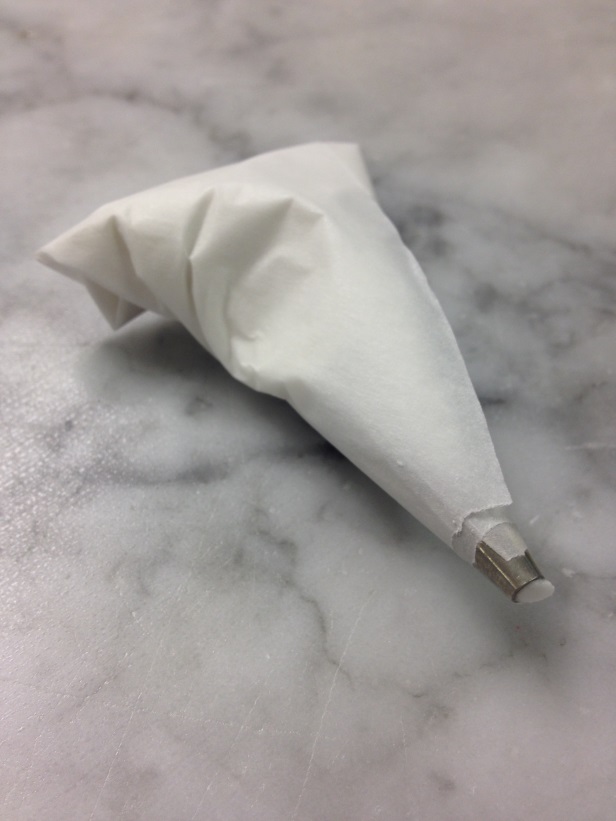
2. Fit a piping bag with a number 1 piping tube and fill the bag a quarter full with soft consistency royal icing. Hold the bag and tip slightly at an angle, close to the cake without scraping the cake with the tip, and without flattening any previously piped lines of icing.
3. Beginning and ending at the edges of the lace design, pipe a continuous line of royal icing. Curve it up, down and around in your chosen lace pattern until the selected area is covered. When finishing a line of royal icing, remove pressure on the bag and deftly pull away.
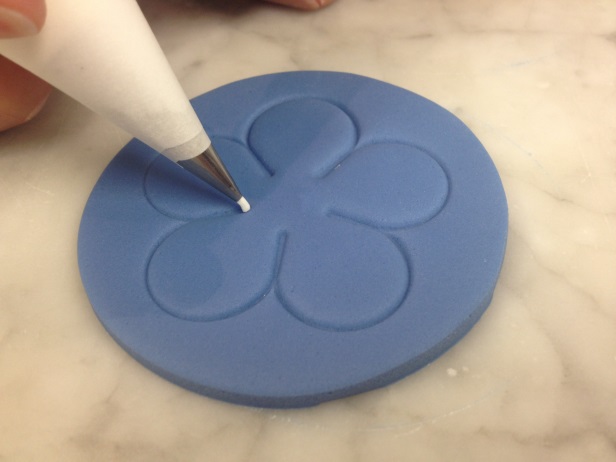
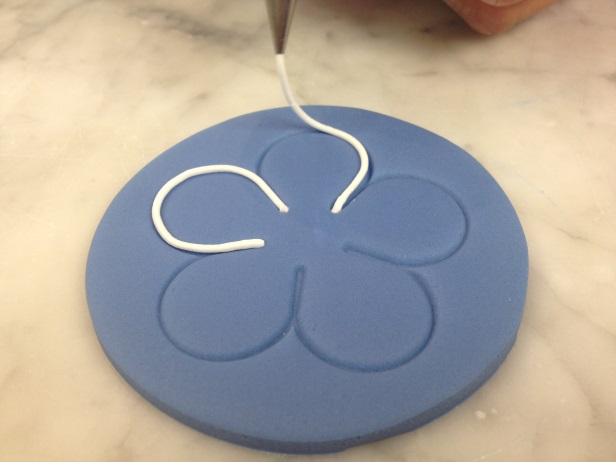
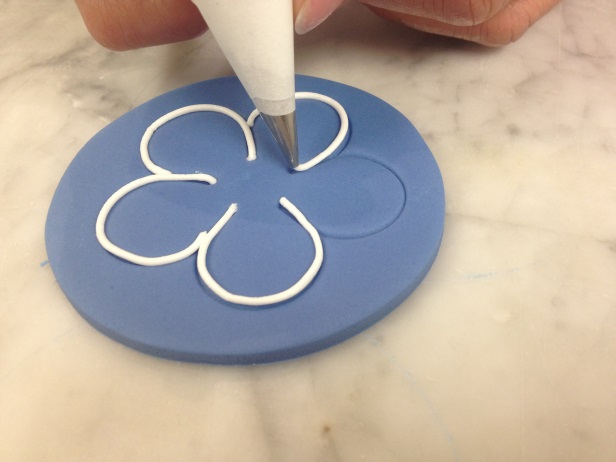
4. Having piped around your design once, pipe again inside of the initially piped line to give definition to the royal icing design.
5. Pipe any internal lines of your lace design, such as veins or petal folds in floral patterns, and again pipe inside the initially piped line to give the design more definition.
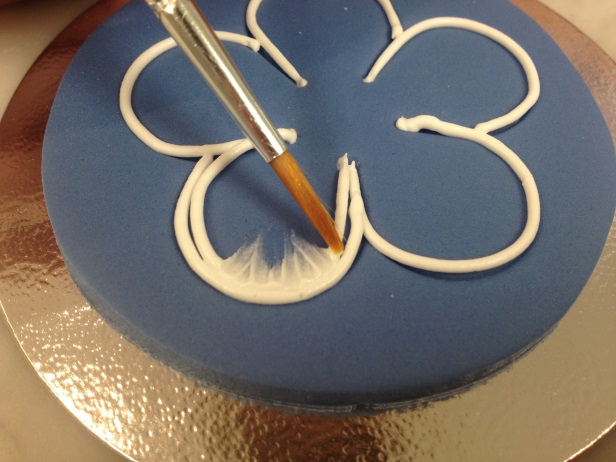
6. Using a clean dry paint brush, drag the still wet inner piped line of royal icing, either towards another piped line or towards the centre or your floral or lace design (is using) to create a lacy, brush embroidery effect.
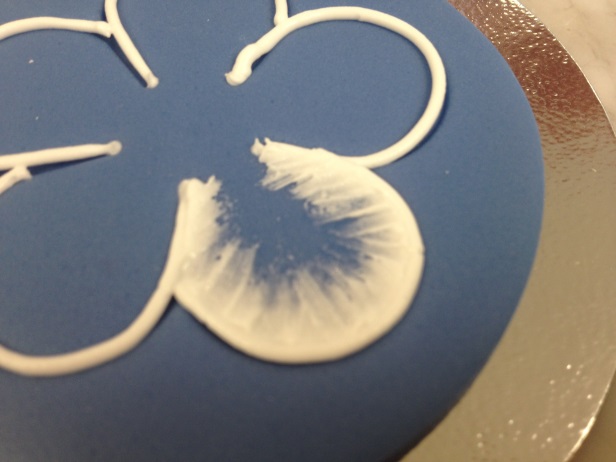
7. Pipe over any key lines which need more definition once you are happy with your brush embroidery effect.
TIPS
• If free handing, practise your royal icing pattern on greaseproof paper, increasing your confidence in piping before applying to the decorated cake.
• You can also lightly mark your iced cake with a scriber, marking key points of your design on the icing.
• Alternatively, if you’re using a plunge cutter, gently push the cutter into the cake to mark the edges of the design and pipe along the key lines.
• Interchange different nozzle sizes in creating lace with royal icing, to provide texture.
• Make certain the lines never touch or cross and don’t leave any loose ends, running lines of icing to finish next to a piped line of icing.
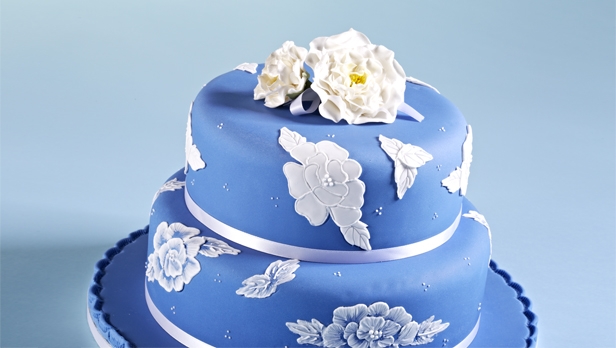
Why not give it a go? Our powder blue wedding cake is the perfect place to start in piping brush embroidery.