Guest Blog: Lottie’s Rainbow Pinata Cake
Tuesday 23rd June 2020
This brilliant guest blog was shared with us by Lottie Cooper, age 12. Lottie wanted to make a rainbow cake to celebrate and say thank you to the NHS for their amazing work during lockdown.
Lottie has kindly shared the ingredients and instructions in case any other children (or adults!) want to make their own rainbow piñata cakes. Lottie attends Prior’s Field School where she was inspired by her amazing Food Tech teacher, Mrs Alisha, who has encouraged her love of baking and experimenting with food.
In the future, Lottie plans to take Food Tech for her GCSE’s, and open her own cake shop with book shop attached. We’ll be cheering you on!
Thank you, Lottie, for sharing this wonderful and inspiring blog with us.
Baking the Vanilla Sponge Cakes
STEP 1: You will need: 450g self raising flour, 2 tsp baking powder, 400g caster sugar, 400g unsalted butter, 8 eggs & 2tbsp milk.
STEP 2: Preheat the oven to 180C (160C for a fan oven) and grease with a little butter two deep 20cm round cake tins. Then line the bottom with greaseproof baking paper.
STEP 3: Use an electric mixer to cream the butter and the sugar together until it’s a lighter colour.
STEP 4: Add the flour, baking powder and eggs gradually while still mixing so the mix is light and fluffy. Stir in the milk.
STEP 5: Spoon the mixture into the tins and level. Bake for 45-50 minutes or until the middle of the cake springs back when you lightly press it. Leave cake in tin for 5 minutes so it comes away from the edges a bit. Then turn out onto a rack and leave to cool.
Making the Pinata Cake
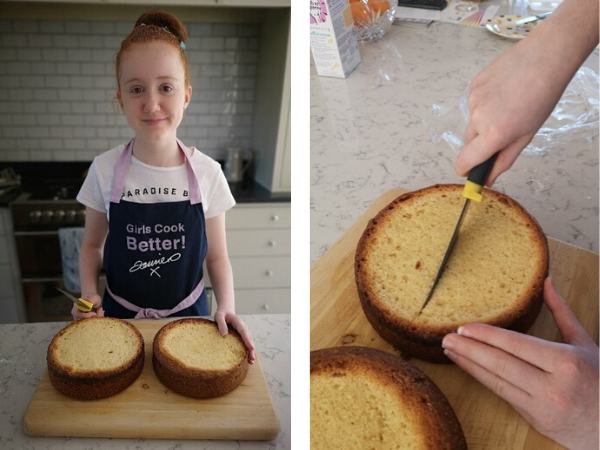
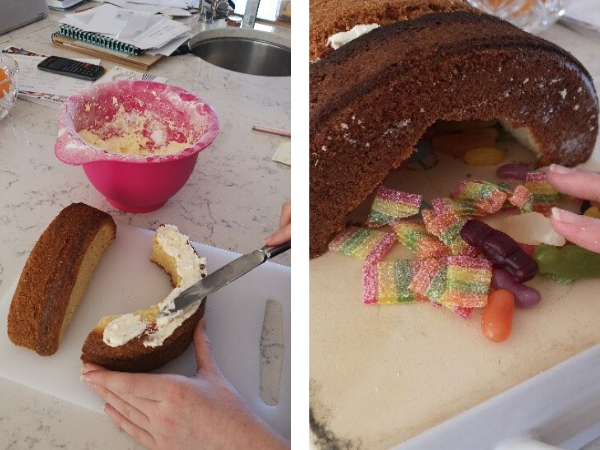
STEP 6: The top of the cakes must be flat to make the pinata cake so carefully chop the tops off. Then cut both cakes in half.
STEP 7: Take two halves and cut out the inside so you have two horse-shoe shaped sponges. These will make the hollow inside for the sweets to go in.
STEP 8: You will need to make some buttercream icing now to glue your cake pieces together and cover the cake.
STEP 9: Buttercream Icing Ingredients – 140g butter (softened), 280g icing sugar, 1-2 tbsp milk, ¼ tsp vanilla extract. Whisk all of these together until smooth.
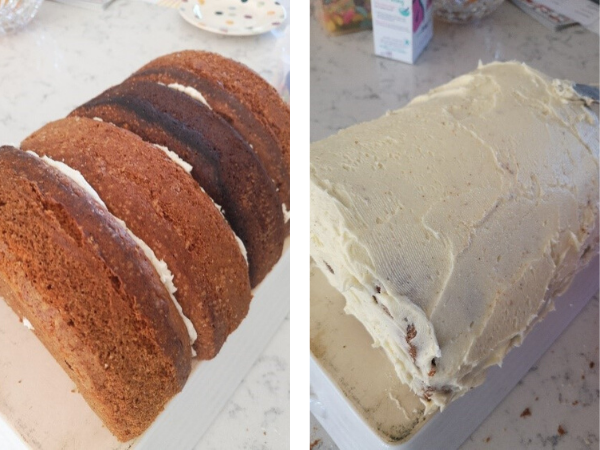
STEP 10: Use the buttercream to glue together 3 halves. Before you put the solid end in fill the cake with lots of rainbow coloured sweeties.
STEP 11: Then stick the last sponge on the end and cover the whole cake with buttercream.
Decorating the Cake
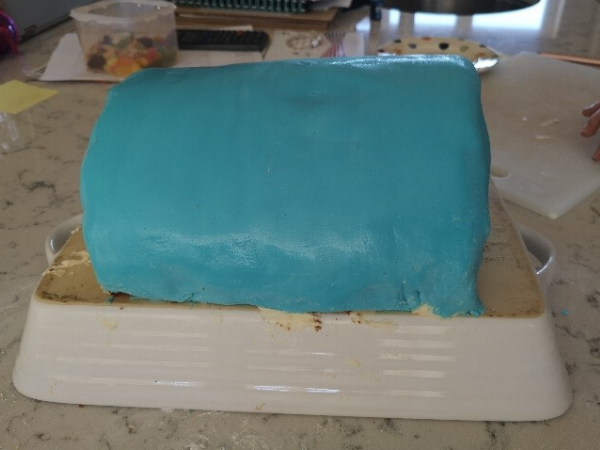
STEP 12: If you are really lucky you will find some sky blue icing to use for the surface of the whole cake. During lock down I could only get white but that’s fine as you add food colouring to make it blue. Soften the icing in your hands first then make a dent and drop some colouring in and mix. I always start with a few drops as you can always add more but you can’t take it away!
STEP 13: When you have the right colour roll it out carefully. Dust the counter surface with icing sugar first.
STEP 14: Moving the rolled-out icing is the trickiest bit. I used 2 rolling pins and draped it over them.
STEP 15: Carefully move your cake onto an upturned dish before draping the icing over it. Then you can easily cut around the edges.
STEP 16: Move your iced cake carefully onto a cake board. (I didn’t have one, so I used a chopping board and covered it with foil first. I also used a big flat pizza spatula to move the cake on as I didn’t want to lose any of the sweets inside).
STEP 17: Don’t worry if the end of your cake is a bit rough. You will cover most of it with the fondant rainbow and clouds. Squish any holes together first though so you don’t have the buttercream leaking out.
STEP 18: Take ¼ of a pack of white fondant icing and mix in the food colouring. You will need: red, orange, yellow, blue, Indigo (dark blue) and violet (purple).
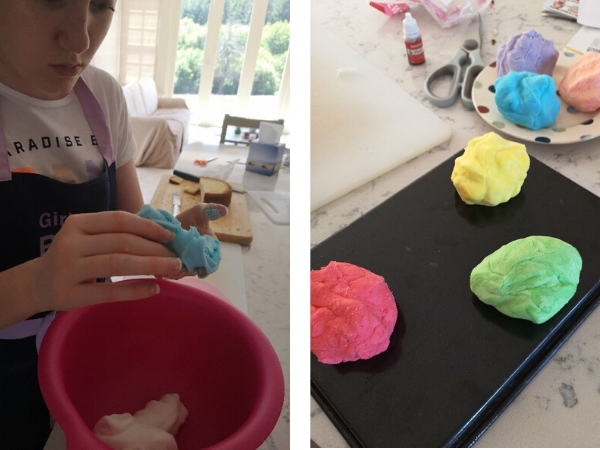
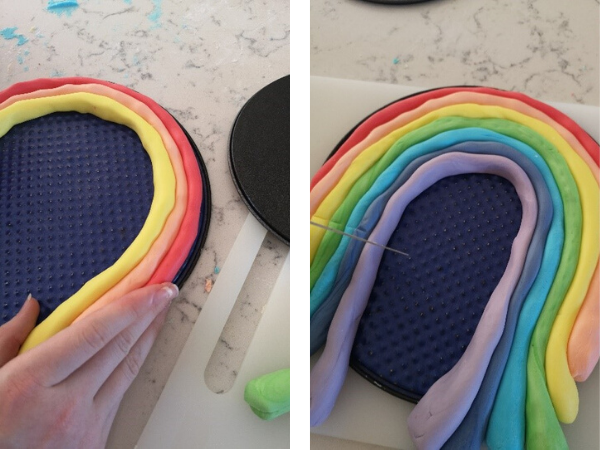
STEP 19: Roll out 7 sausages of the different coloured icing you have made.
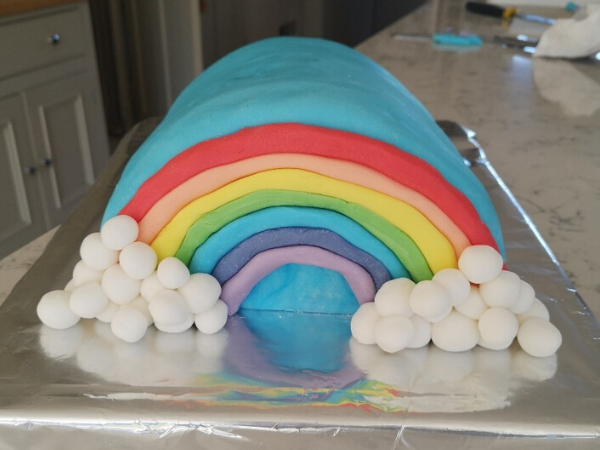
STEP 20: Using the base of the cake tin you cooked with, start placing the icing rainbow parts on the base. Make sure you do this in the right order. Then cut off the ends and using a large flat knife move the fondant rainbow onto the end of the cake. To avoid it falling off, squish the outer red part a little over the top of the cake. This will make it more stable.
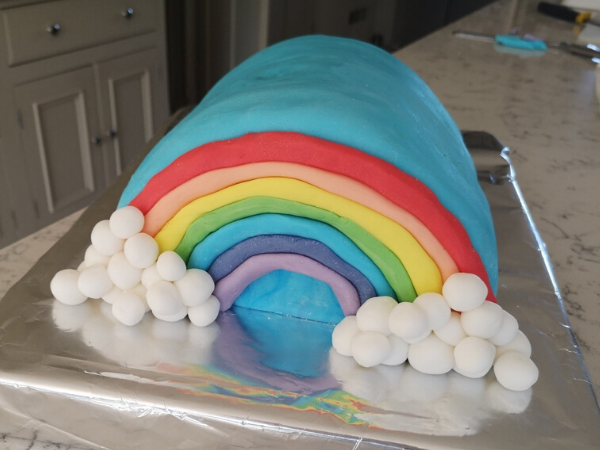
STEP 21: Wash your hands thoroughly and use any remaining white icing to make small white balls of icing. Build these up on both sides of your rainbow and this will look like 2 fluffy clouds at both ends.
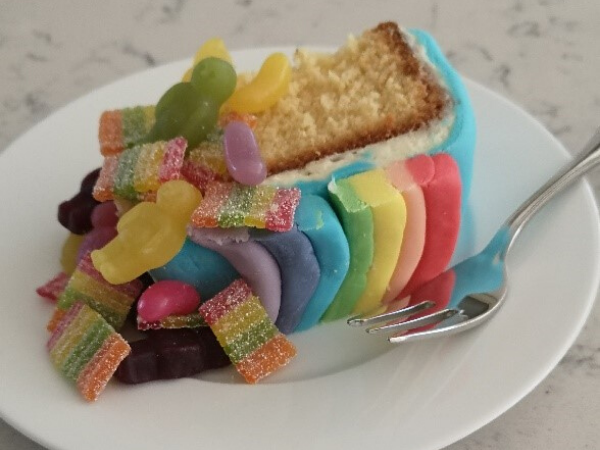
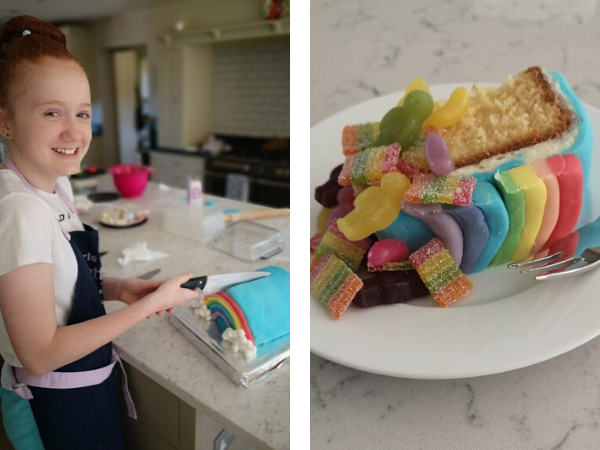
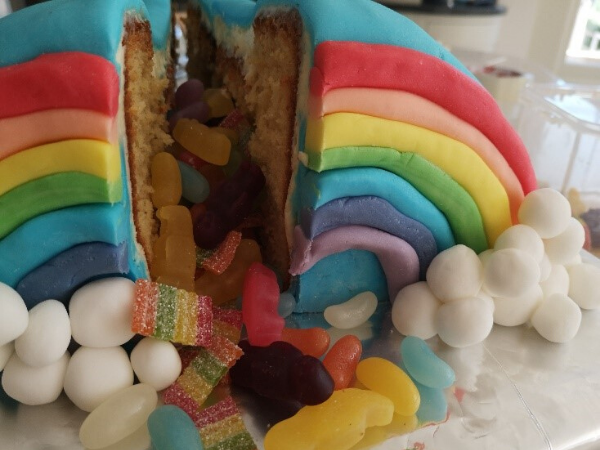
STEP 22: Then cut into your pinata cake and see all the sweets fall out and enjoy!!
If you make your own rainbow piñata cake, don’t forget to share it with us on social @renshawbaking – we’d love to see what you’ve been making!