Emma Chamberlain’s Blog: Basic Modelling
Friday 19th August 2016
Basic modelling shapes for cake decoration
Modelling may seem daunting when you plan the figure as a whole, but breaking models down into basic key shapes makes the process easier. The main shapes for modelling are a ball, a cone or egg shape, an oval, a sausage shape and a rope. Most elements of a modelled figure are made from these shapes, or variations of them. So by starting with the basics you can start to develop your modelling skills from there.
It’s important to remember to knead your icing before use, so that no cracks appear in the surface. That way you’ll get a smooth and even finish on any models that you’re making.
For basic modelling it’s great to use Ready to Roll Icing as it’s easy to shape, but if you want something that will set slightly firmer then you can try mixing one part Ready to Roll Icing to one part Flower and Modelling Paste. You can create some great cake toppers by doing this.
For more intricate modelling or delicate designs such as flowers, it’s best to use Flower & Modelling Paste as it can be rolled much thinner, and sets firmly. What’s great about modelling paste is that you can make your models, toppers and floral designs in advance so that you don’t have to bake, cover and decorate a cake all on the same day. Store your decorations in a cardboard box away from sunlight until you’re ready to use them.
Tips for modelling success
- Knead the paste until it becomes smooth and pliable.
- Keep any icing you are not immediately using wrapped in plastic to prevent drying out.
- Try to refrain from using icing sugar when modelling. Once icing sugar becomes embedded in the surface it is hard to fix and you would be better off starting again.
- If your hands are becoming sticky, wash them in cool water. You will then find working with the paste much easier.
- Just for practice follow the picture below on basic shapes. A little bit of practice goes a long way.
- Add support to larger models by using dried spaghetti. This also helps to keep things in place.
- Always start with a smooth ball first and then shape into required shape.
- If there are any stubborn lines or marks you can smooth this area over with your finger and lightly press it, then reshape, the mark should disappear.
- Attach components of the figure together using cooled boiled water. Just a small amount is required to make the area tacky. If you use too much the piece you are attaching will slide straight off. If this happens you can wipe away excess moisture with a brush, then reattach and hold in place for a moment until you are confident it is secure.
- Measure each component against the figure before attaching to gauge the correct size. Adjust accordingly so the end model is in good proportion.
Basic shapes explained
Ball Shape
As mentioned, it’s important to knead your icing well until no cracks or creases are left. Depending on the size of ball that you need, take a chunk of icing and lightly roll this in circular motions between the palms of your hands until you get the right shape and a smooth surface. You can add or take away from this at any point to get the size you need, just roll it again to smooth out the surface.
Depending on the size you create, ball shaped icing can be used for a head, eyes, buttons or anything else that the shape would suit.
Cone or Egg Shape
Starting with a ball of icing, you can develop this into a pointed cone or a more rounded egg shape. Cup your hands into a V shape and gently roll the ball of icing back and forth until it starts to elongate at one end. Continue this until you get the shape you want.
Larger cone shapes could be used for a body, head, paws while smaller ones could be used to add additional features such as tufts of hair, nose.
Oval Shape
Again by starting with a ball shape, you can create an oval by gently rolling this with the palm of your hand back and forth across your work surface. Again this can be used to create the body of a model or the head of teddy bear
Sausage and Rope Shape
By continuing to roll an oval back and forth over the work surface with the palm of your hand you can create a sausage shape, which is great for legs and arms. As this elongates you can use both hands to roll it out into a rope shape. Sometimes it’s good to use a smoother to do this so that you don’t leave finger marks in the rope.
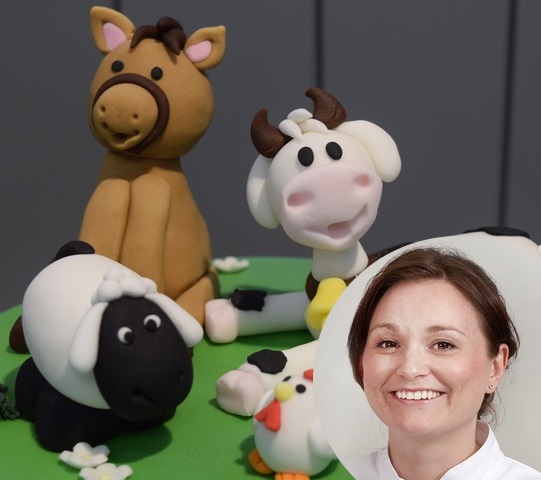
How to model a horse
Watch our short video on using basic shapes to model a horse, perfect for a farmyard birthday or Christening cake.