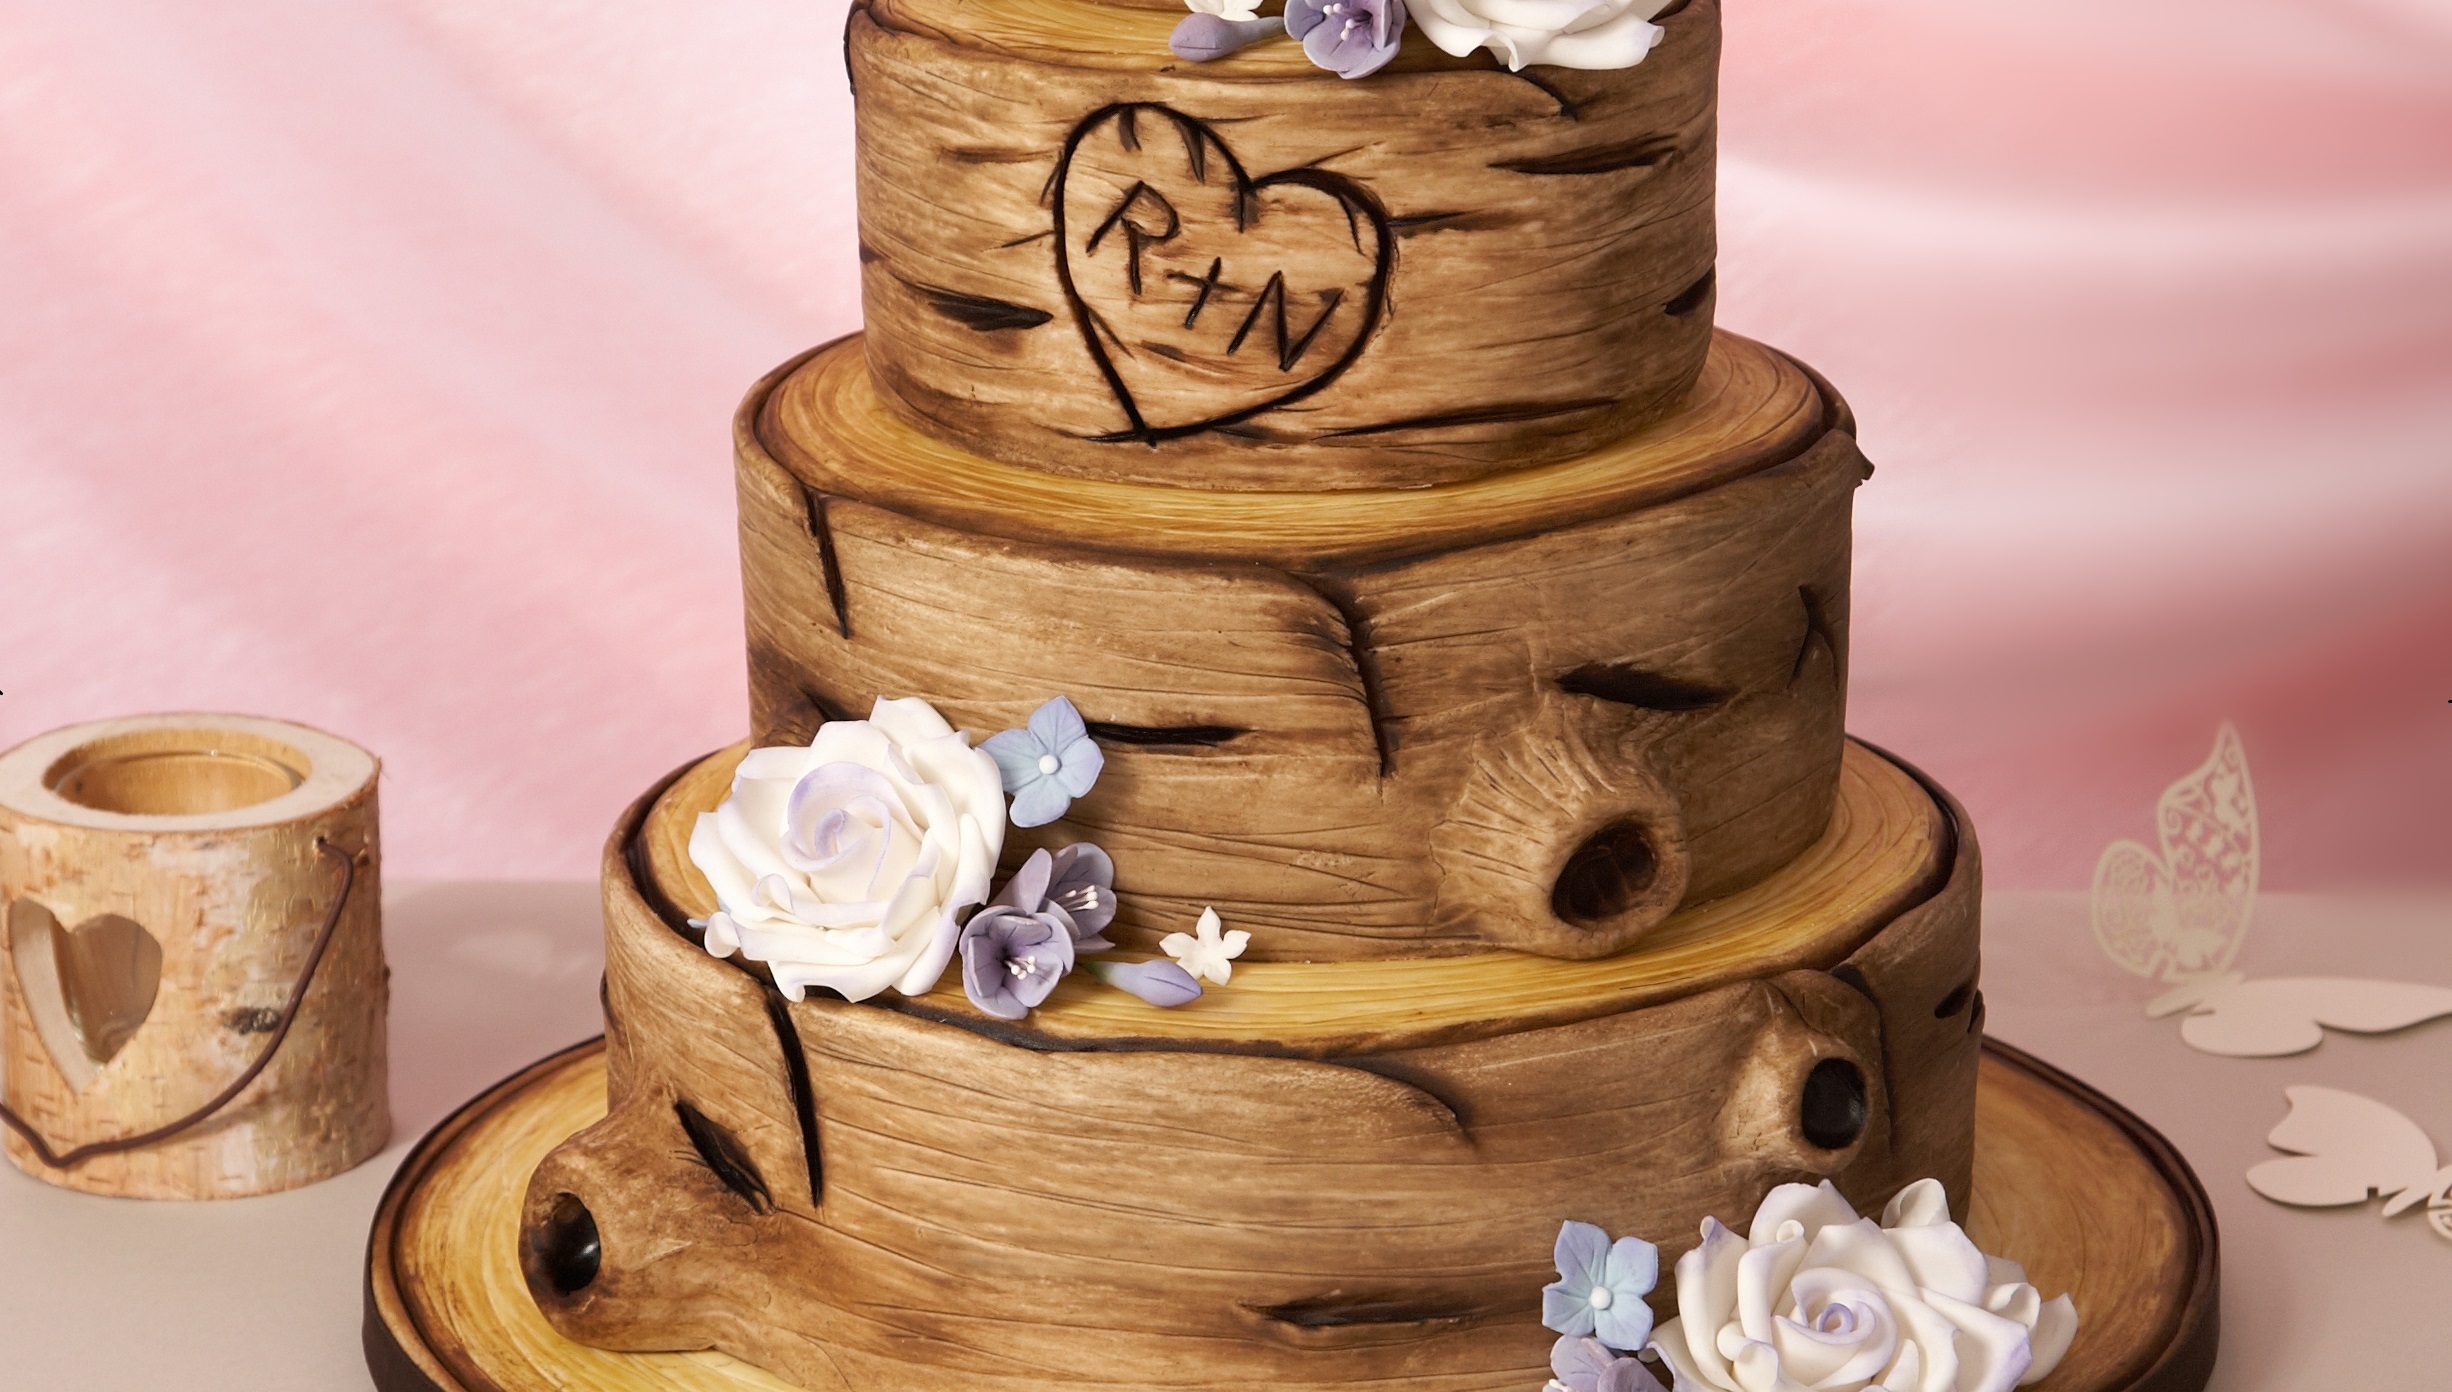
How To Decorate A Tree Bark Style Cake
Uploaded by Kayleigh McDonough
Decorating ingredients
- 4 cakes (10 inch, 8 inch, 6 inch and 4 inch) pre-prepared with jam and butter cream
- 5 kg Renshaw White Ready to Roll Icing
- Rolling pin
- Scribe tool
- Wheel tool
- Cooled boiled water
- Brushes
- Smoothers
- Sugar Flair Dark Brown Paste
- Sugar Flair Primrose Paste
- Sugar Flair Shadow Grey Paste
- Sugar Flair Caramel/Ivory Paste
- 14 inch cake drum
Renshaw products used

Email this recipe
Instructions
Decorating Instructions:
Step 1
Starting with the 10 inch cake, take Renshaw White Ready to Roll Icing and roll out to your desired thickness (4/5 mm). Place over the cake and finish off as you normally would when icing a cake, smoothing down the sides and trimming off the excess.
Step 2
Whilst your cake is still freshly iced and, before moving onto another, place it on to a turn table.
Step 3
Take a scribe tool and groove a continuous line around the circumference of the cake, roughly 5mm in from the edge.
Step 4
Once you have completed the circumference, go around again with the scribe tool and make the groove deeper and slightly wider – taking care not to penetrate through the icing to the cake.
Step 5
Now using the wheel tool, make small random marks on the top of the cake parallel to the groove you have just previously made, contorting to the curve of the cake.
Step 6
Keep making marks in a curve form, until you reach the centre of the cake. This will give you the lines you find when a tree is cut in half.
Step 7
Moving on to making the marks around the cake, use the scribe tool to make deeper indentations and use the wheel tool to make more random lines/grooves all around the cake keeping them all flowing in the same direction horizontally.
Step 8
To achieve the knot/broken branch effect, take a ball of icing (roughly sprout size) and flatten one edge by turning the ball on your surface.
Step 9
Take a small dab of cooled boiled water onto the flat edge and apply the icing to your desired positon on the side of the cake.
Step 10
Using a ball tool, gently press the sides of the icing ball outwards onto the cake. Go all the way around the ball, once done work the ball tool in the centre of the applied ball to give an opening to the knot/branch.
Step 11
You can apply as many of these as you like, in different sizes to the sides of the cake. Be careful not to overload it.
Step 12
Repeat the covering and marking process to your remaining cakes.
Step 13
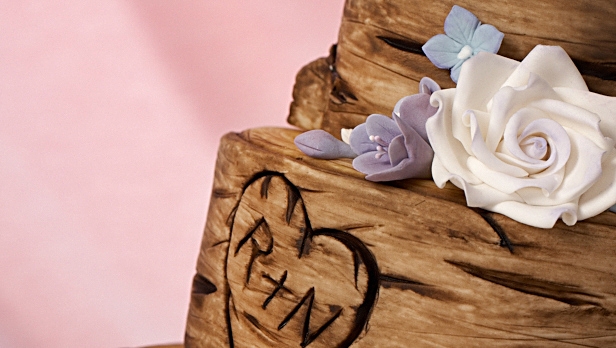
When you get to the 6inch cake, take a heart shape cutter, large enough to write two initials in and push into the side of the cake, then with the scribe tool go around the groove and make it more prominent.
Step 14
Using the same scribe tool, free hand scribe your desired initials into the heart, taking care not to penetrate the cake.
Step 15
Once you have covered and marked all your cakes, set to one side and leave overnight to harden. This will make the painting process easier.
Step 16
Now your cakes have hardened overnight, take a saucer and put a small amount of Sugar Flair Dark Brown Paste and Sugar Flair Primrose Paste and a small amount of Sugar Flair Caramel/Ivory Paste and using cooled boiled water, dilute the mixture down so it has a watery consistency.
Step 17
Using a brand new decorator's fine paint brush start to paint the top of the cake, painting in the direction of the grooves you have made. Cover the whole of the top of the cake. You can add more paint to achieve the desired colour.
Step 18
Now with a small paint brush, take the Sugar Flair Dark Brown Paste and paint into the groove around the top edge of the cake. Once you have done this, use the large brush to blend in.
Step 19
Still using the small brush with Sugar Flair Dark Brown Paste, paint into the deeper grooves around the sides of the cake and in the knot/branches you have added. Please note, the scribed heart shape and initials will be painted in the same way as the groove around the top using Sugar Flair Dark Brown Paste.
Step 20
On a separate saucer take small amounts of Sugar Flair Dark Brown Paste and Sugar Flair Shadow Grey and the same as before mix and water the paste down so it is a diluted mixture and has a watery consistency.
Step 21
Take the cleaned decorator's brush and, like you did on the top of the cake, paint around the side of the cake, making sure you continue painting in the same direction as the grooves, not up and down.
Step 22
Again, once you have painted all the way around you can add more paint to make it darker in places if you desire.
Step 23
Repeat the painting process for all the tiers and leave to dry.
Step 24
Once all the tiers are painted and dry you can stack as normal.
Step 25
Now your cake is stacked and painted you can add various flowers to give it that extra special look.